
 Tablet Guide
FlyDrone answers one question: where and when is the shot best, not just whether you can fly. One map folds FAA airspace, TFRs, park rules, weather, sun and even camera exposure into a go/no-go verdict, the best hours to shoot, and a plan for a whole shooting day.
This guide comes in three editions: desktop (a browser with a mouse or trackpad), tablet (an iPad or Android tablet, in the app or in a browser) and phone (an iPhone or Android phone, in the app or in a browser). Each edition is complete on its own. The features, the numbers and the verdict logic are the same everywhere. What changes is where a control sits and how you reach it, and each edition describes only its own screen. You are reading the tablet edition. With a mouse or trackpad, the Desktop / Tablet / Phone switch at the top opens the others; on a phone or tablet there is no switch, because the guide opens in your own edition.
Inside the app, the ? button in the top bar opens this guide full screen, in the edition that matches your screen. In the iOS and Android apps it works without a connection, because the guide ships inside the app; in a browser, the pages and the pictures you have already opened are kept for offline reading. × at the right end of the guide's top bar closes it and puts you back where you were; in a wide window the app's version and build date sit just left of it.
How to read it. The guide runs from simple to complex. If you are new, read the first five chapters and stop there. That covers the whole app in about fifteen minutes:
- Start here: what the app answers, how to get in, and your first check.
- The screen: the layout, the top bar, map views, the legend, full screen, gestures and the Android Back button.
- Points on the map: the launch point, the two Homes, and everything else the map draws.
- The verdict: the go/no-go line and every factor behind it.
- The timeline: scrubbing through the hours.
The next six are the reference for every panel and setting: Best windows, The flight brief section by section, Spoken brief, Layers and points of interest, Settings, and My spots and the community layer.
Then the Pro tools: Shot planner, Altitude explorer, Spot finder, Trip planner and The rest of Pro. After those come the drive and the field: Drive from you, Pre-flight checklist and On location. The rest is money, data sources and vocabulary: Plans, limits and budgets, Where the data comes from, Glossary and Troubleshooting.
Advisory only. Data can be incomplete or out of date. You are the pilot in command: verify NOTAMs, TFRs, LAANC and local rules before flying.
1 Start here
1.1 What FlyDrone actually answers
FlyDrone Planner in 3 minutes: the three questions, and how the app answers them, from the first point on the map to a planned shooting day.
It answers three questions, in this order:
May I fly here, at this hour? This has two halves, and they carry equal weight:
- the place: FAA airspace and the LAANC ceiling, live TFRs, national parks, restricted grounds, stadium game-day TFRs, wildfire perimeters, helicopter pads and airfields;
- the weather at the selected hour: fog, a cloud deck that leaves no legal altitude 500 ft below it, visibility under the 3-mile Part 107 minimum, a thunderstorm, or wind past your aircraft's rated limit.
Both halves feed the same one-line verdict, and every reason is listed under it.
When is it worth flying? The app searches your whole forecast for the hours where light, wind, cloud and rain line up. It scores them, ranks them and draws them on a timeline.
What will the shot look like? It gives you the sun direction, golden and blue hour, the exposure a light meter would read, the ND filter to fit, and the altitude and distance for your framing. For a whole day, it also gives you the order to drive the stops in.
Weather is not the "nice to have" half. A fogged-in morning or a 300 ft cloud deck blocks a flight just as a TFR does. Part 107 sets minimums for visibility and cloud clearance, and your drone has a wind limit of its own. So the same spot can be green at 07:00 and red at noon. The verdict always belongs to the hour on the timeline, never to the place alone. The verdict lists every factor.
What it does not do: it doesn't file your LAANC authorization, read NOTAMs to you, or replace your own eyes on site. It points you at the right tools and the right questions.
1.2 Where FlyDrone runs
The app is the same everywhere. There are three ways to open it:
- In a browser, at flydrone.app, on any computer, tablet or phone. A new version arrives on the next page load.
- The iOS app, for iPhone and iPad.
- The Android app, for phones and tablets. The apps update through the App Store and Google Play.
Which layout you get depends on the screen, not on how you opened the app:
| Screen | Layout | Edition of this guide |
|---|---|---|
| A mouse or trackpad, window wider than 640 px | Top bar with search, docked flight brief, timeline along the bottom | Desktop |
| A touch screen wider than 640 px (iPad, Android tablet) | The desktop top bar and timeline, with both side panels as edge drawers | Tablet |
| 640 px wide or narrower (a phone) | A one-row top bar, full-screen edge drawers, pull-down search, pull-up legend | Phone |
Two cases give a tablet the phone layout: an Android tablet narrower than about 640 px in portrait, and an iPad app in Split View or Slide Over made narrower than 640 px. If that happens, the phone edition of this guide describes your screen. The tablet apps are not locked to one orientation, so you can turn the tablet any way you like.
Android text size. The Android app ignores the system font size and always draws text at 100%. Scaling it with the system setting squeezed the timeline's two-line status out of its row. If you want bigger text, use Settings → Appearance → Text size → Large in FlyDrone. The same switch works on every device.
1.3 Get in: sign in first
Getting started: signing in, the screen, a first check of a launch point, the timeline, and a tour of every Settings section, on the Free plan.
There is no anonymous way in: the app opens only for a signed-in account. A free account costs nothing and needs no card.
Sign-in is the same everywhere, in a browser and in the iOS and Android apps: Continue with Google or Sign in with Apple. There is no password to invent.
Before you sign in, you see one of two screens:
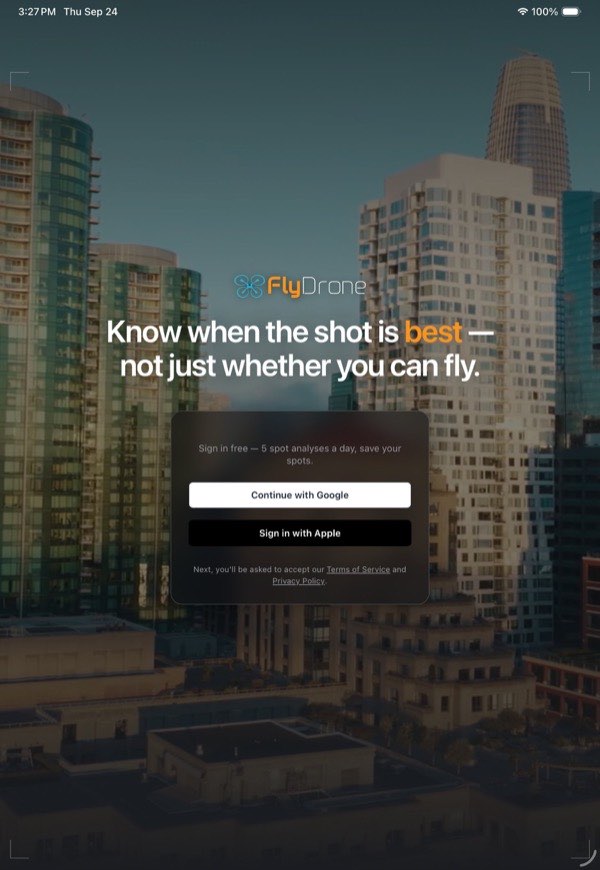
- In a browser, the FlyDrone home page: the headline over drone footage with a card right on it, and a page about the app below. On a computer the card is the sign-in card, with the App Store and Google Play badges under the two buttons. On an iPhone, iPad or Android device the card shows only the badge of that device's store; Sign in on the web under it opens the same two buttons. User Guide under the card opens this guide in a new tab. Start free under the prices brings you back up to the card. Its Simple pricing part shows the three plans with a Monthly / Yearly · save up to 27% switch. It opens on Monthly, with each paid plan's yearly price and saving under the monthly one (OR $34.99/YR — SAVE 27%); on Yearly the Pro card carries a Best value chip. On a phone or tablet a note says these are the web's prices and that in the app the store sets the price and any free trial.
- In the app, one screen with no scrolling: the FlyDrone logo and headline over drone footage, and the sign-in card on top. It shows no prices, because in the app the store sets them, and the plans dialog shows them after sign-in.
Under the sign-in buttons, a line says Next, you'll be asked to accept our Terms of Service and Privacy Policy.
If you close the Google or Apple window without picking an account, nothing happens: you are back at the card, with no error. Where the browser cannot open a sign-in window at all (some apps' built-in browsers), the page goes to Google or Apple and comes back signed in. If sign-in really fails, the card says why in one line, for example No connection. Check your internet and try again., Too many attempts. Wait a few minutes and try again., or, on an Android phone with no Google account, There's no Google account on this phone. Add one in the phone's Settings, or sign in with Apple. If you close the Google window on Android several times in a row, the phone stops opening it for a while, and the card says Google sign-in is paused on this phone after several cancelled attempts. Try again later, or sign in with Apple. Anything else reads Sign-in failed. Please try again.
One account, several ways in. Your saved spots and your plan live on the account, not on the device or on the button you pressed. You can sign in with Google on the web and with Apple on an iPhone and reach the same account, as long as the two are joined. If both use the same email, they join by themselves. If the emails differ (Apple's Hide My Email makes a different one), the iOS and Android apps ask Merge with your other account? at the first sign-in that would start a new account. Press Continue with Google (or Apple) to sign in the way you did before, and the two become one, with saved spots and subscription included. A second card, One more step, then asks you to Confirm with the new method once more, so both buttons open the account from then on. Answer No, I'm new here only if this really is your first account.
In a browser, and later on any device, join them in Settings → Account: it shows Signs in with … and offers the missing method, Add Google or Add Apple.
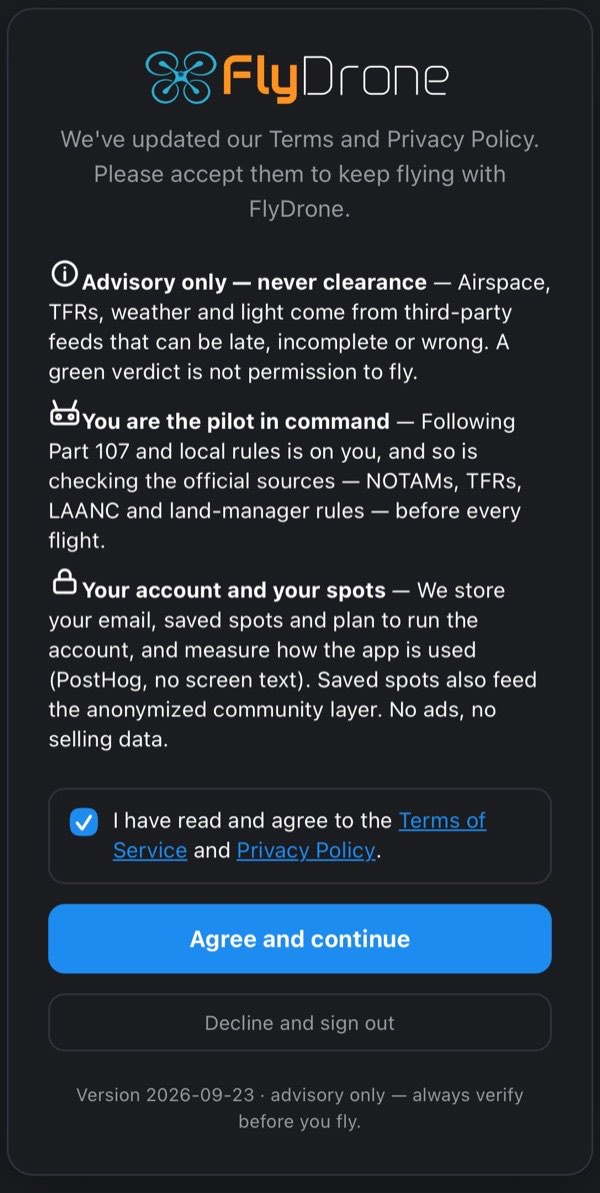
The agreement. Whichever way you come in, free or paid, the first screen after sign-in is the agreement. It has three short points:
- Advisory only, never clearance. The data comes from third-party feeds that can be late or wrong, so a green verdict is not permission to fly.
- You are the pilot in command. Part 107 and local rules, and checking the official sources, are on you.
- Your account and your spots. What is stored and why.
Under the points, How do you fly? asks your pilot category: I fly for fun (recreational, 49 USC 44809) or I fly under Part 107. Nothing is picked for you. The answer decides which rules the brief applies (see Pilot category), and you can change it any time.
Tick I have read and agree to the Terms of Service and Privacy Policy (both links open the full text), then press Agree and continue. The button stays gray until the box is ticked and a category is chosen. Decline and sign out takes you back to the sign-in screen. If a new version of the terms comes out, this screen comes back once, headed We've updated our Terms and Privacy Policy. Continuing to use the app is not taken as agreement.
Your location. The first time the map loads after the agreement, the app asks for your location. In the apps this is the system prompt; in a browser it is the browser's own prompt. If you allow it, the map opens on where you are, and your first fix becomes Home 1, so there is something to measure drive times from. After that, Home 1 stays where it is (see Homes). If you decline, nothing breaks. You can set Home by address or by tapping the map, and the buttons that read your position (PIC here, Use my location, Locate) say Couldn't read your location — check the location permission and try again. The app reads one fix when you ask for it. It never tracks you in the background.
1.4 Plans in one table
| Free | Hobby | Pro | |
|---|---|---|---|
| New spot analyses a day | 5 | 50 | Unlimited |
| Saved spots | 5 | 20 | Unlimited |
| Forecast | 24 hours | 48 hours | Up to 7 days |
| Recommended windows | 1 | 3 | 3 to 5 |
Hobby adds the camera and movement settings, the compass ray (Which way I'm facing), the drive time and the community layer. Pro adds the planning tools: Shot planner, Altitude explorer, Spot finder, Trip planner and the spoken brief, plus Home 2, a fleet of drones and private spots. Prices, trials, billing and every limit are in Plans, limits and budgets.
What counts as a "new spot analysis". It is a point you haven't analyzed today. These never cost a slot:
- re-opening one of your saved spots;
- tapping within 50 m (about 160 ft) of a point you already analyzed today;
- pressing PIC here while you are already standing on the point.
That makes the free plan a real workflow, not a trial in disguise.
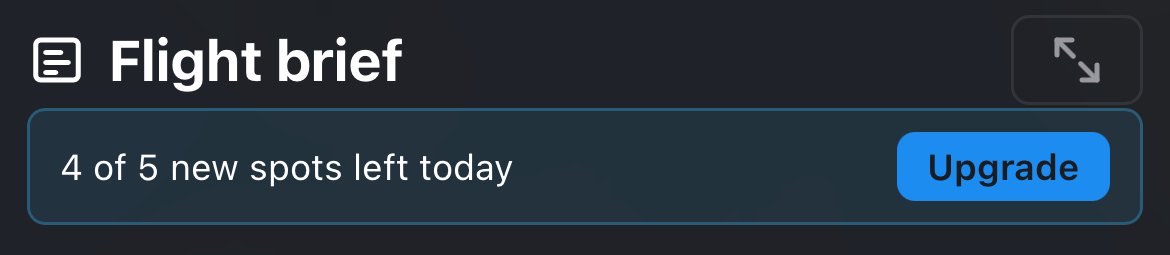
The daily counter. On a Free account, a bar at the top of the flight brief reads 3 of 5 new spots left today, with an Upgrade button beside it. When the five are spent it reads Daily free limit reached, and the next new spot opens the plans dialog instead of a brief. The count starts again at midnight, your device's local time. Paid plans show no counter. Hobby's 50 a day is a ceiling few people meet; at 51 the plans dialog offers Pro.
1.5 Your first check, in 60 seconds
- Tap the map where you want to launch. That sets the PIC point: the pilot's spot, and the subject of everything in the brief. The first check in a new area can take up to 2 minutes, because some data sources are slow; the line under the timeline names what is still loading. Spots near one you've already checked usually load faster, and a spot you've checked before is quickest.
- Read the verdict chip that floats under the top bar. Tap it to slide the full flight brief in from the right edge.
- Scrub the timeline at the bottom. Green bands are recommended hours, red bands are "not advised". The clock, the score and every section of the brief follow the cursor.
- Jump to a window. The numbered buttons to the left of the score (and the rows in the brief's Best windows section) move the cursor to that window's best moment.
- Save the spot with Save current spot in the My spots section at the bottom of the brief. Opening it again tomorrow costs nothing.
2 The screen
2.1 The layout
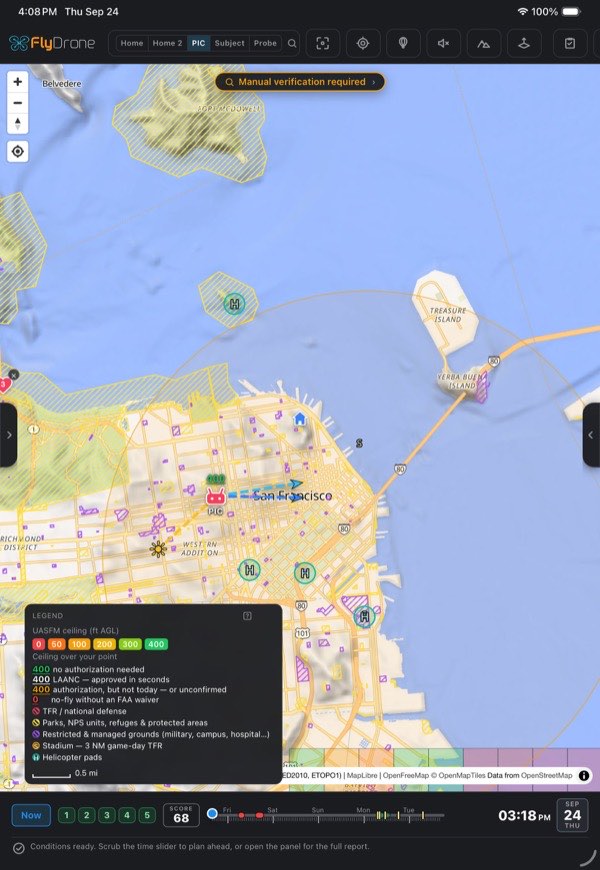
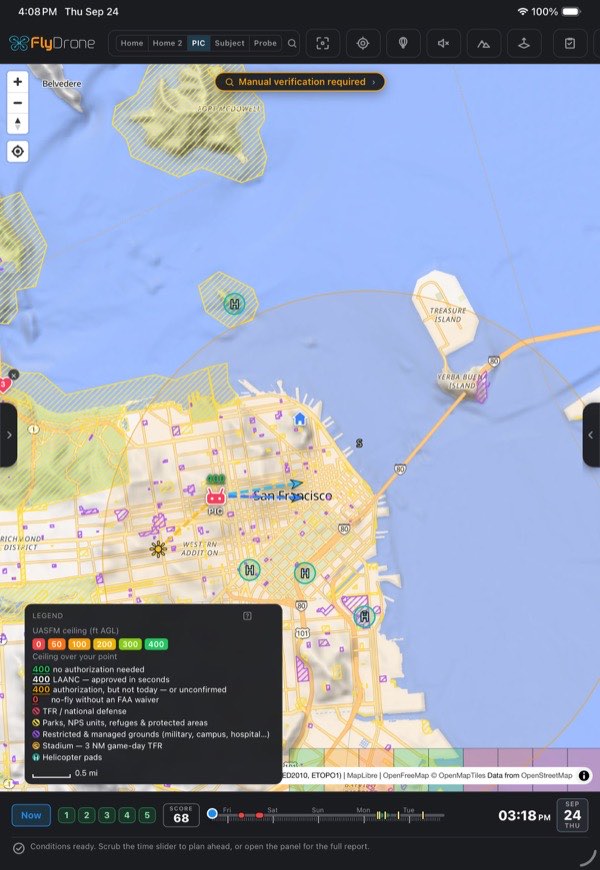
The tablet screen keeps the desktop's top bar and timeline, and turns both side panels into drawers that slide in over the map:
- The top bar runs across the top: the logo, the address search, the map tools, and Checklist and Help at the right end. On a screen narrower than 860 px (an 11-inch iPad in portrait is 834) the logo is left out, so the search keeps its room.
- The map fills everything between the bar and the timeline. Zoom, the compass and the locate button sit at its top-left corner, and the legend at its bottom-left.
- The settings drawer slides in from the left edge (280 to 360 px wide).
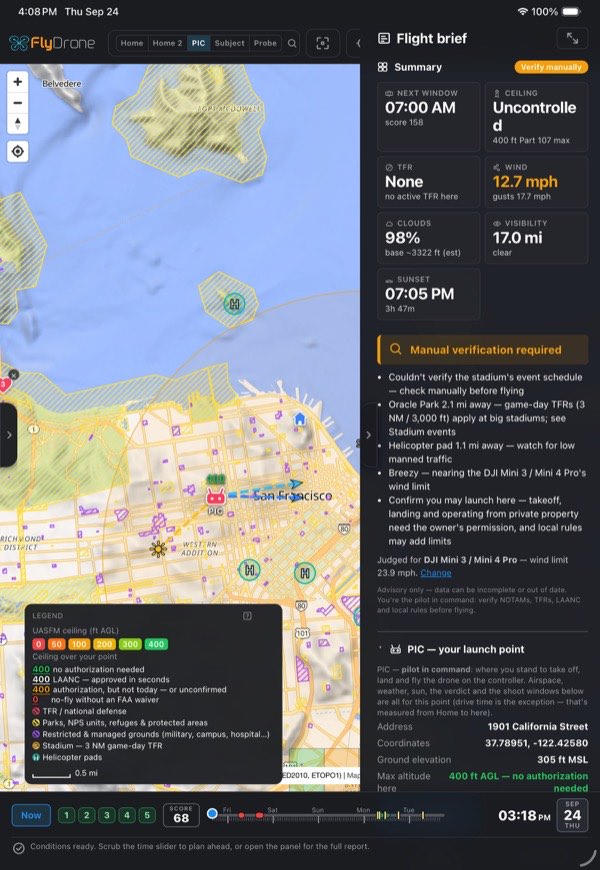
- The flight brief drawer slides in from the right edge (320 to 420 px wide).
- The timeline runs along the bottom.
Grips. A shut drawer leaves only its grip on screen: a 24 px tab at mid-height on the screen edge. Drag the grip across to open or close the drawer. A press on the grip with no movement toggles it. A drag commits once you pass the halfway point; let go earlier and the drawer springs back. Both drawers start shut.
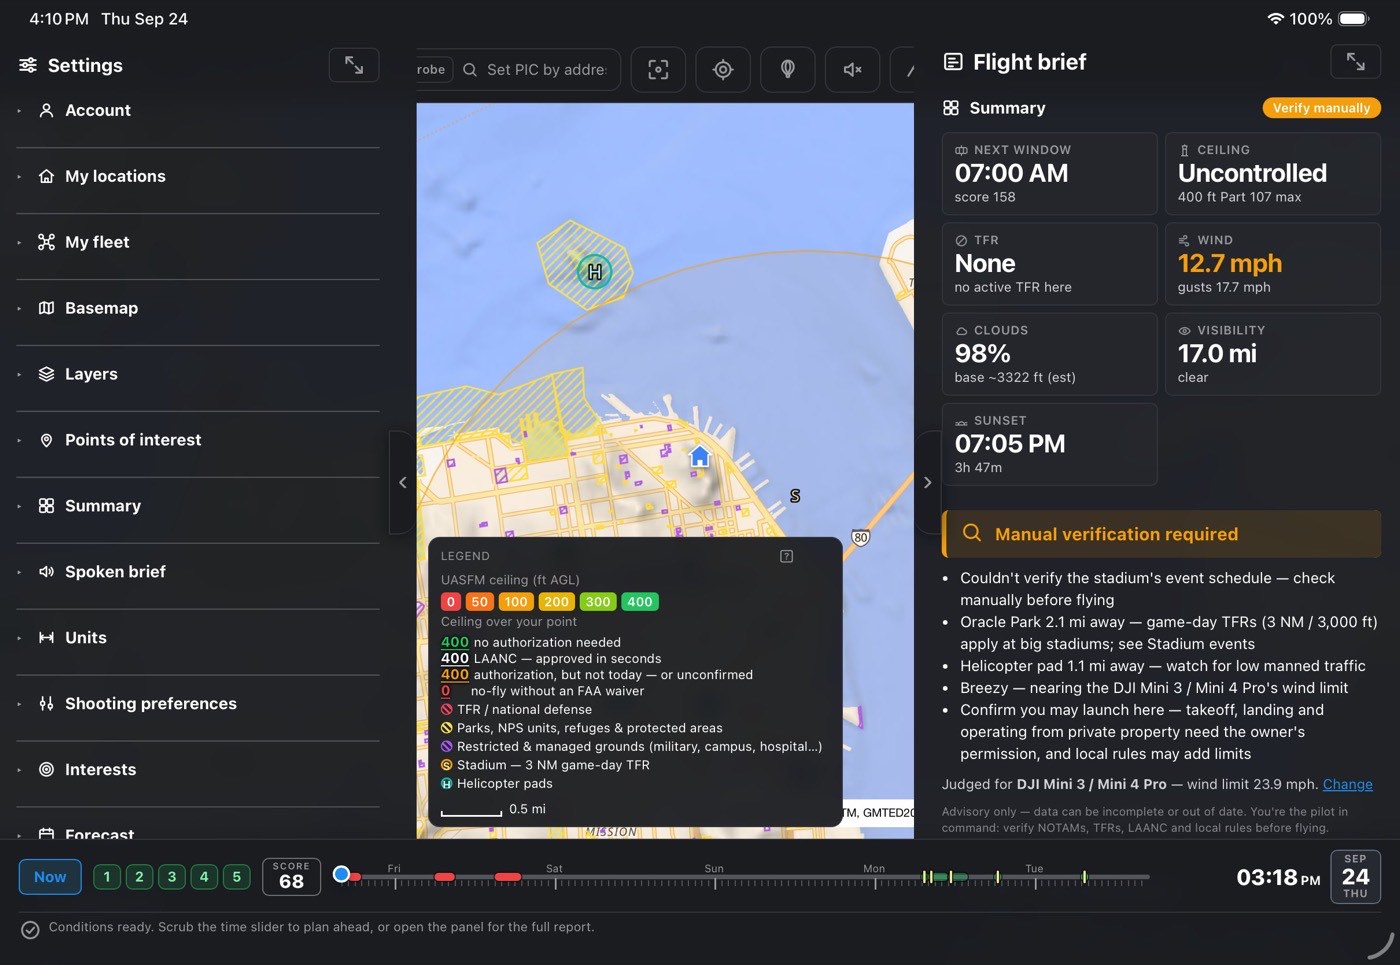
One or two drawers. In portrait, one drawer at a time: opening one closes the other. In landscape, both can be open at once, with the map between them. Rotating from landscape to portrait with both open closes Settings and keeps the flight brief, because the brief is what you set a point for.
What covers what. The drawers run the full height of the screen and slide over the top bar. So an open settings drawer covers the logo and the search, and an open brief covers Checklist and Help at the right end of the bar. Under the status bar (the clock and battery) an open drawer keeps a solid strip of its own color, so the content you scroll never slides up under the clock. The timeline stays on top of both drawers, so you can scrub while reading.
Tapping a row in a list (a saved spot, a Home, Show on map) flies the map there and slides that drawer away.
There is no settings gear and no full-screen button on a tablet: the left grip opens Settings, and the map already has the full width whenever the drawers are shut.
2.2 The two panels
Settings holds these sections, in this order: Account, My locations, My fleet, Basemap, Layers, Points of interest, Summary, Spoken brief Pro, Units, Shooting preferences, Interests (Pro only), Forecast, Appearance, Timeline (phone only) and Support. Settings goes through each. Your settings are kept on this device. Your saved spots and your plan are kept on the account and follow you to every device.
The flight brief is everything about the selected point. From the top:
- the daily counter (Free accounts only);
- Summary, with the verdict in it;
- PIC, which names and locates the point itself;
- the sections: Best windows, FAA airspace, TFR & NOTAMs, Stadium events, Parks, Restricted zones, Sun, Wind, Clouds & fog, Precipitation, Temperature, Air quality, Wildfires & hazards, GPS & satellites, Camera settings and Movement settings (Hobby), Drive from you (Hobby);
- the Pro planning tools;
- My spots, at the bottom.
The flight brief section by section covers all of them.
Sections start closed. Each closed section shows a one-line summary next to its name, so the whole brief reads at a glance. Press a heading to open or close that section. Summary can't be closed, and PIC starts open. A section a plan doesn't include carries a small Hobby or Pro tag.
Collapse all / Expand all. Both panels have a small square button at the right of their title (Settings, Flight brief). It closes every section at once, or opens every one. Its tooltip says which it will do next. In Settings the first press opens everything, because the sections start closed.

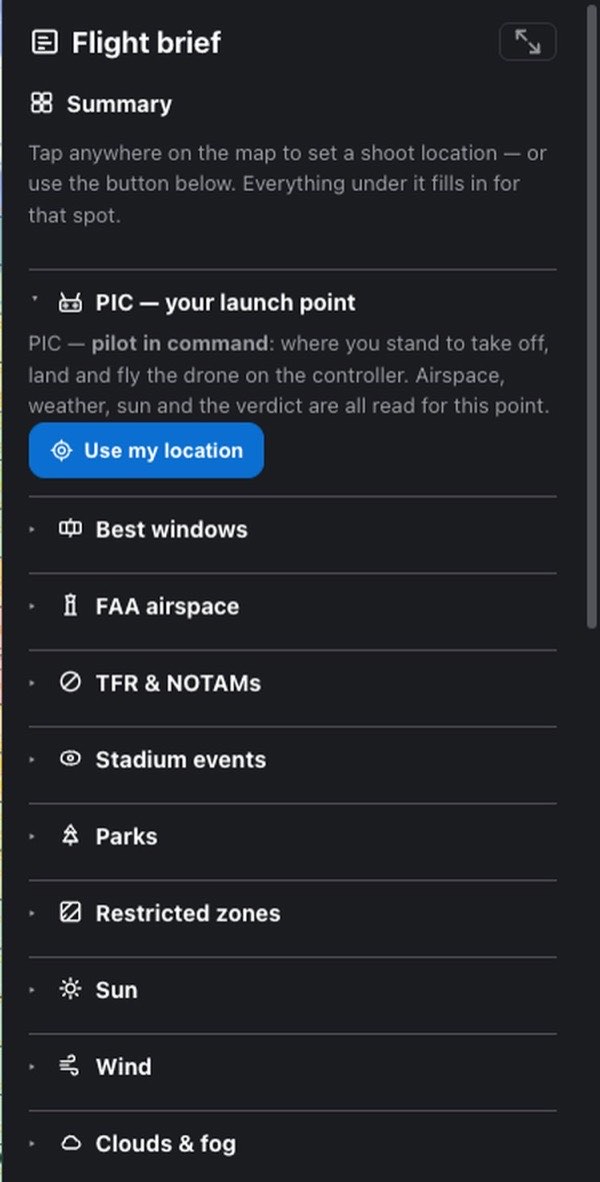
Before you set a point, the flight brief is already there. It shows:
- the Summary with one sentence: Tap anywhere on the map to set a shoot location — or use the button below.;
- an empty PIC section that explains what PIC means, with a Use my location button;
- every section of a real brief, closed, each with a one-line description of what it will show, and its Hobby or Pro tag where it has one;
- My spots, so you can open a saved spot without tapping a new one.
Use my location puts the point where you stand, from one device fix. A point placed this way counts as "where you are standing" for Which way I'm facing (see below). Until there is a point, the timeline shows no slider, only an instruction: Tap anywhere on the map to set your shoot spot…
2.3 The top bar
From left to right: the logo, the search (always open, with the row of target buttons in front of it), then Fit all, PIC here, Probe, Speaker, Basemap and Tilt, and at the right end Checklist and Help. The buttons are touch-sized. There is no settings gear (the left grip opens Settings) and no full-screen button. When the bar runs short, as on an iPad in portrait, the search box is what narrows: every button, Help included, stays on screen. Below 860 px the logo is left out too.
| Control | What it does |
|---|---|
| Search | Address and place search, always open. The row of buttons in front of it chooses which point a result moves; see The search bar |
| Fit all | Frames everything you've placed: both Homes, the PIC point, the subject, the probe and any trip stops. It levels the map and turns it north-up first. With only one point it just flies there. Saved spots are left out on purpose |
| PIC here | Sets the launch point to where you are standing, from one device fix. Already on the point (within 50 m)? Then it just flies the map back to it: nothing is re-read and no daily spot is spent. If it can't read a fix, the button turns red |
| Probe Pro | Altitude-explorer probe mode. While it's lit, every map tap moves the probe. Grayed out until there is a PIC point. Below Pro, a tap opens the plans dialog |
| Speaker Pro | Reads the flight brief out loud, and keeps reading each new point until you tap it off. Turns red if nothing could be played at all. Below Pro, a tap opens the plans dialog. See Spoken brief |
| Basemap | Cycles Map → Satellite → Terrain. The icon shows the view you're on |
| Tilt | Tips the map to 60° so Terrain becomes 3D. A second tap levels it and turns it north-up |
| Checklist | The pre-flight checklist, in a window docked at the right edge of the map. Glows green when every item is ticked |
| Help | This guide, full screen, in the tablet edition. × closes it |
On the map, at the top-left corner: zoom in / out, the compass (tap to turn north-up), and locate, which centers the map on your device. Locate doesn't move Home 1; it only fills Home 1 in if you have none yet.
Neither bar has a go-to-Home or a go-to-PIC button. Settings → My locations flies to either Home, and the flight brief's PIC section flies to the launch point with Show on map. PIC here is not a go-to button: it places the point where you stand. That is the job of a pilot standing at the launch spot with the panels shut. Probe and the Speaker are Pro tools, but they are on the bar on every plan, and below Pro a press offers you Pro.

2.4 The verdict chip
A verdict chip floats over the map, centered just under the top bar: the go/no-go headline in the verdict's color, with its icon and a › at the end. Tap it to open the flight brief drawer. It hides while the brief is open, because the brief shows the same verdict.
While the safety checks are still loading it reads Checking conditions, please wait…, never an early "Good to fly". It shows nothing before there is a point.

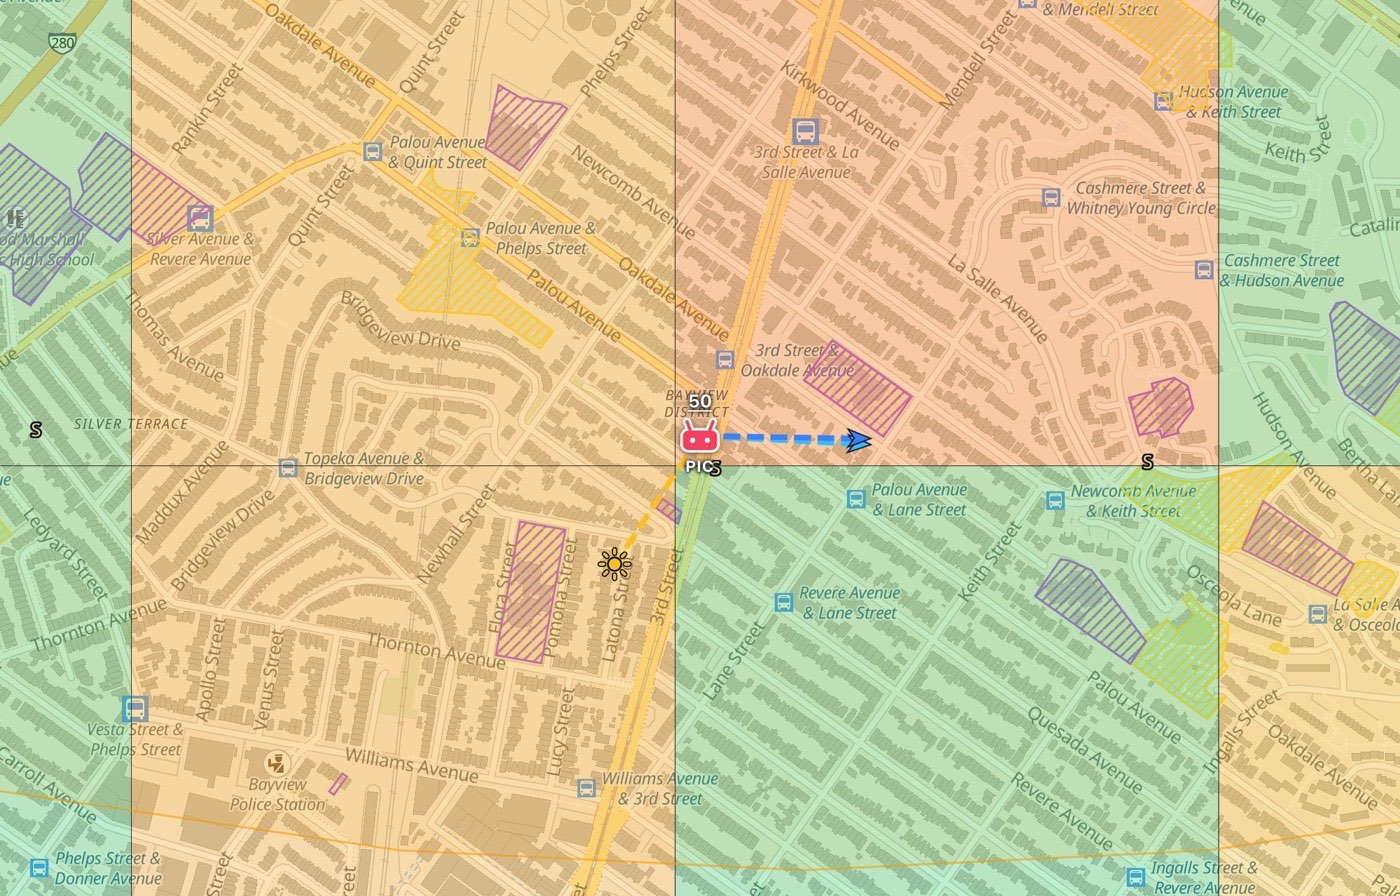
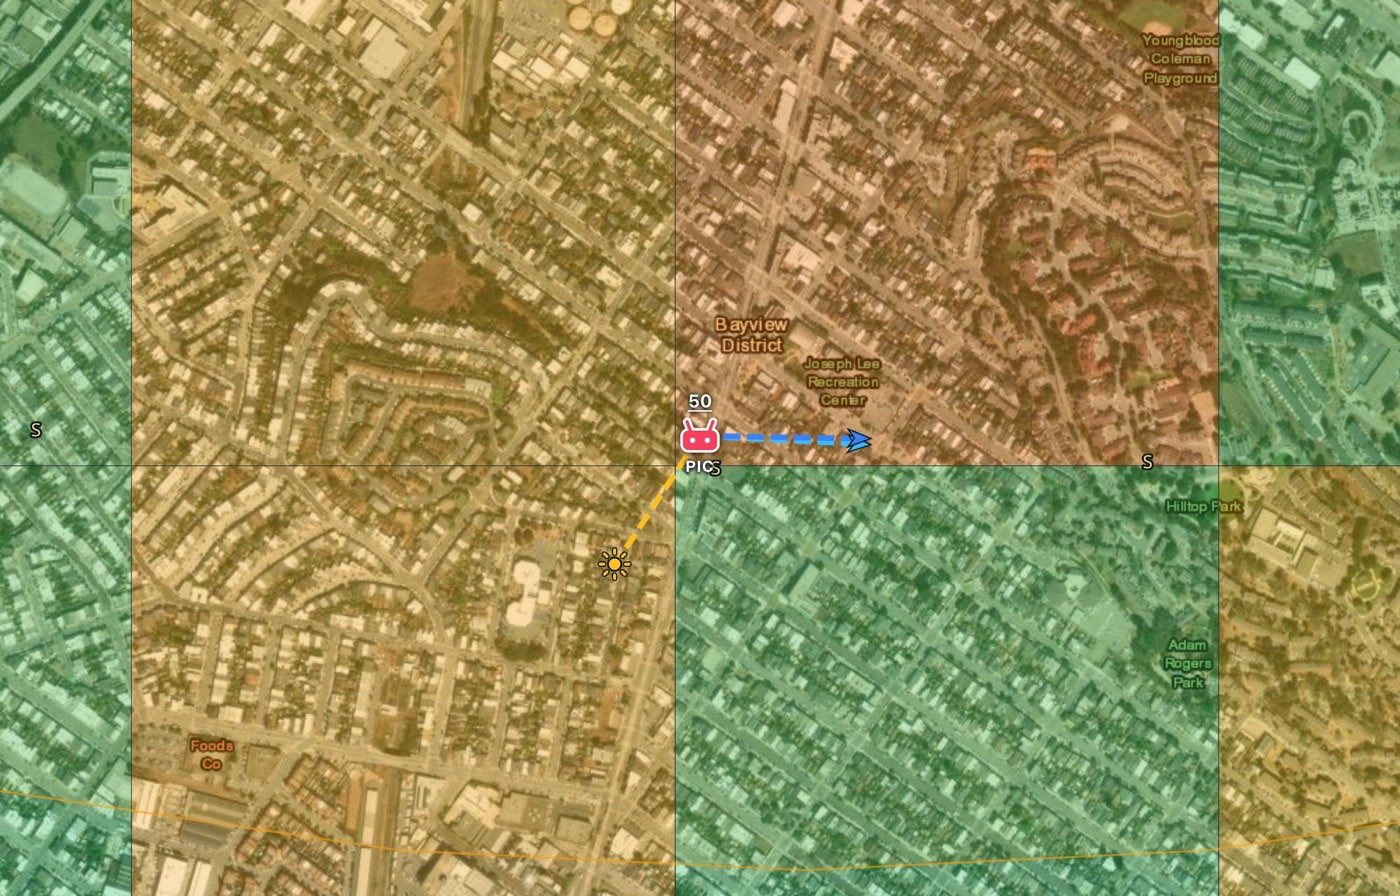
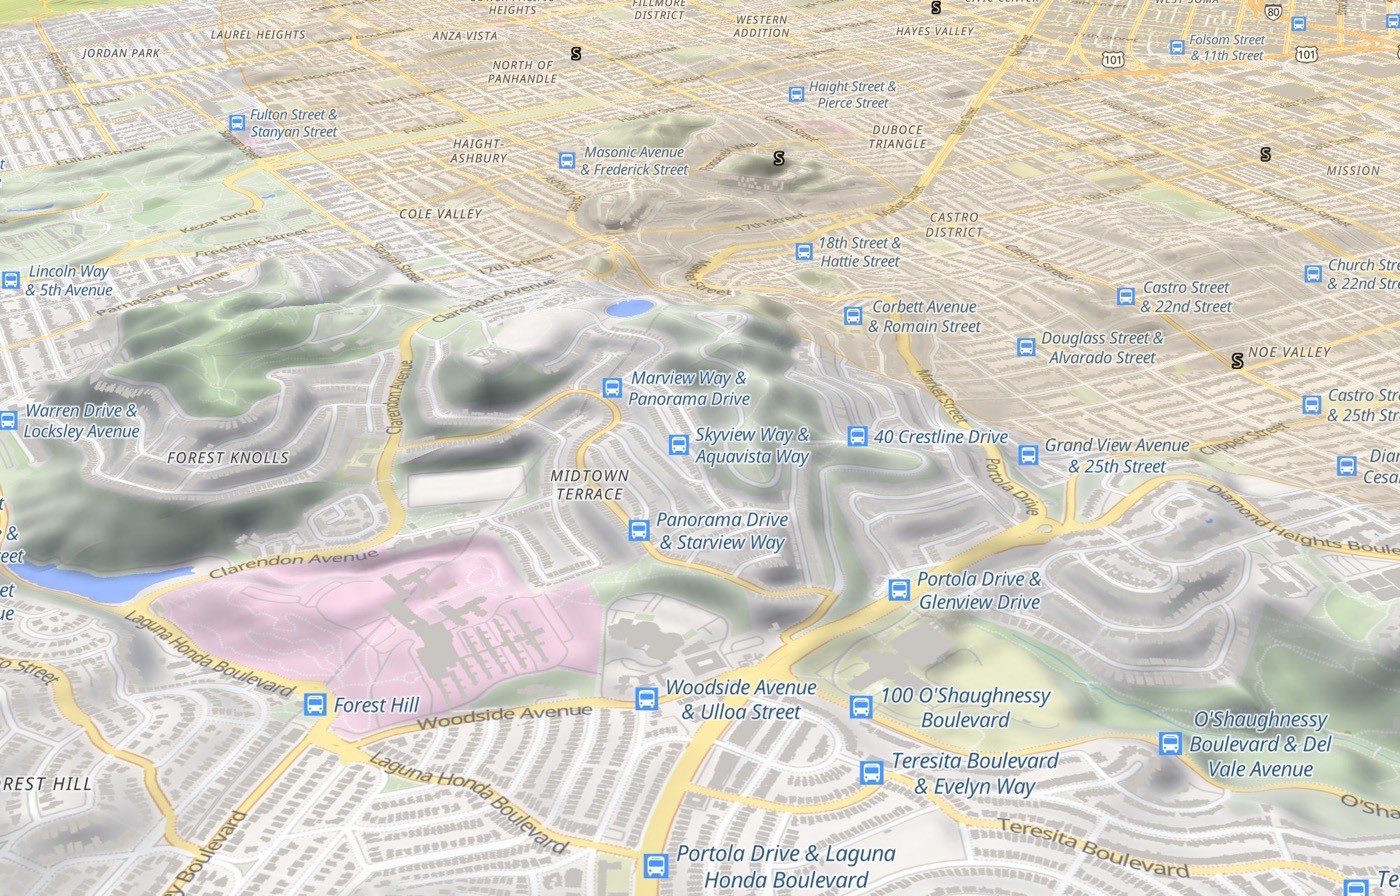
2.5 Map views
There are three bases. A new install opens on Terrain.
- Map: the plain vector map. Clearest for streets, labels and context.
- Satellite: imagery, for what the ground actually looks like.
- Terrain: the vector map with shaded relief. Tilt the map and the relief becomes real 3D. It's the fastest way to see whether a ridge stands between you and the shot, or how far the valley below you drops. Elevation comes from AWS Terrain Tiles. If they can't be reached, the map stays flat rather than drawing relief it doesn't have.
Switch with the Basemap button in the top bar, which cycles Map → Satellite → Terrain, or pick one by name under Settings → Basemap. The buttons there are named Map, Satellite and Terrain too.
On Map and Terrain, Settings → Basemap → 3D buildings raises the city's buildings when you tilt. It's off by default. Heights come from OpenStreetMap and can be off, and the ceiling doesn't use them. On Terrain the buildings cover the sun, wind and VLOS lines, so turn it off to read those.
To tilt, use the Tilt button, or drag up or down with two fingers. A two-finger twist rotates the map. Tilt a second time brings it back to flat and north-up.
2.6 The legend
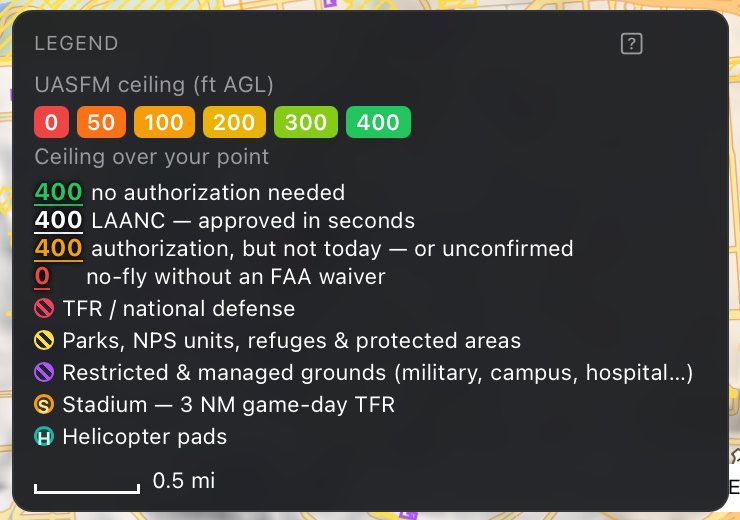
The legend explains what the map draws. It lists only what is switched on:
- the UASFM ceiling swatches (0, 50, 100, 200, 300, 400 ft), which grade the airspace grid squares by altitude;
- Ceiling over your point, once a point exists: the four colors of the number above the PIC marker (see The number above the PIC point);
- one row for each area layer that is on: TFRs, clouds, traffic, crime, parks, restricted grounds (with a second row for the dashed state-law buffer around a prison), stadiums, wildfire and smoke and volcanoes, helicopter pads;
- the community hearts with their 1★ to 5★ colors, and the colors of the points of interest you've switched on;
- a scale bar at the bottom, in your distance unit, that updates as you zoom.
On a tablet the legend is a box at the bottom-left of the map. Its ✕ folds it down to a small Legend button; tap that to bring it back. When the settings drawer opens, the legend steps right so the drawer doesn't cover it.
2.7 Full screen
A tablet has no full-screen button. The map already has the whole width whenever the drawers are shut.
2.8 Gestures
| Gesture | What it does |
|---|---|
| Tap the map | Sets the PIC point, the launch spot everything is computed for |
| Tap while a mode is armed | Places what that mode is for: a Home (from My locations' Map button), a Shot-planner subject, the altitude probe, or a saved spot being moved. The lit button tells you a mode is on |
| Drag an edge grip | Opens or closes a side drawer. A press with no drag toggles it |
| Pinch | Zoom |
| Drag with one finger | Pan |
| Two-finger drag up or down | Tilts the map into 3D (the Tilt button does it in one tap) |
| Two-finger twist | Rotates the map |
| Drag the timeline | Scrubs time in 30-minute steps |
| Drag the drone icon Pro | Moves the planned drone around its shooting ring |
| Drag the probe balloon Pro | Moves the altitude probe; a double tap on it removes it |
| Tap a list row | Flies the map there and slides the drawer away |
There is no press-and-hold on the map. It used to drop a marker, and it fired when people reached for a two-finger rotate, so it's gone.

2.9 Android Back
In the Android app, the system Back button (or the back gesture) closes whatever is on top, one layer per press, in this order:
- any dialog (the plans dialog, a spot's details), closed as a tap outside it would close it;
- the Spot finder's results;
- Help;
- the pre-flight checklist;
- the flight brief;
- Settings.
With nothing open, Back sends the app to the background. It never quits, so your point and your timeline are there when you come back. iPhones and iPads have no Back button; close things with their own ✕ or by pushing the drawer away.
Android gesture navigation and the grips. With gesture navigation on, Android keeps a strip about 20 px wide along each side edge for its own back gesture. The drawer grips are 24 px wide and sit on those same edges. A swipe that starts right at the edge is taken as Back, not as a grip drag. With nothing open, that Back sends the app to the background. Start the drag on the inner half of the grip, or just press the grip, which toggles the drawer without a swipe. This applies to the Android app only.
3 Points on the map
Points on the map: the launch point and the ceiling above it, the wind arrows and the sun ray, Home 1 and Home 2, what search moves, and the modes that arm a click.
FlyDrone keeps up to five named points: two Homes, the launch point, and, on Pro, a subject and an altitude probe. Home 2, the subject and the probe need Pro. Knowing which point you are moving is most of the learning curve.
| Point | What it is | How to set it |
|---|---|---|
| Home 1 | Where you drive from. Trips and spot searches start here. Set once; it doesn't follow you to a shoot | Filled in from your first location fix. After that: Settings → My locations (Locate, or Map then tap the map), or the search with Home selected |
| Home 2 Pro | Optional trip destination. With it set, a day runs one way: Home 1 → stops → Home 2 | Settings → My locations (Locate or Map), or the search with Home 2 selected. Clear it with its ✕ |
| PIC | The launch point being analyzed. The brief is about this spot | Tap the map, PIC here in the top bar, the search with PIC selected, Use my location in the PIC section, or a row in My spots. Clear point in the PIC section removes it |
| Subject Pro | What the camera points at, for the Shot planner | Pick subject on map in the Shot planner, then tap it, or the search with Subject selected |
| Probe Pro | The Altitude explorer's marker: how high you may be over there | Probe in the top bar (or Place probe on map in the Altitude explorer), then tap the map, or the search with Probe selected. Needs a PIC point: every number is measured from it |
Clearing the PIC point clears the subject and the probe with it. Both are measured from a launch point, so neither can outlive one.
3.1 PIC: the single most important point
PIC is aviation's term for the Pilot In Command: the person legally responsible for the flight. In FlyDrone the PIC point is where that person stands: the spot you take off from, land back at, and fly from. It is not the subject, and not where the drone will hover.
That distinction matters, because the entire brief is computed for this point:
- the airspace cell you're in and what LAANC would grant there;
- whether a TFR or a park boundary covers you;
- the sun at that exact coordinate;
- the weather for the square kilometer around it, which is the finest any forecast model resolves;
- the exposure and the drive time.
Move the PIC point ten miles and every number changes.
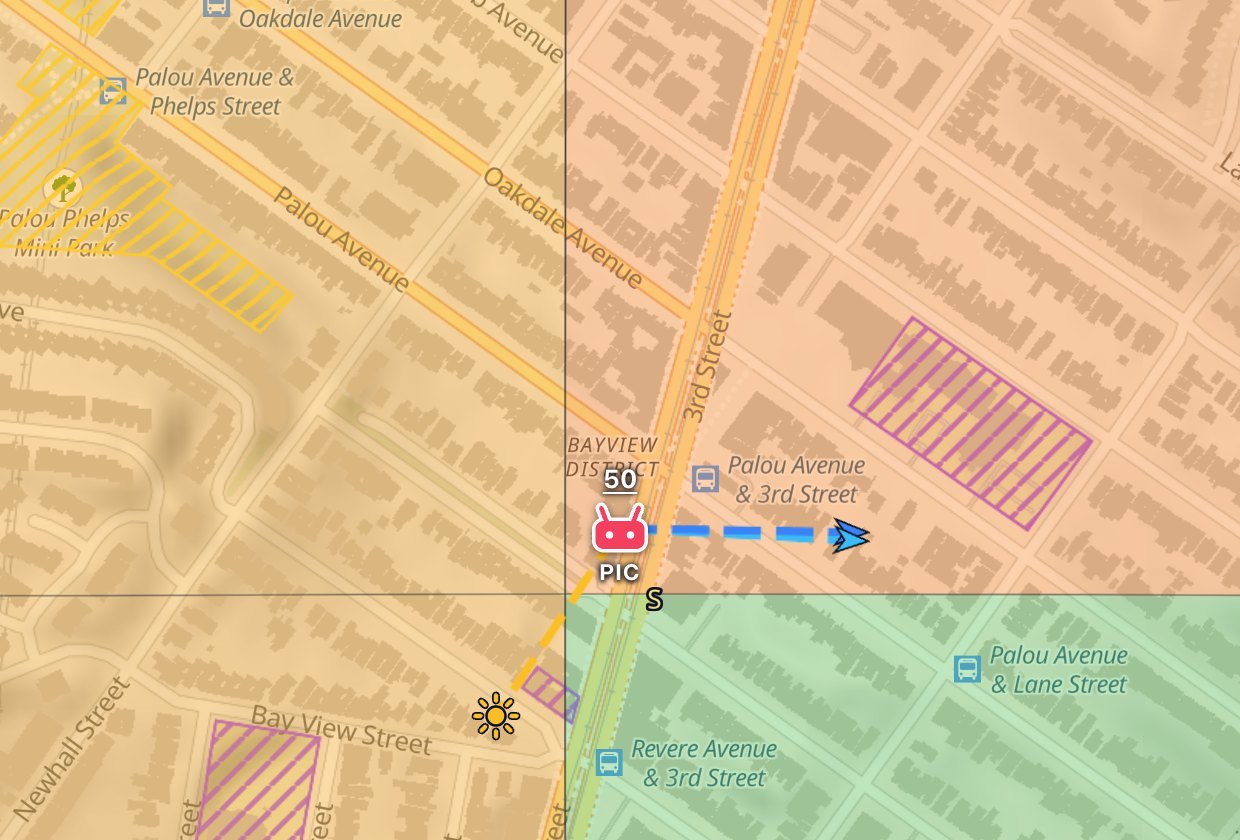
The marker is a red radio-controller glyph with a white outline and a small PIC caption under it. When the PIC point sits on one of your saved spots, the spot's heart steps aside and the PIC marker is drawn. One place gets one marker, and it's the one that says where you're flying from.
Everything else about the point lives in the flight brief's PIC section, right under the Summary: its address, coordinates, ground elevation and ceiling. It also has the buttons Use my location, Show on map (it flies back to the point and slides the drawer away), Copy coordinates and Clear point. Under those are Which way I'm facing and a full-width Navigate button that hands the point to Google Maps for the drive. Navigate is a plain link: it costs no allowance and needs no plan. The flight brief section by section covers each one.
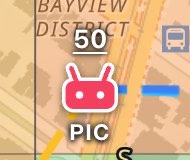
3.2 The number above the PIC point
Just above the marker floats an underlined number: the highest altitude you may fly at this spot, in your altitude unit. Its color answers the question that actually decides the shoot: can I get permission, and can I get it today?
| Color | What it means | |
|---|---|---|
| Green | Nothing to ask for. You're outside the grid, and the number is the plain Part 107 ceiling: 400 ft AGL | |
| White | Controlled airspace, and LAANC hands the authorization over in seconds. The number is that cell's ceiling | |
| Amber | Flyable, but not today. The square isn't LAANC-enabled (an FAA DroneZone application, filed well ahead), or its LAANC is by further coordination (a person reads the request), or its LAANC covers recreational flyers only. Amber also covers a square whose record we couldn't read, so an unconfirmed cell never looks as easy as a confirmed one | |
| Red | Ceiling 0: no altitude is authorized here at all. That takes an FAA waiver, not a form |
The color comes from the same calculation as the verdict's airspace line and the PIC section's ceiling row, so the three can never disagree about a square.
The number is missing while the airspace is still loading, and when the airspace lookup failed. In that case the verdict and the FAA airspace section say what went wrong. A missing number never means "no limit".
Don't confuse this scale with the UASFM ceiling swatches in the legend. Those grade the grid squares by altitude (0 ft red up to 400 ft green). This one grades the paperwork. The legend lists both, one under the other.
There are two things it doesn't do:
- It doesn't shrink for a low cloud deck. The Clouds & fog section works out the usable ceiling under 107.51(d).
- It describes the launch point only. With a shot planned, the drone's own position is checked separately, because a trajectory can cross into a different cell.
3.3 Wind arrows
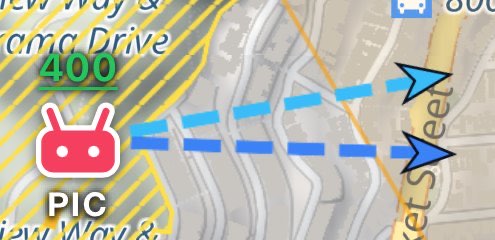
Two layers, Wind at ground and Wind at 400 ft, each draw one dashed arrow out from the PIC point. Both are on to begin with. The second one's name follows your altitude unit: Wind at 122 m in meters.
| Arrow | Reads | |
|---|---|---|
| Light blue | Wind at the ground | |
| Deeper blue | Wind at 400 ft AGL, where the drone actually flies |
They point the way the wind blows, downwind. So a "from the north-west" reading in the brief draws an arrow toward the south-east. Their length on screen is always the same and says nothing about the speed. How strong the wind is lives in the brief's Wind section, judged against your aircraft. Both arrows follow the timeline cursor, so scrubbing through an afternoon shows the sea breeze swinging round.
3.4 The sun ray
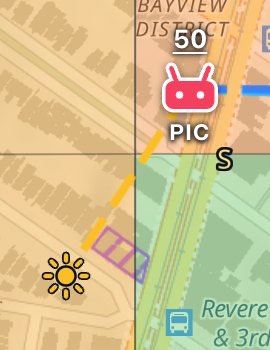
With the Sun ray layer on (it is to begin with), a dashed golden line runs from the PIC point toward where the sun is at the selected time, with a small gold sun at its tip. It only appears while the sun is above the horizon.
Read it as a light direction. The sun sits along the ray, so shadows fall the opposite way, the same bearing the Sun section prints as "shadows fall NE". Point your camera along the ray and you shoot into the sun. Stand with it behind you and your subject is front-lit.
On Pro, while the timeline cursor is inside a recommended window, the map adds a fan of seven fainter rays. They show where the light travels across that whole window: faint at its start, solid at its end.
3.5 Which way you're facing Hobby
Press Which way I'm facing in the PIC section, and a solid green line runs from the point the way your device is pointed, with a green dot on the end. This is the one for standing in a valley or under trees, where you know exactly where you are on the map and still can't tell which ridge in front of you is which. Turn on the spot until the ray lies over the thing you're looking at, and the map and the landscape line up. Hold the phone flat like a map or upright like a viewfinder; both read correctly. The ray stays on when you close the brief. The same button, now Stop compass, switches it off, and while it runs the section shows the bearing, for example Facing 225° SW.
It needs three things. When one is missing, the button isn't there or is grayed out:
- A paid plan. On Free the control isn't in the section.
- A compass sensor. On a device without one, a desktop computer for example, the control isn't there.
- A point set from your own location, with Use my location in the PIC section or PIC here in the top bar. The ray comes out of the PIC point, so from a spot you only tapped on the map it would be a confident line about nothing. The section says so under the grayed-out button. Move the point somewhere else and the compass switches off.
The first use on an iPhone or iPad asks for motion access. The check only says the point was yours, not that you're still standing on it. If a fix taken when the compass starts lands well away from the point, a note says so. And it is your device's compass, with its errors: a car, a tripod head or a power line pulls it, and some devices report magnetic rather than true north. Line it up against something you can see before trusting it a mile out. On location covers using it in the field.
3.6 Everything else you'll see on the map
| Marker | What it is |
|---|---|
| Blue house | Home 1. With Home 2 set too, both houses carry a tag, Home 1 and Home 2, so they can't be confused |
| Red heart with a number | A saved spot. The number is its place in the My spots list, not its rating, so a row and a marker always match. Tap it to plan there. A saved spot that is the PIC point wears the PIC marker instead, and one that is a trip stop wears the stop's yellow circle |
| Colored hearts Hobby | The community layer: areas other pilots saved, colored by average rating from near-black gray (1★) through navy and blue to white (5★). They are aggregated cells, never someone's exact coordinate. They appear from zoom 12 in, and not on Free |
| Yellow crosses Pro | Spot finder results, while its results are open |
| Yellow dots, then A to G Pro | Trip stops: plain dots before you calculate, lettered in visiting order after, with the drive time on each leg |
| Route line | The driving route to the point, or the route of a planned trip |
| Red dot Pro | The Shot planner's subject, with its shooting ring around it |
| Drone Pro | The planned drone position on the shooting ring. Drag it around. It carries two numbers: the ceiling that applies there, and the altitude your framing needs |
| Balloon Pro | The altitude probe: an instrument you park somewhere to read what the air is like there, not an aircraft |
| Green ray Hobby | Which way you're facing (above) |
| Colored dots | Points of interest, in the legend's colors: viewpoints, parking, restrooms, gas, groceries, hotels. All off to begin with |
Out of the box the map draws everything that can make a flight illegal or unwise: the UASFM ceiling grid colored by altitude, TFRs, parks, restricted grounds, stadium circles and helicopter pads. It also draws the sun ray, both wind arrows, your saved spots and trip stops. Wildfire and smoke, cloud shading, live traffic, crime and community spots start switched off, and so do all the points of interest, so a first map isn't a wall of pins. Turn them on in Settings → Layers and Settings → Points of interest. Traffic and community spots aren't offered on Free, and Trip stops only on Pro. Layers and points of interest covers each one.
3.7 Homes: set once, then yours
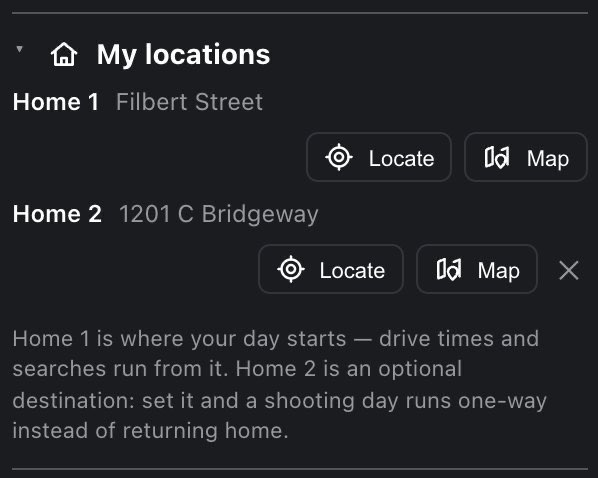
Both Homes live in Settings → My locations, at the top of the settings panel. It's one place to set them, whatever uses them later. Each row shows the Home's address and two buttons:
- Locate reads one device fix and puts that Home there.
- Map arms the next tap on the map to set that Home. The button reads Tap the map… while it's armed.
Tapping the address flies the map to that Home and slides the drawer away. When both are set, their markers read Home 1 and Home 2. Clearing Home 2 with its ✕ turns trips back into round trips from Home 1.
Home 1 is set once and then stays put. The very first time you open the app with no Home at all, your device position fills it in, so there is something to measure from. After that it's yours: nothing re-reads it on later launches, and the map's own locate control shows where you are without moving it. That matters most on a shooting day. Drive out to a location and open the app there: a Home that followed you would put your drive time at zero and point every spot search at the place you're already standing. To move it, do it on purpose: Locate or Map in My locations, or the search with Home selected.
Setting Home 2 needs Pro. It exists for one-way days, which the Spot Finder and Trip planner own. Below Pro, the Home 2 row explains what it's for and has no buttons.
3.8 The search bar
The search sits in the top bar and is always open. An open settings drawer covers it; push the drawer away to search.
A row of buttons in front of the search field decides what a result moves. They read in the order a flight is set up:
| Button | A result moves | Shown |
|---|---|---|
| Home | Home 1, the drive-from origin | Every plan |
| Home 2 | Home 2, the trip's destination | Pro only |
| PIC | The launch point. The default, because it's the only one that pulls a brief | Every plan |
| Subject | The Shot planner's subject | Pro only |
| Probe | The altitude probe | Pro only |
Subject and Probe stay grayed out until there is a PIC point, because both are measured from it. Their tooltip says so. If the PIC point is cleared while one of them is selected, the search switches back to PIC.
The field's placeholder repeats the choice (Set PIC by address…, Set Home by address…, Set Home 2 by address…, Set subject by address…, Set probe by address…), so a search aimed at the wrong point is visible before you pick a result. Picking a result moves that point and flies the map to it.

3.9 What pressing the map does
Tapping the map sets the PIC point. That is the map's only bare gesture. Everything else is a mode you switch on first, and each one arms the next tap for its own job:
- Map in My locations sets a Home. The button reads Tap the map….
- Pick subject on map in the Shot planner sets the subject.
- Probe in the top bar moves the probe. The button stays lit, and the probe keeps following your taps until you press it again, which also removes the probe.
- Move on a saved spot moves that spot. The status line under the timeline says Tap the map to move this saved spot there. Tap the button again to cancel.
The lit button is what tells you a mode is on.
Every new point counts toward the daily allowance on Free and Hobby (see Plans in one table). Re-opening a saved spot, or tapping again within 50 m of a point you already analyzed today, doesn't.
4 The verdict
Reading the verdict: more than thirty checks for the spot and the hour, the five levels, the reasons hardest first, what a failed source does, and what the verdict leaves to you.
Set a point and the brief opens with a one-line verdict. It is the most important thing in the app, and it is not one check: it is more than thirty, run against the spot and the time on the timeline, and folded into one line. This chapter lists all of them, with the exact words each one prints.
4.1 Where you read it
The verdict lives in the Summary section at the top of the flight brief. The Summary heading carries a short chip with the verdict. Under your Summary tiles comes the full verdict line with its icon, then the list of reasons.
The brief is a drawer on the right edge. While it is shut, the headline floats over the top of the map, just under the toolbar, as a chip: the verdict's icon, its label and a ›. Tap the chip to slide the brief open. The chip hides while the brief is open, because the same words are then on screen in full.
4.2 Checking conditions, please wait…
While any safety source is still loading, the verdict line reads Checking conditions, please wait… next to a spinning icon. The Summary chip reads Loading, and the chip over the map shows the same words with the same spinner. There is never a provisional green. A fetch in flight looks exactly like "checked and clear", so the app shows no verdict at all until every source has answered or failed.

4.3 The five levels
Every verdict is one of five levels. Each has its own icon shape, so you can tell them apart without relying on color: a circle passes, a triangle warns, a barred circle stops.
| Icon | Verdict line | Summary chip | Color | Means |
|---|---|---|---|---|
| Circle with a tick | Good to fly | Good to fly | green | Nothing is blocking. Notes may still apply. |
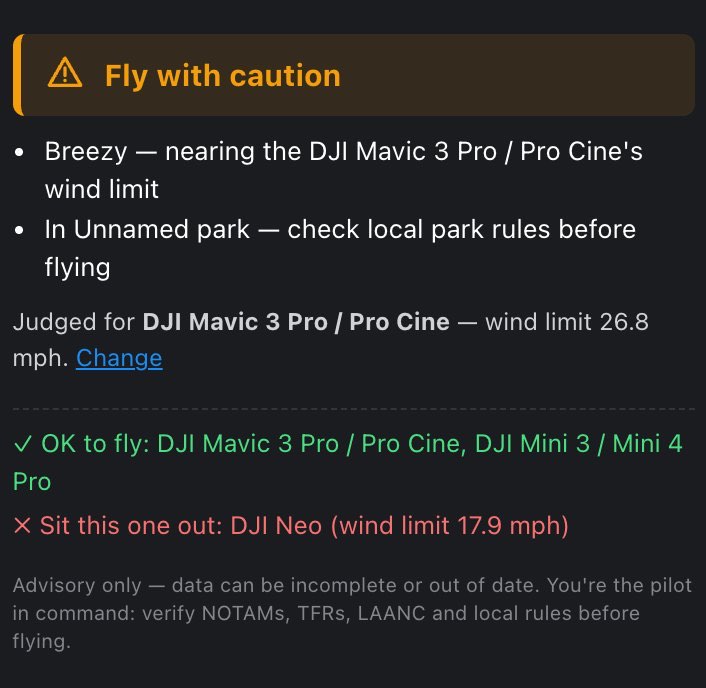
| Triangle with "!" | Fly with caution | Caution | amber | Legal, but something needs your judgment. |
| Magnifier | Manual verification required | Verify manually | amber | A source that could have said no didn't answer. Nothing was judged, so the words don't pretend it was. |
| Permit with a tick | FAA authorization required | Auth required | blue | Controlled airspace. Flyable once you hold the authorization. |
| Barred circle | Not advised | Not advised | red | A hard blocker: an active TFR, a prohibited zone, a 0-ft grid cell, a fire perimeter, weather below the legal minimums, and so on. |
The same colors and icons appear wherever a verdict is shown: the chip over the map, the Summary heading, a Trip planner stop and a Spot finder result.
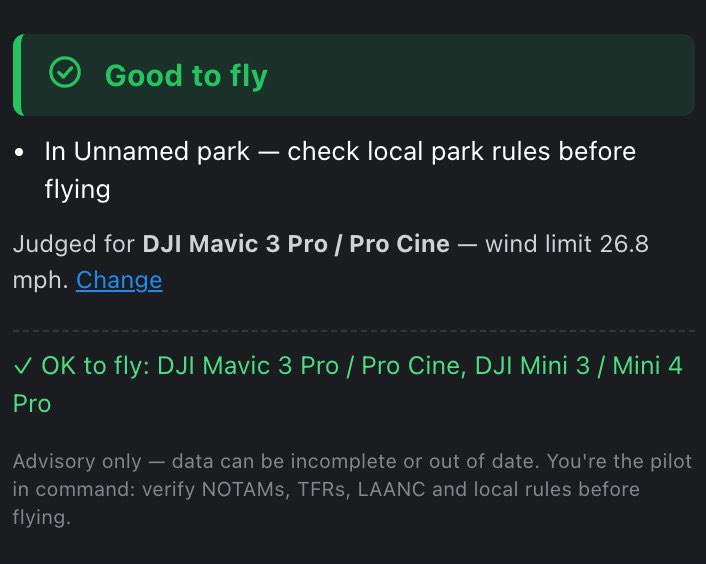
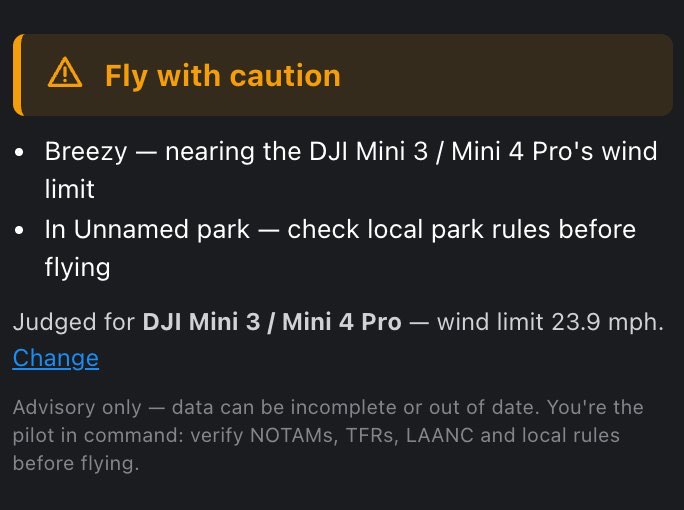
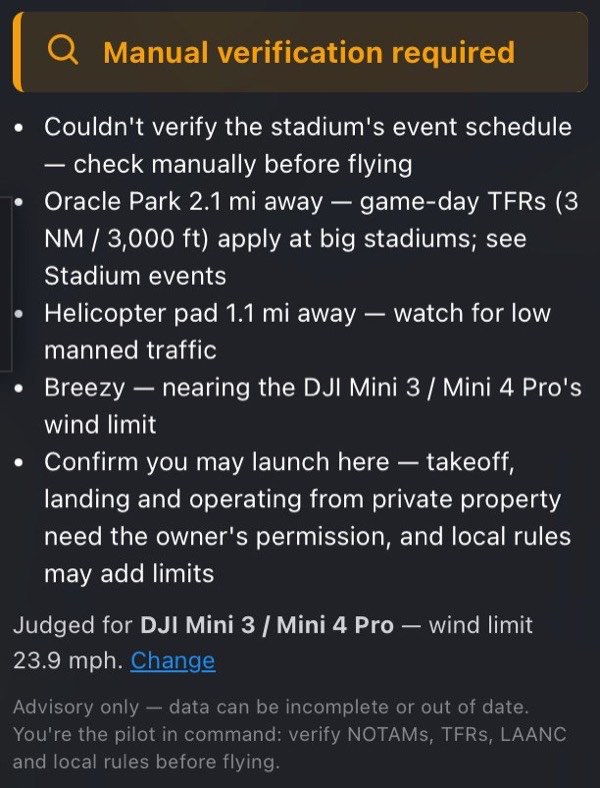
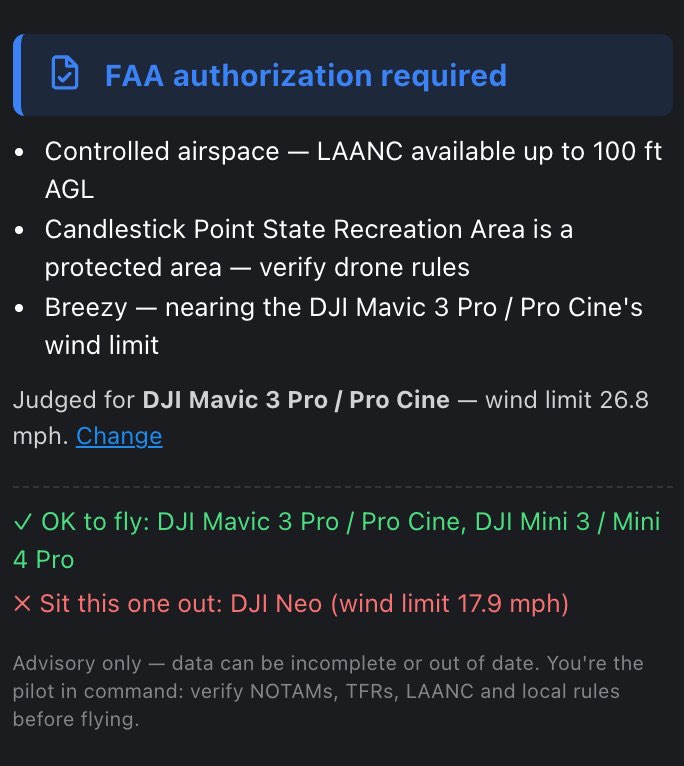
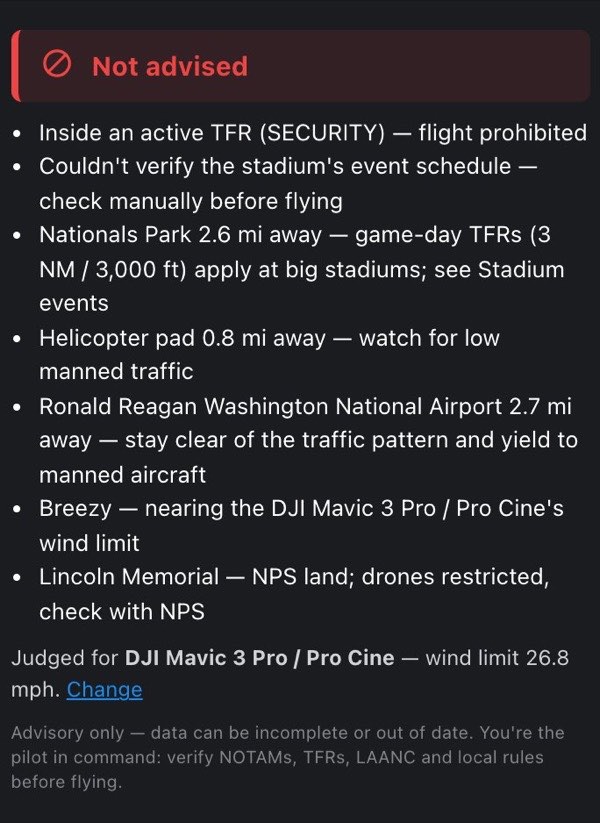
Only the worst factor sets the color, but every factor is listed. A green verdict can still carry notes to read. A red one shows everything else that was wrong too, so fixing one thing doesn't surprise you with the next.
The order of severity is Good to fly → Fly with caution → Manual verification required → FAA authorization required → Not advised. Two rules follow from it:
- Authorization outranks caution. A controlled-airspace spot with breezy wind reads FAA authorization required, because a legal requirement belongs in the headline. Both reasons are still listed.
- An unanswered blocker outranks a known small problem, but sits below the two things the app positively knows (authorization and no-fly). A fact you can act on beats an absence you can't.
4.4 What sits under the verdict line
- The reasons, one line each, hardest first (see the next section). With nothing to report you get a single line: Airspace, weather and visibility all look good.
- Which aircraft it was judged for: Judged for DJI Mini 3 / Mini 4 Pro — wind limit 23.9 mph. followed by a Change link. Every wind call is a call about one aircraft's rated limit, so the verdict names it. The aircraft is whichever one is selected in Settings → My fleet. With an empty fleet it is the default, the DJI Mini 3 / Mini 4 Pro (23.9 mph). Change opens the Settings drawer at My fleet. In landscape the brief stays open beside it; in portrait the brief slides away.
- Fleet advice Pro, with two or more drones in your fleet: ✓ OK to fly: … and ✗ Sit this one out: … (see With a fleet, the verdict names names).
- A fixed note, always present: Advisory only — data can be incomplete or out of date. You're the pilot in command: verify NOTAMs, TFRs, LAANC and local rules before flying.

4.5 How to read the reason list
The list is sorted by severity, hardest first. The lines that made the verdict what it is come first, then anything needing authorization, then the unanswered blockers, then cautions, and last the notes that leave a verdict green. So the top line always explains the color.
Within one level the order is fixed. The app adds reasons in this order, and sorting by level keeps it:
- airspace (the grid cell and how it's authorized)
- an active TFR
- a restricted zone
- a stadium
- a wildfire perimeter or nearby fire, smoke, a volcano
- a helicopter pad, then an airfield
- park rules
- wind, fog, the cloud deck, the structure exception, visibility
- NPS land, then unclassified ground
- thunderstorm, rain
- night, low light for video
- geomagnetic activity, then temperature
- the planned shot Pro, then line of sight Pro
- sources that couldn't be checked
That is why a helicopter pad sits above a park's rules when both are cautions, and why an NPS caution comes after a breezy-wind caution.
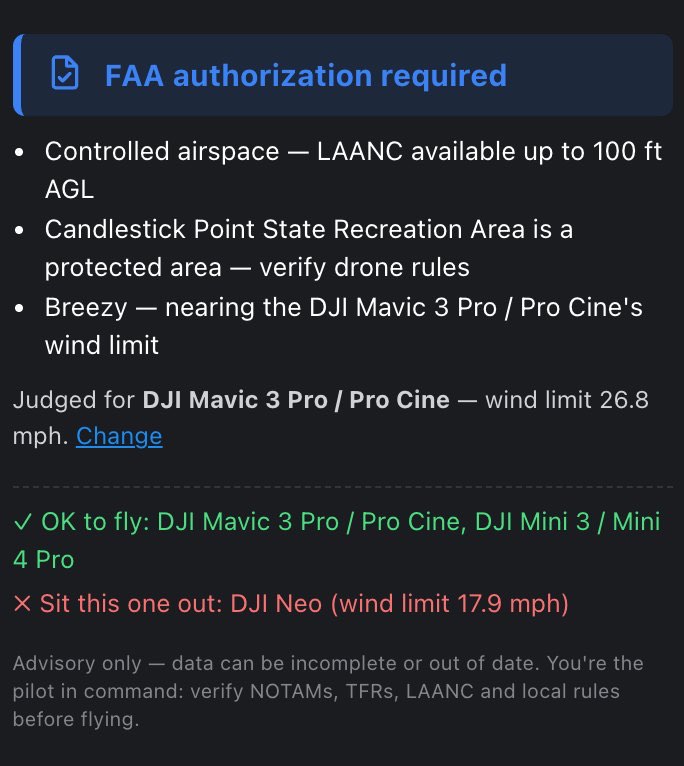
The tables below give every line the verdict can print. Words in italics are filled in for the spot (names, distances, heights); distances and speeds follow your units.
4.6 1 · Airspace and restrictions
| Line in the verdict | Level | When |
|---|---|---|
| Controlled airspace — 0 ft; FAA waiver required | Not advised | The FAA grid cell (UASFM) publishes a 0-ft ceiling. There is no authorization to grant; only a waiver. |
| Controlled airspace — LAANC available up to X AGL | Authorization | Instant approval, in seconds, from your LAANC app. |
| Controlled airspace — up to X AGL, but only by LAANC further coordination: a person reviews it, so not same-day | Authorization | Same permission, but a person reviews it. |
| Controlled airspace — up to X AGL; LAANC here covers recreational flyers only, not Part 107 | Authorization | The cell is enabled for 49 USC 44809 flyers, not for Part 107. A recreational pilot gets LAANC available here instead. |
| Controlled airspace — up to X AGL; LAANC here covers Part 107 only, so a recreational flight's authorization goes through FAA DroneZone, filed well ahead | Authorization | Recreational pilot only: the cell's LAANC is not enabled for 44809 flyers. |
| Controlled airspace — up to X AGL, but this square isn't LAANC-enabled: authorization goes through FAA DroneZone, filed well ahead | Authorization | No LAANC here. Plan days ahead. |
| Controlled airspace — authorization required up to X AGL; whether LAANC covers this square is unconfirmed | Authorization | The LAANC record wasn't read. The app won't claim an instant approval it hasn't seen. |
| Controlled airspace (Class D) — FAA authorization required; LAANC isn't available here, apply through FAA DroneZone | Authorization | The US Class D of a Canadian airport: Sault Ste Marie, ON over Sault Ste Marie, MI, and Abbotsford, BC over Sumas, WA. The FAA grid has no square there, so there is no LAANC. |
| Inside an active TFR (name) — flight prohibited | Not advised | The point is inside a standing national-defense TFR, or inside a live one (VIP, fire, event) that is in effect during the hour on the timeline. |
| Scheduled TFR (type) here window — not in effect at the selected time | Caution | The point is inside a live TFR, but it is not in effect during the hour on the timeline. The line names its next window in the spot's local time, for example Wed Sep 30, 04:15 PM–08:45 PM. It adds (and N more) when the TFR has several. |
| National security UAS flight restriction (name) — drones prohibited | Not advised | A permanent FAA restriction (14 CFR 99.7) over a military, Coast Guard, Energy Department or other federal site, or a National Defense Area along the southern border. |
| Military zone — drones prohibited | Not advised | Mapped military ground. |
| Airfield grounds — launching here needs explicit authorization | Not advised | The point is on an airfield's own grounds. |
| Correctional facility — state bans drones over it (without written consent) | Not advised | Prison grounds in a state whose law bans drones over them outright: NC, SC, NV, TX, ID, MO, LA, TN, WI, MN, SD. Iowa and Delaware too, unless your pilot category is Part 107: their exemption is for commercial or FAA-authorized flights (Delaware's line reads without written permission). With no category set, those two add (commercial flights exempt: set your pilot category), or (FAA-authorized operators exempt: …). Without written consent is added where the facility's consent lifts the ban. |
| Within N ft of a prison — state bans drones here without written consent | Not advised | Outside the fence but inside the state's buffer: 500 ft in North Carolina, South Carolina and Nevada. |
| Correctional facility / Within N ft of a prison — state bans drones over it / here condition | Caution | A state law that applies only if the facility is fenced or posted (if it is fenced or posted: CT with a 100 ft buffer, FL, OR, VT; with no pilot category set the line adds (commercial flights exempt: set your pilot category)), or whose exemption for pilots flying under federal rules has an unclear reach (unless its federal-pilot exemption covers you: AL, 500 ft). The app can't check the condition, so it names it. |
| Correctional facility / Within 100 ft of a prison — state exempts commercial flights; carry proof of the commercial purpose | Note | Part 107 pilot only: CT, FL, OR, VT and IA exempt FAA-compliant commercial flights. In Delaware the line reads exempts FAA-authorized operators; carry your remote pilot certificate. The law doesn't bind you, so the verdict stays green unless something else says otherwise. |
| Within 1,500 ft of a prison — South Carolina bans drones here from January 1, 2027 | Caution | Between 500 and 1,500 ft of a South Carolina prison or jail, until Act 150 takes effect. From that date it is a no-fly. |
| Correctional facility — drones usually prohibited | Caution | Prison grounds in a state without a prison drone law in the app. |
| Hospital grounds — don't launch here | Caution | |
| Critical infrastructure — don't launch here | Caution | Power plants, substations and similar. |
| Private business grounds — launching needs the owner's permission | Caution | |
| School / campus grounds — takeoff usually needs permission | Caution | |
| Stadium — TFR during major events | Caution | The point is on a stadium's own grounds. |
| Stadium distance away — game-day TFRs (3 NM / 3,000 ft) apply at big stadiums; see Stadium events | Caution | An FAA-listed stadium within 3 nautical miles (5,556 m, about 3.45 ordinary miles). |
| Event (league) at stadium — a game-day TFR covers this spot at the selected time (3 NM / 3,000 ft, an hour before to an hour after) | Not advised | An MLB, NFL or NCAA Division I football game at that stadium covers the time on the timeline. |
How authorization works, and why the ceiling alone doesn't tell you. How high the grid cell allows and how you get permission are two separate facts, so the verdict names the route. A 400 ft cell with no LAANC is a completely different flight plan from one LAANC clears in seconds. An airport that grants instant approvals in most cells can still have cells that don't. Where several facilities cover one cell, the answer is the strictest of them, because every one of them has to be satisfied. The verdict, the PIC section and the FAA airspace section all read this from the same record, so they can't contradict each other.
The game-day window. The FAA's stadium TFR runs from one hour before a qualifying event to one hour after it ends. Nobody publishes when a game will end, so the app treats the TFR as live from 1 hour before the start to 7 hours after the start. A nominal game plus an hour is about 4.5 hours, and rain delays and lightning holds happen; closing the window early would put you inside a live TFR. The verdict line quotes the rule itself ("an hour before to an hour after"); the timeline and the windows use the longer hold. While an event covers the time on the timeline, the stadium's ring on the map turns red. The Stadium events section lists what's on.
4.7 2 · Fire, smoke and volcanoes
| Line in the verdict | Level | When |
|---|---|---|
| Inside the name wildfire perimeter (N acres) — aerial firefighting operates here | Not advised | The point is inside an active fire's mapped perimeter, TFR or not. |
| Name wildfire distance away — fire TFRs pop up without warning | Caution | An active fire within about 5 miles (8,047 m), measured to the nearest edge of its perimeter or to its reported location, whichever is closer. |
| Class smoke forecast overhead — expect poor visibility and a hazy horizon | Caution | The NOAA smoke forecast puts 3 µg/m³ or more over the point at the hour on the timeline. Thinner than that is background air. The class prints as a range, such as "3 - 25". |
| Name volcano (code aviation code) distance away — ash advisories ground aircraft fast | Caution | A USGS elevated-alert volcano within 50 km (about 31 miles). |
4.8 3 · Manned traffic — what no airspace map tells you
| Line in the verdict | Level | When |
|---|---|---|
| Helicopter pad distance away — watch for low manned traffic | Caution | A hospital or private helipad within 1 mile. Helicopters arrive low and fast, off any published route. |
| Airfield name distance away — stay clear of the traffic pattern and yield to manned aircraft | Caution | An airfield within 2 miles, including uncontrolled Class G fields where flying is perfectly legal. |
This is the pair most apps show as a clean green. An uncontrolled airport (like Half Moon Bay) is Class G: no authorization needed, and nothing in the FAA grid warns you. Its traffic pattern still circles at 800–1000 ft AGL right where you're standing. FlyDrone never calls those spots "good to fly": stay clear of the pattern and yield to manned aircraft.
4.9 4 · Whose ground you're standing on
| Line in the verdict | Level | When |
|---|---|---|
| Drones prohibited in park (park rules) | Not advised | OpenStreetMap marks the land as a national park or as run by the National Park Service, and the official NPS boundary layer does not cover the point. When the official boundary does cover it, that source wins and you get the NPS caution below instead. |
| Park is a protected area — verify drone rules | Caution | A wildlife refuge, a nature reserve or another protected area. |
| Park — NPS land; drones restricted, check with NPS | Caution | Inside an official National Park Service boundary. Launching, landing and operating are restricted by NPS policy, which is not FAA airspace, so it is a caution rather than a no-fly. |
| In park — check local park rules before flying | Note | An ordinary city or regional park. The verdict stays green. |
| Confirm you may launch here — takeoff, landing and operating from private property need the owner's permission, and local rules may add limits | Note | The ground check ran and matched no park, NPS unit or restricted zone. |
Those last two are the app's way of not pretending. No open dataset knows every parcel's owner, so the verdict reminds you instead of implying a permission it can't verify.
4.10 5 · Weather and the legal minimums
Wind is judged against the aircraft named under the verdict, and against the worst of four values: the surface wind, the surface gusts, the wind at 400 ft, and the estimated gust at 400 ft. A drone doesn't fly at 10 m, so a calm ground reading never earns a pass on its own.
| Line in the verdict | Level | When |
|---|---|---|
| Gusts above limit — the drone's wind limit (or Gusts at altitude above …) | Not advised | The worst gust reaches the aircraft's rated wind resistance. "At altitude" means the estimated 400 ft gust is the one over the line. |
| Wind above limit — the drone's wind limit (or Wind at altitude above …) | Not advised | The steady wind reaches the limit. |
| Breezy — nearing the drone's wind limit | Caution | Wind or gusts at 72 % of the limit or more. For the default DJI Mini 3 / Mini 4 Pro that is from about 17 mph; the limit itself is 23.9 mph. |
| Fog in the forecast — visibility below the 3 SM minimum and no line of sight | Not advised | The weather model reports fog for the hour. |
| Fog / cloud deck at height AGL — no legal altitude 500 ft below clouds remains | Not advised | Cloud base under 500 ft. 14 CFR 107.51(d) wants 500 ft below the cloud, so nothing legal remains. |
| Cloud base height AGL caps the ceiling at X instead of Y — stay 500 ft below clouds (14 CFR 107.51(d)) | Caution | The deck minus 500 ft is lower than the ceiling you'd otherwise have. In open Class G (400 ft) that means a deck under 900 ft. |
| Cloud base … caps the ceiling at X — … this shot needs Z, so it doesn't fit under the deck this hour Pro | Not advised | The same, with a Shot planner framing that needs more height than the deck leaves. |
| Plan needs Z — legal only under the structure exception (14 CFR 107.51(b)): … Pro | Caution | The planned shot goes above 400 ft only because a structure stands within 400 ft of the drone. The structure's height is an estimate: confirm it, and stay within 400 ft of it. |
| Visibility well below the 3.0 mi minimum | Not advised | Visibility under 3 km. |
| Visibility below the 3.0 mi Part 107 minimum | Caution | Visibility under 3 statute miles. |
| No visibility data — confirm 3.0 mi flight visibility yourself | Caution | The model left visibility out for this hour. |
| Thunderstorm in the forecast — lightning and violent gusts | Not advised | |
| High chance of precipitation | Caution | Chance of rain 60 % or more. Most drones aren't weather-sealed. |
| Freezing (temp) — reduced battery & flight time | Caution | 0 °C (32 °F) or colder. LiPo capacity and flight time drop sharply. |
| Extreme heat (temp) — watch overheating | Caution | 40 °C (104 °F) or hotter. |
When a cloud base comes from the humidity estimate rather than the model, the height is printed with a ~ and the line says (estimated from humidity).
4.11 6 · Light and space weather
| Line in the verdict | Level | When |
|---|---|---|
| Sun below horizon — low light | Caution | Night flight needs anti-collision lighting, and you lose the visual. |
| Light is ~N stops short for clean video at your settings — plan a brighter hour | Caution | The sun is up, but even after the exposure ladder gives up everything it can (ISO, aperture, shutter, frame rate), the scene is more than half a stop short at your camera settings. |
| Geomagnetic storm (Kp N) — GPS/compass may drift | Caution | Kp 5 or higher. GPS fix and compass heading drift, which is bad news for return-to-home. |
4.12 7 · The planned shot Pro
With a subject set in the Shot planner, the drone's planned position can sit in different airspace from your launch point, so its own problems reach the verdict too. They arrive as one line, its parts joined by " · ":
| Part of the line | Level |
|---|---|
| Planned drone position needs Z — above the X ceiling there | Not advised |
| Planned drone position is inside restricted airspace (TFR / no-fly zone / fire) | Not advised |
| Planned drone position is over a structure taller than its Z — the aircraft would fly into it | Not advised |
| Planned drone position is in controlled airspace (airport) — LAANC authorization required, grid ceiling X AGL | Caution |
| Planned drone position is in a caution area (stadium 3 NM or restricted-use zone) | Caution |
| A structure taller than the planned Z stands within distance of the drone's spot | Caution |
| ~N° of the trajectory is closed at Z (ceiling, TFR or restricted zone) — the red arcs; the aircraft must not cross them | Caution |
| Building data around the trajectory is incomplete…, Couldn't read the buildings around the trajectory…, Still reading the buildings around the trajectory… | Caution |
| Still reading the airspace around the trajectory (TFRs, zones, grid)… or Couldn't read … around the trajectory… | Caution |
The line takes the level of its worst part. A drone position in controlled airspace is a caution here, not the blue authorization level: the headline's blue belongs to the launch point's own cell.
Two more lines check that you can still see the aircraft:
| Line in the verdict | Level | When |
|---|---|---|
| Planned drone position distance away — beyond the ~X visibility, you can't keep VLOS | Caution | The framing puts the drone farther away than the forecast visibility. |
| Planned drone position distance away — a drone disappears from sight past ~X | Caution | Farther than a drone that size stays visible: about 2,000 times its diagonal (500 m for a 250 mm Mini). |
4.13 8 · Anything that couldn't be checked
A source that fails is never shown as all-clear. Every failed check adds its own line, Couldn't verify source — check manually before flying, and the ones that could have banned the flight change the headline itself.
Not every silence weighs the same. A source that could have said no outright, and didn't answer, lifts the whole verdict to Manual verification required:
- TFRs: the TFR lookup failed.
- all TFRs: the live TFR sweep came back incomplete, or couldn't be reached at all, and no TFR was found. A notice that is only text, with no boundary at all, isn't counted as a gap, or the warning would be lit everywhere forever.
- airspace: the grid lookup failed, or the cell came back with a ceiling that couldn't be read. An unreadable cell is a cell that wasn't read, never an open sky.
- national security restrictions: the FAA's list of permanent prohibited areas couldn't be read.
- the stadium's event schedule: a stadium is within 3 NM and its schedule couldn't be read in full. The ring alone can't say whether a game-day TFR is live.
- wildfire & hazard data: the whole wildfire and hazard lookup failed.
- wildfire perimeters: that part of it failed. Being inside a perimeter is a no-fly, so not knowing is blocking.
Sources that could only have raised a caution stay plain cautions: weather, restricted zones, stadium TFR zones, nearby wildfires, the smoke forecast, volcano alerts, park rules (the park or NPS lookup), helicopter pads (this lookup also finds airfields), and geomagnetic activity.
On top of that:
- Each source retries twice on its own before it is reported as failed.
- The failing section shows a red Reload chip in its heading. Tap it and only that source re-fetches. A Reload is ignored while the fetch is running and for 5 seconds after, so pressing it repeatedly doesn't restart the wait.
- Best windows are withheld while airspace, TFRs, park rules, restricted zones, national security restrictions or the wildfire & hazard data are down, with a ↻ Reload missing data button. A green window inside a TFR nobody read would be worse than no window at all. See When the list is empty.
4.14 With a fleet, the verdict names names Pro
With two or more drones in My fleet, the verdict adds a line for each group:
- ✓ OK to fly: drones
- ✗ Sit this one out: drone (wind limit X), or drone (VLOS distance) when a shot is planned.
Each drone is checked against the hour's worst wind (the same four-value blend as above) and, with a Shot planner framing, against how far it stays visible (about 2,000 times its diagonal). Wind is checked first: a drone the wind rules out is listed with its wind limit even if it would also fail VLOS.
The lines appear whenever the hour is flyable for some aircraft, green verdicts included, so you can see at a glance which drones to pack. They are hidden when something other than wind makes the hour Not advised: under fog, a TFR or a 0-ft cell no drone flies, and "OK to fly" under a red verdict would be a contradiction. When wind is the only problem the lines stay, because bringing a tougher aircraft is exactly the way out.
4.15 What the verdict does not decide
- Your shooting preferences never touch it. The taste sliders reweight the shoot score and the recommended windows. They cannot turn a red hour green.
- It doesn't file anything. LAANC authorization, waivers and NOTAM reading remain yours.
- It doesn't know local ordinances, state park by-laws, HOA rules or a landowner's opinion.
- It doesn't see obstacles outside a planned shot: wires, trees, cranes, people. That's the pre-flight checklist and your eyes.
The same rules paint the timeline. For every hour of the forecast, the app runs the verdict's rules again with that hour's weather. It uses the spot's fixed facts: the grid ceiling, an active TFR, a prohibited restricted zone, a park where OpenStreetMap says drones are prohibited (unless the official NPS boundary covers the point, exactly as in the verdict), a wildfire perimeter, your aircraft's wind limit, and every game-day window at a nearby stadium. Any hour that comes out Not advised is painted red on the timeline and can never be part of a recommended window. Cautions don't paint anything; only no-fly hours do.
5 The timeline
Timeline and best windows: the timeline as the app's clock, and when it is worth flying: the score, how a window is built, Shooting preferences and the sun fan.
The bar along the bottom of the screen is the app's clock. Everything else shows the moment the timeline's cursor is on: the verdict, every section of the brief, the wind arrows and the sun ray on the map, the smoke forecast and a stadium ring that turns red during a game.
5.1 Before you set a point
Until there is a point, the timeline has no slider. The bar shows instructions instead: Tap anywhere on the map to set your shoot spot. You'll get plenty of useful flight info and the best hours to fly over the next 48 hours. The left panel is for settings; the right is your flight brief. The number of hours follows your plan's forecast horizon.
5.2 What's on the bar
One row across the full width of the screen, left to right:
- Now: moves the cursor to the present moment.
- Numbered buttons (1, 2, …): one per recommended window, best first. Tap one to jump to that window's best hour. The button of the window the cursor is in turns solid green.
- The score box: the shoot score at the cursor, under a small SCORE caption (see below).
- The track with the slider.
- The clock and a small calendar tile.
Under the row sits the status line. The timeline stays on top when you open a drawer, so you can scrub with Settings or the brief open.

5.3 The track
- Scrub in 30-minute steps from now to the end of your forecast horizon: 24 hours on Free, 48 hours on Hobby, and on Pro 2 to 7 days (5 by default, set in Settings → Forecast).
- Small ticks mark the hours; taller ticks mark midnight, labeled with the weekday. Ticks follow the spot's local time.
- Green bands are the recommended windows. The best one is solid green, and each next one is the same green, paler. Bands carry no number of their own: the rank is the shade, and the numbers are on the jump buttons.
- A golden tick inside each green band marks the window's peak, its single best hour.
- Red bands are the hours the verdict rules out (Not advised). They stay even when the recommended windows are withheld because a safety source failed: they can only warn, never clear.
Bands and peak ticks are not buttons. Tapping anywhere on the track moves the cursor to that spot, like any slider. To land exactly on a window's best hour, use the numbered buttons or a row in the Best windows section.
5.4 Jumping around
Now returns the cursor to the present. The numbered buttons jump to the middle of each window's best hour. With no recommended windows there are no numbered buttons.
5.5 The score
The number in the box next to the track is the shoot score at the cursor: the same scale the windows are ranked on, explained in How an hour is scored. It moves as you scrub. It shows — while the verdict is still loading and on any hour that is Not advised, because a number there would contradict the verdict.
5.6 The clock
The big clock shows the time at the cursor, in the spot's local time (not your phone's or computer's), in your 12- or 24-hour setting. The calendar tile next to it shows the month, the day and the weekday. When the cursor is inside a recommended window, a second, smaller line appears under the clock: #2 · 17:00–20:00, the window's number and span.
5.7 The status line
The line under the timeline is where the app tells you what's going on. It shows one message at a time, the most important first:
| Message | When |
|---|---|
| Tap the map to move this saved spot there. Tap the button again to cancel. | You've armed a saved spot to be moved. |
| The instructions above | There is no point yet. |
| Loading weather, airspace, TFR… | Sources are still coming in. A thin blue progress bar runs along the bottom edge. |
| Couldn't load sources — pan the map or tap again to retry. | One or more sources failed. |
| Couldn't check the map for a building at your subject — … or No building found at your subject — … Pro | The Shot planner couldn't measure your subject; set its width in the brief. |
| Conditions ready. Scrub the time slider to plan ahead, or open the panel for the full report. | Everything loaded. |
5.8 The sun path across a window Pro
While the cursor is inside a recommended window, the map adds a fan of thin sun rays from your PIC point: one at the window's start, one at its end, and five in between, faint at the start and solid at the end. Together they show where the light travels during the whole shoot. The fan sits under the usual dashed sun ray for the cursor's moment. Rays for times when the sun is down are left out. The fan needs the Sun ray layer on (it is on by default).
6 Best windows — when to actually fly
The verdict answers may I. This answers when should I. It is the feature most worth understanding, because it is tunable and it decides the green bands on your timeline.
FlyDrone scores every hour of your forecast horizon for how good the footage would be, then hands you the best runs of consecutive hours, best first. How many you get is your plan: 1 on Free, 3 on Hobby, and on Pro 3, 4 or 5 (5 by default, under Recommended windows in Settings → Forecast).
6.1 The section in the brief
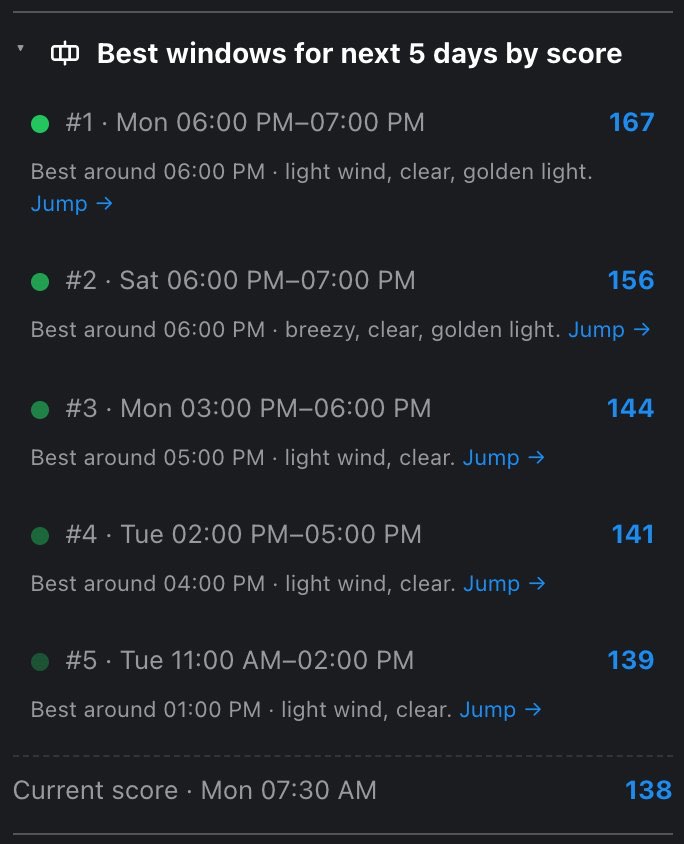
The section is called Best windows for next 48 h by score; the "48 h" is your horizon (24 h, 48 h, or 5 days and so on on Pro). Each window is one row:
- #1 · Thu 17:00–20:00 and the window's score on the right. The dot's shade matches the window's band on the timeline.
- Under it: Best around 18:00 · conditions. Jump →
The conditions are a short summary of the peak hour: the wind (light wind under 5 m/s, about 11 mph; breezy under 8 m/s, about 18 mph; otherwise strong wind), the sky (clear under 25 % cloud, some cloud under 70 %, otherwise overcast), then golden light if the sun is 0–6° up at any hour in the window, low light (sun down) if the peak itself is after dark, and low visibility under 3 miles.
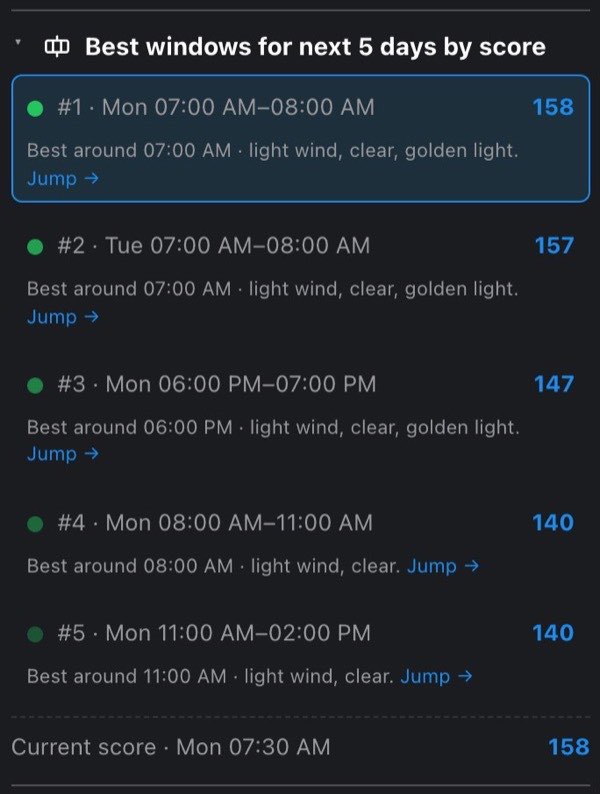
Tap a row and the cursor jumps to the middle of that window's best hour, so every section shows those conditions. The row the cursor is in is outlined in blue.
Under the list, Current score · day, time gives the score at the cursor, so you can compare "now" (or any hour you've scrubbed to) against the picks. It shows — on a Not advised hour.
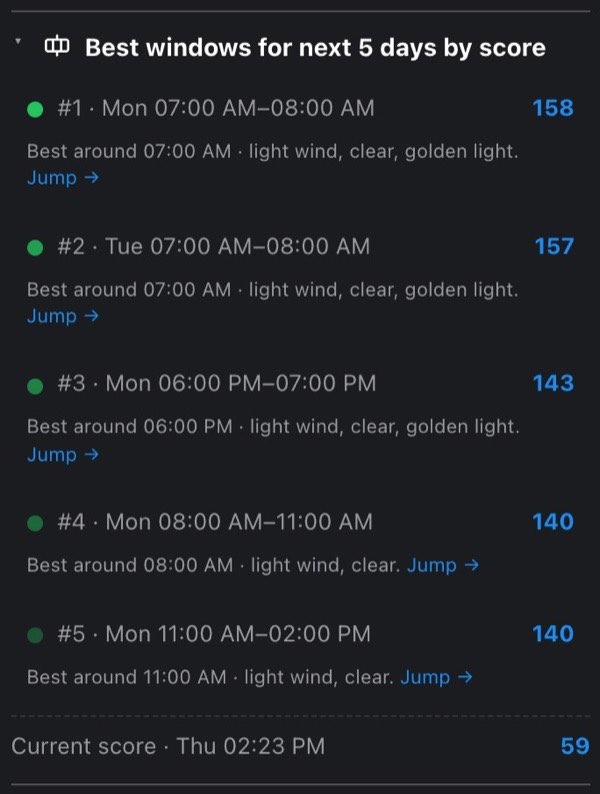
The section opens itself when a fresh list arrives for a spot. Sections start closed, and the windows land a beat after the rest of the brief; a section that stayed shut would hide the answer it had just worked out. Collapse it by hand and it stays collapsed while you scrub. Closed, its heading still tells you the answer: next 17:00, score 158. That summary disappears while the list is loading, empty or withheld.

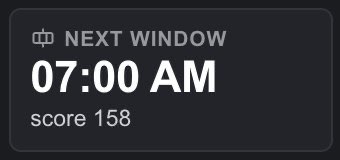
The Next window tile. The Summary at the top of the brief has a Next window tile, on by default. It shows the first window's start time with score N under it; tap it to open this section. While there is no answer it says why: looking…, forecast didn't load, checks incomplete (a safety source failed) or none ahead.
Near a stadium with an unreadable schedule, a red note sits above the list: These hours are within stadium's 3 NM game-day TFR ring, and its event schedule could not be read. Check the venue's fixtures yourself before flying any of them. The windows are ranked as if the stadium were quiet, so you meet the caveat before the first window. A missing schedule doesn't hide the windows; the verdict flags it as Manual verification required instead.
6.2 How an hour is scored
The score is a comparison scale, not a percentage. Each hour starts at 100 and is pushed around by the weather and your taste. It is not capped at 100: a dry, clear, calm afternoon scores about 125–155, and a dry, clear, calm hour of golden light about 143–173. Only hours that are close in score are worth telling apart.
Weather:
| Factor | Effect |
|---|---|
| Wind: the worse of the 400 ft wind and the surface gusts | Judged against your aircraft's rated wind limit. Free up to about a quarter of the limit (27 %), then a steady penalty per mph above that, plus a flat −40 once the wind reaches the limit. At the limit the total is always about −113, whatever you fly. For the default DJI Mini 3 / Mini 4 Pro (23.9 mph) the free part is up to about 6.4 mph, and each mph above it costs about 4 points. |
| Cloud cover | Free up to 25 %; −0.15 per % above that (at most −9 at 85 %); a flat −18 above 85 % (overcast is overcast). |
| Chance of rain | −0.5 per %: a 60 % hour loses 30 points. |
| Dry weather | A fixed bonus from +25 at 0 % chance of rain, through 0 at 50 %, to −25 at 100 %. There is no slider for it: nobody wants to fly in rain. It counts in full while the sun is up and fades out as it sinks from the horizon to 6° below, so after dark it adds nothing either way; a dry, clear night doesn't climb into a window on this bonus alone. |
| Visibility | −60 under 3 km, −25 under the 3-mile Part 107 minimum. A bonus for real clarity: +10 over 10 miles, +15 over 15, +20 over 20, +25 over 25, +30 over 30 miles. Missing visibility neither costs nor earns anything. |
| Sun below the horizon (judged at the middle of the hour) | −85 within 20 minutes of sunset or sunrise, −95 up to 40 minutes, −100 beyond. |
The darkness penalty is deliberately brutal. It keeps a night hour far below any decent daylight hour, so you get night only when you ask for it (see the Light slider below).
Worked examples at the default preferences:
- Dry (0 %), clear, calm, 15-mile visibility, midday: 100 + 25 (dry) + 15 (clarity) = 140.
- The same hour with the sun 0–6° up: + 18 golden light = 158.
- Calm and clear but a 60 % chance of rain: 100 − 30 − 5 = 65, before visibility and light.
The score never drops below 0.
6.3 How your preferences change it
The four sliders in Settings → Shooting preferences add bonuses on top. They are taste: they cannot make an unsafe hour recommendable, because a Not advised hour is thrown out before scoring even starts.
Settings is the left drawer: tap the grip on the left edge.
| Slider | What it does |
|---|---|
| Light: Night · Golden · Day | Blends the two nearest anchors and rewards how well the hour matches them. Golden: up to +18 for a sun 0–6° up. Day: up to +14, full once the sun is above 25°. Night: up to +60, full once the sun is 6° below the horizon. The night bonus is large on purpose: it has to outweigh the darkness penalty. At the middle (Golden, the default) you get the classic golden-hour bias. |
| Time of day: Morning · Anytime · Evening | Up to ±22, measured from solar noon rather than the clock, so it's right anywhere. It grows from nothing at solar noon to full 6 hours either side. Toward Morning, morning hours gain and evening hours lose; toward Evening, the reverse. It fades out as the sun sets. Anytime (the default) adds nothing. |
| Sky: Cloudy · Sunny | Up to ±30 toward the sky you want. On Sunny a clear hour gains 30 and an overcast one loses 30; on Cloudy the reverse; a half-cloudy hour is unaffected. It fades out after dark: a clear night isn't "sunny". The middle (the default) adds nothing. |
| Max window length — N h (1–10 h) | Caps how far a window may grow around its peak. 3 h by default. Short keeps the window pointed at the sweet spot; long lets it cover a whole shootable afternoon. |
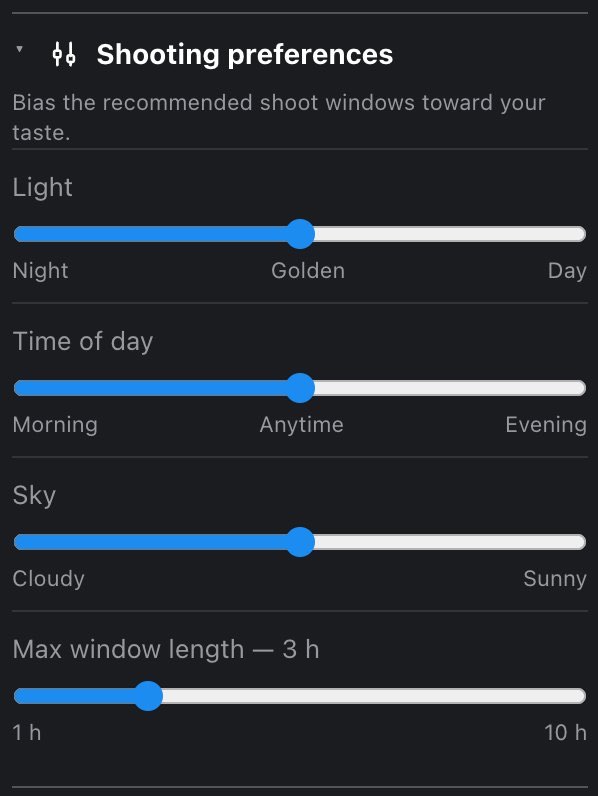
Drag a slider and watch the timeline. Recommendations are recomputed on the spot: no button, no reload, nothing fetched. The list re-ranks, the green bands move along the timeline, and the numbered buttons follow. Sliding Time of day from Morning to Evening walks the whole set of windows across the day in front of you, which is the fastest way to learn what the scoring rewards. The red bands don't move: those are safety, not taste.
6.4 What reorders windows without disqualifying them
Two factors change the ranking only. A rough hour sinks in the list but never drops out of it; the verdict is the place for hard truths.
- Geomagnetic activity: −10 per point of Kp above 4 (a storm starts at Kp 5 and degrades GPS and compass).
- Harsh temperature: −2 per °C below freezing or above 40 °C.
The score printed on a window includes these; the bar a window has to clear (below) does not.
6.5 How the windows themselves are built
- Throw out the unflyable hours. Any hour the verdict's rules call Not advised is disqualified: a 0-ft grid cell, an active TFR, a prohibited zone, a park where drones are prohibited, a wildfire perimeter, a game-day stadium window, weather below the minimums, or wind at your aircraft's limit. Such an hour can neither start a window nor be part of one, so it is also a hard wall between windows. Pick a different aircraft in Settings → My fleet (or with Change under the verdict) and the whole set is rebuilt: a tougher airframe both keeps more hours and is penalized less for the breezy ones.
- Take the best remaining hour as the window's peak. Its score without the Kp and temperature penalties must be at least 40, or nothing more is recommended at all. That is why a geomagnetic storm or a cold morning can push a window down the list but can't empty the list.
- Grow outward one hour at a time, always taking the better neighbor, while that neighbor scores at least 55, or the peak minus 15, whichever is higher. So a window never smears into weaker hours just because they're next to it. For example, a golden-hour peak of 158 next to afternoon hours of 140 stays a one-hour window, because 140 is below 143.
- Stop at your max window length, mark those hours used, and repeat for the next window. Windows never overlap.
6.6 Where they show up
- In the brief: the ranked list and the Current score row.
- On the timeline: a green band per window with a golden tick at its peak, and a numbered button for each.
- In the Summary: the Next window tile.
- On the map Pro: the sun-path fan while the cursor is inside a window.
Windows are anchored at now, not at the cursor. Scrubbing the timeline never changes them. Changing your aircraft, your preferences, your horizon, the number of windows or the spot does.
6.7 When the list is empty — and why
| What you see | What it means |
|---|---|
| Finding the best windows… | Still loading the forecast or the safety checks the windows depend on. |
| Couldn't load the forecast — tap ↻ Reload above, or check your connection. | Weather is the whole input, so there is nothing to rank. Tap the red Reload chip in the section heading. |
| Best windows are hidden — couldn't check sources. | A safety source failed: airspace, TFRs, park rules, restricted zones, national security restrictions or the wildfire & hazard data. Each of them can rule an hour out on its own, so no window is offered until it loads. ↻ Reload missing data re-fetches only the failed ones. The red bands on the timeline stay. |
| Flying isn't advised here for the next 48 h — see the airspace and conditions below. | The place is the problem: at least 60 % of your horizon is Not advised (a 0-ft grid cell, a prohibited park, a standing TFR). The period is your horizon. |
| No good flying window in the next 48 h. | The weather is the problem: no hour cleared the bar of 40. Scrubbing won't change the list, since windows don't depend on the cursor. Try another spot, a longer horizon (Pro), or different preferences. |
6.8 Tuning it for the shot you want
- Sunsets: Light at Golden, Time of day at Evening, max length 1–2 h.
- A long shooting afternoon: Light toward Day, max length 5–6 h.
- Moody, textured skies: Sky toward Cloudy. Overcast hours stop losing points to your taste (the base cloud penalty still applies).
- Night and astro: Light all the way to Night. That +60 is what lets a clear, calm night clear the bar.
- Nothing appears at all: first check whether the spot is simply Not advised for most of the horizon. Widen the max window length last; it changes how long windows are, not whether there are any.
7 The flight brief, section by section
The flight brief is the panel that answers for the point you picked. It says its own name at the top, Flight brief, the counterpart of Settings on the other side of the screen, so you always know which of the two panels you are looking at.
7.1 Where the brief lives
On a tablet the brief is a drawer on the right edge, 320 to 420 px wide depending on the screen. Shut, only a 24 px grip peeks out of the right edge, with a small ‹ on it. Tap the grip to open or close the drawer, or drag it: past halfway it commits. Tapping the floating verdict chip near the top of the map opens the brief too; the chip hides while the brief is open, because the verdict is then on screen inside it.
The drawer runs the full height of the screen and covers the right end of the top bar (Checklist and Help) while it is open. A solid strip of the drawer's color stays under the status bar, so the sections you scroll never slide under the clock. The timeline stays on top of it, so you can scrub the hours while you read. In landscape the brief and Settings can be open side by side; in portrait opening one closes the other, and turning the tablet to portrait with both open keeps the brief and closes Settings. On an Android tablet, Back closes the brief.
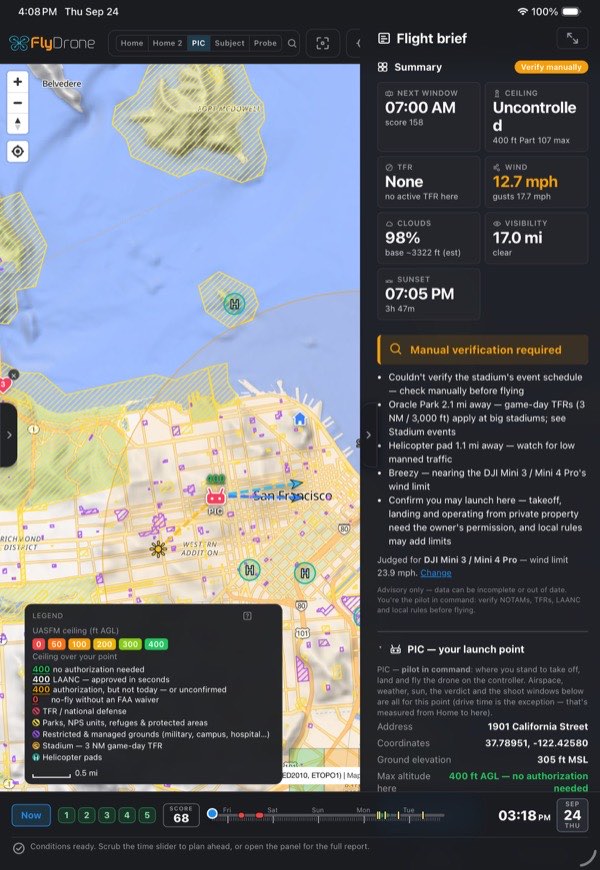
7.2 Sections start closed, and answer anyway
Every section below the PIC block starts closed. A closed heading still tells you something: on the right it carries a status chip, the worst thing that section found at the hour on the timeline, in green, amber, red, blue or gray. The chips are listed section by section below.
Five sections also print a one-line summary on the closed heading, next to the chip, so the number you came for is readable without opening anything:
| Section | Closed-heading summary |
|---|---|
| Best windows | next 6:30 PM, score 82: the first window's start and its score. Blank while the forecast is loading, when it failed, when a safety check is down, or when there is no window |
| FAA airspace | the grid ceiling, for example 200 ft. Only inside the FAA grid; blank outside it |
| Sun | sets 7:42 PM, or below horizon after sunset. Blank on a day with no sunset (polar summer) |
| Wind | 8 mph, gusts 12 |
| Movement settings | the DJI Fly tab for your shooting style: Cine, Normal or Sport (Hobby and Pro only) |
The other sections show only their chip when closed. The summary disappears once you open the section, because the section itself is then on screen.
Press a heading to open or close that section. The small square button at the right of the panel title opens or closes every section at once: arrows pointing outward (Expand all sections) while things are closed, arrows pointing inward (Collapse all sections) once they are open. Settings has the same button.
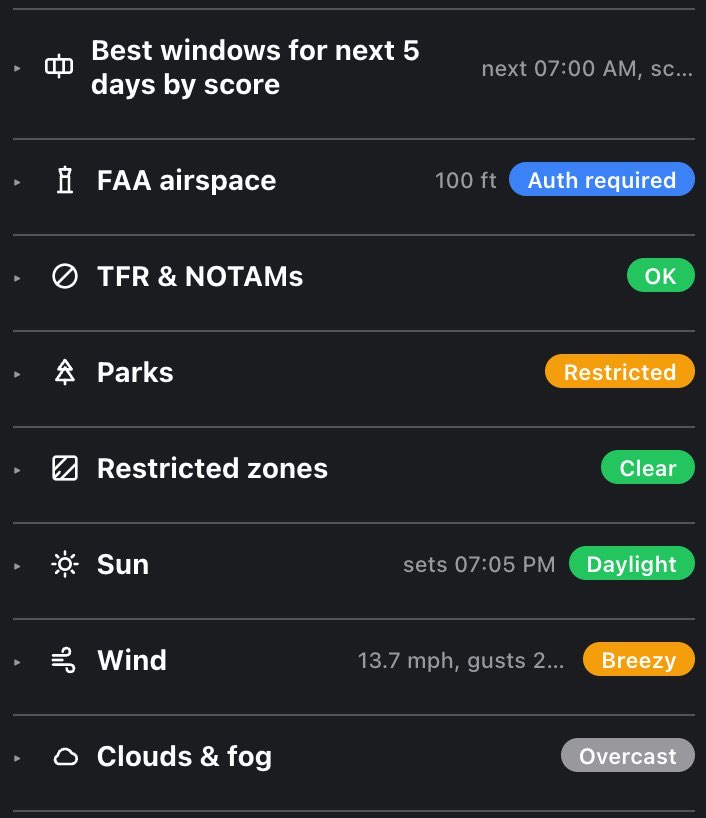
Four blocks behave differently:
- Summary, at the top, cannot be closed. It holds the verdict, so its heading has no caret and Collapse all does not touch it.
- PIC — your launch point starts open. You can still close it by hand or with Collapse all.
- Best windows opens by itself once the hours are worked out, because the ranked windows are the recommendation the whole panel exists to make. If you close it, it stays closed until the list is worked out again, for example for a new point.
- A Summary tile opens the section it came from and scrolls to it (see below).
7.3 One order, whatever you pay
The sections always come in the same order:
Summary · PIC · Best windows · FAA airspace · TFR & NOTAMs · Stadium events (only near a stadium) · Parks · Restricted zones · Sun · Wind · Clouds & fog · Precipitation · Temperature · Air quality · Wildfires & hazards · GPS & satellites · then the Hobby sections: Camera settings · Movement settings · Drive from you · then the Pro tools: Shot planner · Altitude explorer · Spot finder · Trip planner · and last, My spots.
Everything free comes first, then Hobby, then Pro as one block. A section your plan does not open is not hidden: it stays in its place, closed, with a Hobby or Pro pill on the right of its heading. Press the pill to see the plans. The pill is an offer, so it only appears where you could act on it: a subscriber sees no pill on anything already included, and no section is ever labeled "Free". If you see no pills at all, everything in the brief is open to you.
Two sections can be missing entirely, for reasons that have nothing to do with your plan: Stadium events appears only when your point is inside a stadium's 3 NM game-day TFR circle, and Movement settings is left out when the aircraft you fly has no gimbal at all (the long-range FPV entry in the catalog).
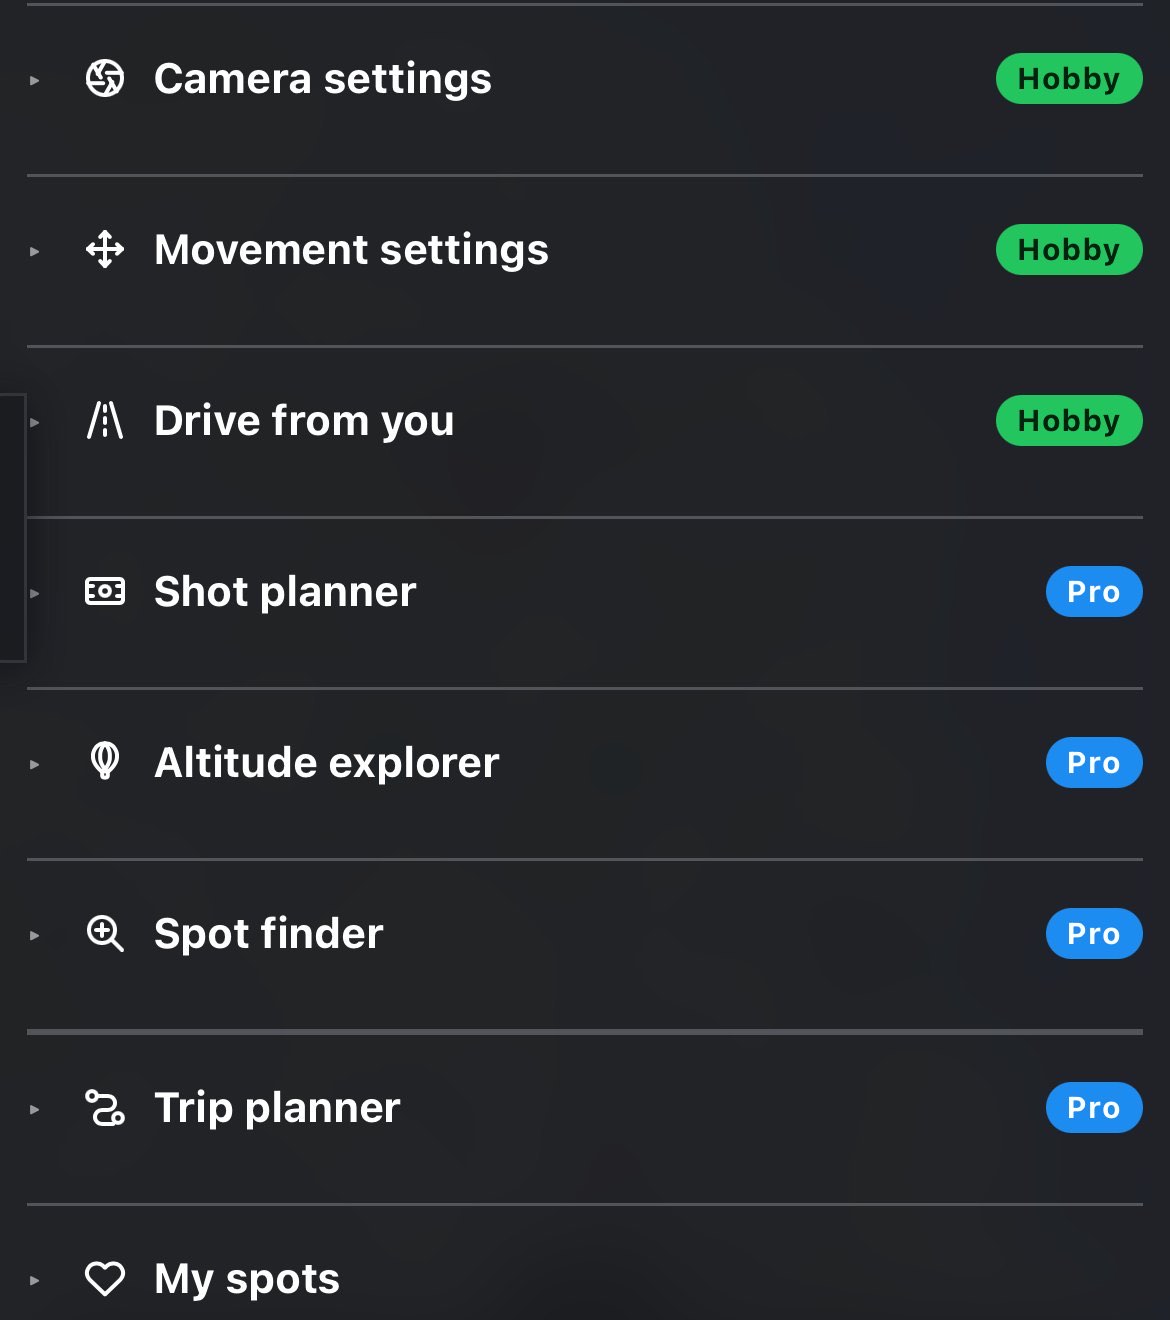
On a Free account, a line under the panel title counts down the day's new spots: 3 of 5 new spots left today, then Daily free limit reached, with an Upgrade button beside it. Paid plans do not see it. The limits are explained in Plans, limits and budgets.
7.4 Before you pick a point
With no point set, the brief is already there and already in order. The Summary holds one sentence telling you to tap the map; the PIC section explains what the PIC point is and offers Use my location, which sets the point where you stand (exactly like the same button in the full PIC section, compass included). Below them every other section is listed closed, each with a one-line description of what it will hold, so you can see the whole brief before you spend a spot. Spot finder, Trip planner and My spots already work here: the first two need only Home or your saved stops, and My spots lets you jump straight to a saved place.
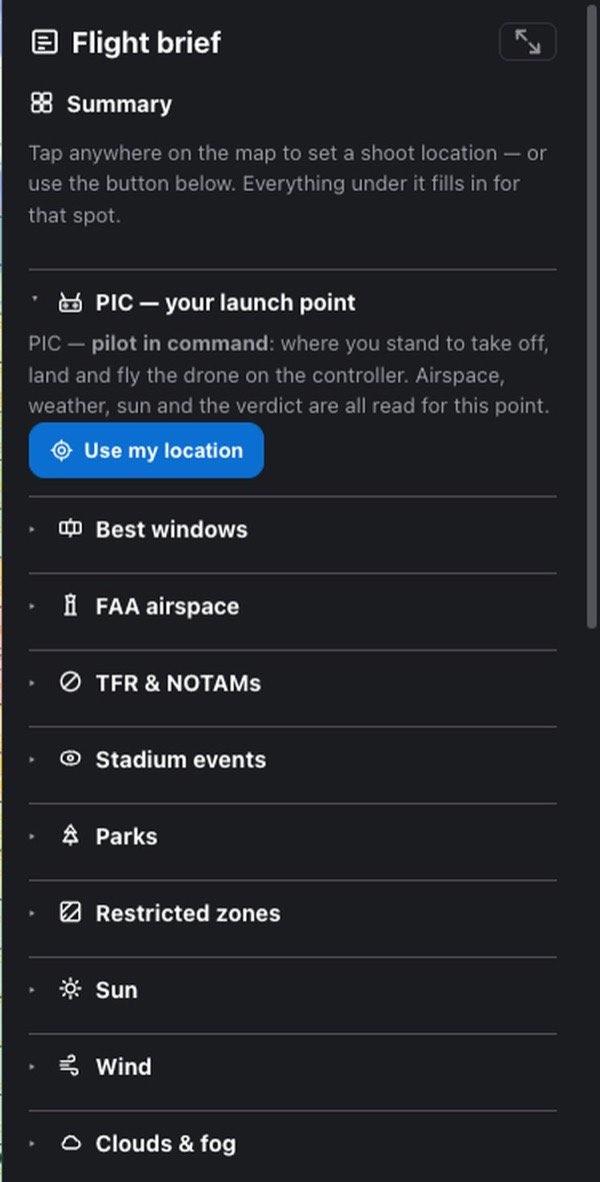
7.5 Summary
The first block in the brief, and the only one that never closes. It holds two things: the tiles, the figures you chose drawn big, and the verdict under them.
The heading carries the verdict as a chip, so the go/no-go is still on screen when the tiles are scrolled past:
| Chip | Verdict below it |
|---|---|
| Good to fly (green) | Good to fly |
| Caution (amber) | Fly with caution |
| Verify manually (amber) | Manual verification required |
| Auth required (blue) | FAA authorization required |
| Not advised (red) | Not advised |
| Loading (gray) | Checking conditions, please wait… |
The two ends use the same words as the verdict; the three in the middle are shortened to fit. The chip says Loading until every safety check has answered, because a check still in flight looks the same as a check that came back clear. How the verdict is reached is in The verdict.
The tiles. Two to a row on every device, ten at most, so the verdict stays on the same screen as the numbers. Out of the box you get eight: Pilot, Next window, Ceiling, TFR, Wind, Clouds, Visibility and Sunset. Choose others in Settings → Summary. The tiles always appear in the brief's own order, not in the order you ticked them.
Pilot comes first and is the one tile that is a switch: Recreational | Part 107. Tapping a half changes your pilot category right there; it opens no section and the brief does not move. Under it: 49 USC 44809, 14 CFR 107, or, before you choose, strictest rules apply. The voice does not read it. The other tiles:
| Tile | Big number | Line under it |
|---|---|---|
| Next window | start time of the best window ahead | score N. Or — with looking…, forecast didn't load, checks incomplete (a safety source is down, so no hour has been cleared) or none ahead |
| Ceiling | N ft AGL, or Uncontrolled | the route: LAANC instant, LAANC, further coordination, FAA DroneZone request, recreational flyers only, FAA waiver required or authorization required; outside the grid 400 ft Part 107 max (400 ft recreational max for a recreational pilot). The route follows your pilot category |
| TFR | None, Inside TFR, Scheduled, Partly checked or Unverified | no active TFR here; the restriction type; type · not at this hour; N couldn't be verified; live feed unreachable |
| Wind | surface wind | gusts N |
| Clouds | cover in % | base N ft or no cloud deck |
| Visibility | distance | clear, OK, below min or poor — no fly; — not reported here where the model has no visibility |
| Precipitation | chance in % | the type (Rain, Snow, Thunderstorm…) or dry |
| Temperature | air temperature | feels N |
| Dew spread | temperature minus dew point | dry air, getting damp or fog can form |
| UV index | UV index | — |
| Air quality | US AQI | the AQI category; — no forecast yet for an hour past the end of the air-quality forecast |
| Sunset | sunset time | countdown to it; — no sunset today |
| Golden hour | countdown to the next golden hour, or Now | from 6:58 PM, or golden light |
| Sun position | sun altitude in degrees | direction and azimuth, or below horizon |
| GPS | ≈ usable satellites | usable of N · Kp 2.3 |
| ND filter (Hobby and Pro) | the recommended ND, or none | for your aperture, or light needs no filter |
What the tiles do:
- Every tile is a shortcut. Press one and the brief opens the section it came from and scrolls to it: Clouds and Dew spread go to Clouds & fog, Visibility and Air quality to Air quality, UV index, Sunset, Golden hour and Sun position to Sun, ND filter to Camera settings.
- A tile is colored only when its section flags something. The color is the section chip's own, so a tile can never look calm about an hour its section calls a problem. Green and gray chips leave the tile plain, so the one amber or red number stands out. Blue (an FAA authorization) does color the Ceiling tile: it is not a hazard, but it is not "nothing to do" either. The sun tiles and the ND tile are never colored.
- Nothing loaded is never a number. A figure that did not arrive reads — with the reason under it (loading…, checking…, couldn't check, forecast didn't load, no forecast yet), never a zero and never a blank. A safety check that did not run is not an all-clear.
- The tiles follow the timeline. Scrub it and they re-read for that hour.
- A long word is drawn a size smaller. A value with a word too long for the tile at full size, such as Uncontrolled, steps down a size rather than breaking in the middle of the word.
Under the tiles, the verdict: one colored line with an icon, then every reason, then the aircraft it was judged for, then the standing reminder Advisory only — data can be incomplete or out of date. You're the pilot in command: verify NOTAMs, TFRs, LAANC and local rules before flying.
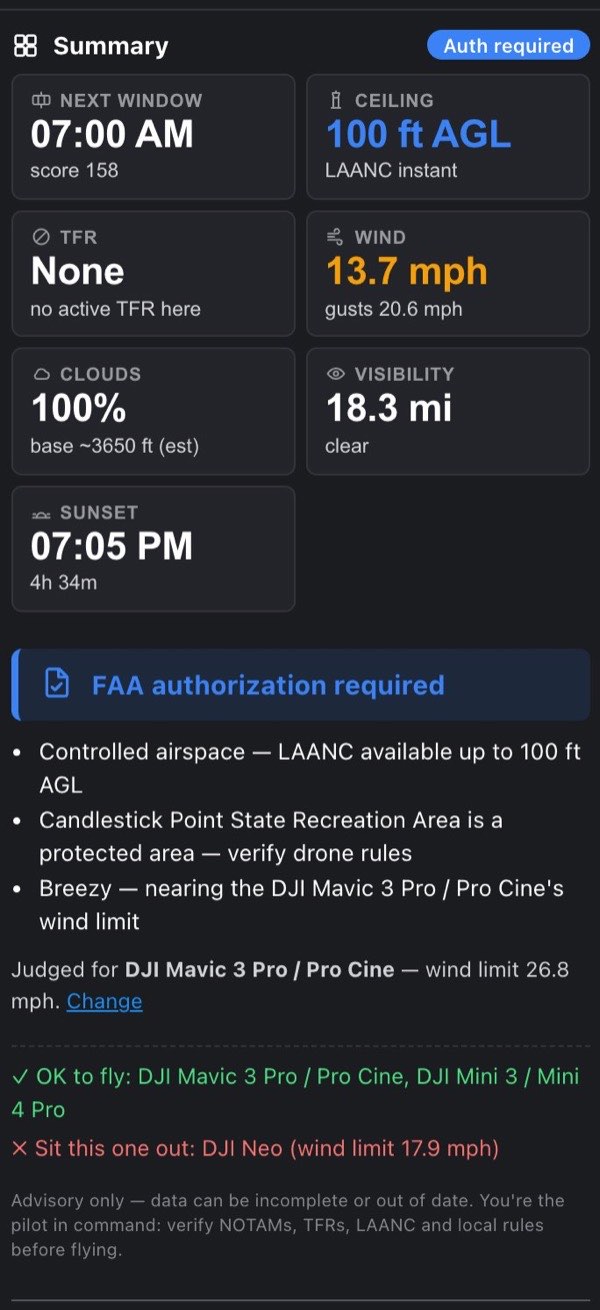
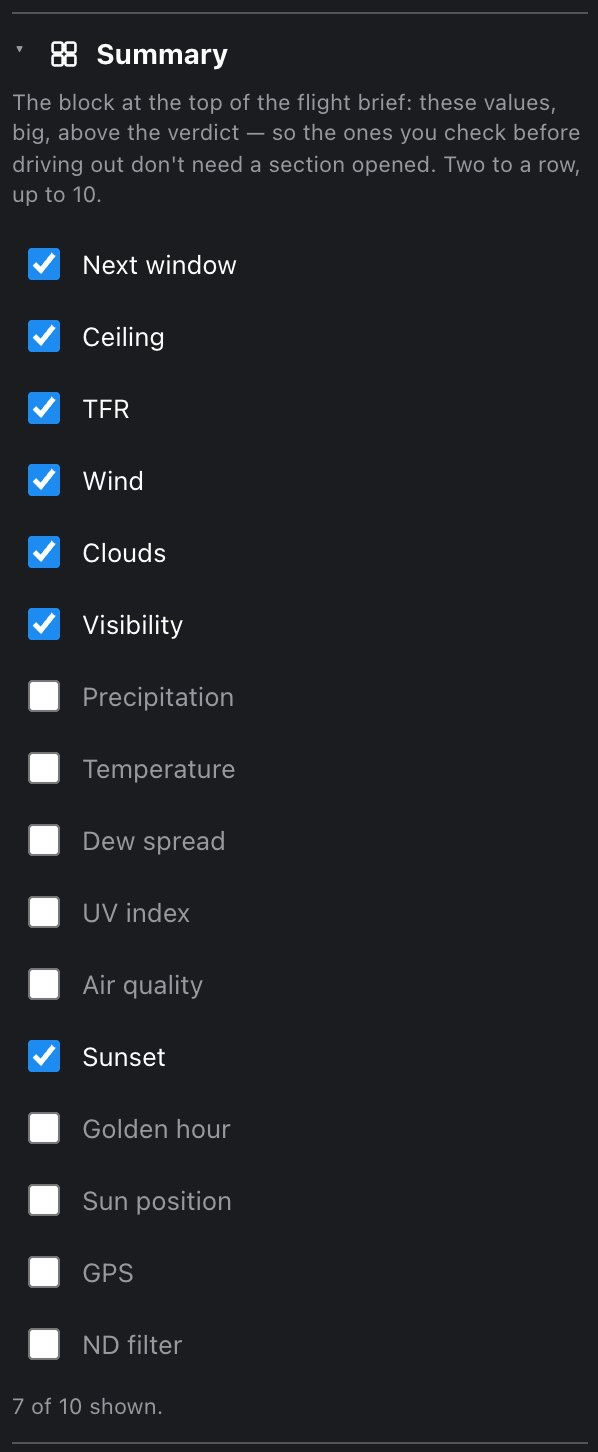
Choosing tiles. Settings → Summary is a plain list of tick boxes, in the order the tiles are drawn. Under it, 7 of 10 shown. counts your choice. At ten the remaining boxes go dead and the line says — untick one to add another. With nothing ticked it says — the Summary shows the verdict only. The ND filter box is offered only on Hobby and Pro, since the figure comes from Camera settings.
7.5.1 Which aircraft the verdict is for
Right under the reasons the verdict names the drone it was judged for: Judged for DJI Mini 3 / Mini 4 Pro — wind limit 23.9 mph. with a Change link. The active drone's wind limit and visual-line-of-sight distance shape the verdict, the timeline, the recommended windows, the score on each saved spot and the Shot planner, so a wind call is always a call about a particular aircraft.
The picker itself is in Settings → My fleet, not in the brief. Change opens Settings on that section. In portrait the brief closes to make room; in landscape Settings opens beside it.
On Pro with two or more drones in the fleet, the verdict adds which of them suit the hour: ✓ OK to fly: … and ✗ Sit this one out: …, each ruled-out drone with its reason, (wind limit 22 mph) or (VLOS 0.6 mi).
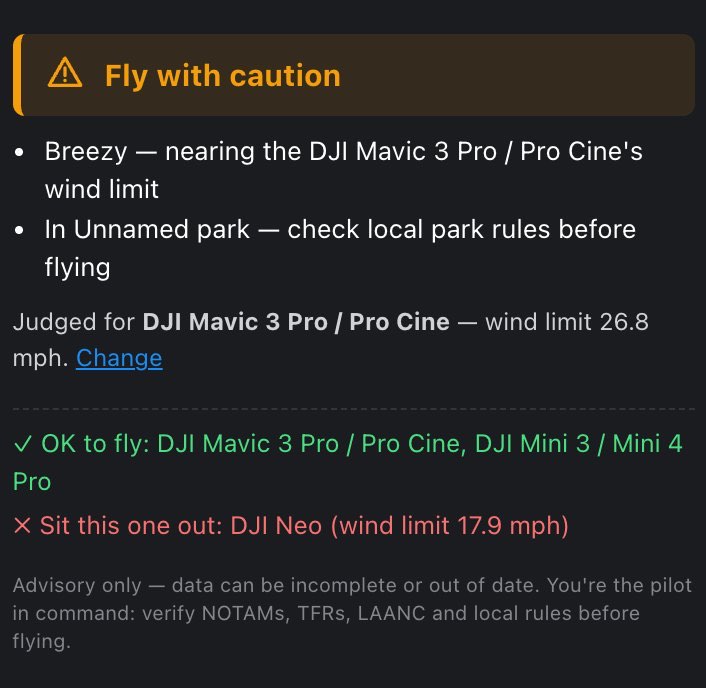
7.6 PIC — your launch point
Directly under the verdict, because the verdict is the answer and this is what it is an answer about. The section opens with one sentence: PIC means pilot in command, the spot where you stand to take off, land and fly the drone on the controller, and everything in the brief is read for this point (drive time is the exception: it is measured from Home to here).
Then four rows:
| Row | What it shows |
|---|---|
| Address | the street address, … until it has been looked up |
| Coordinates | latitude and longitude, five decimals |
| Ground elevation | height of the ground here above sea level, N ft MSL; — if it could not be read |
| Max altitude here | the legal ceiling and how it is authorized, in the same color as the map's ceiling scale |
Max altitude here reads one of:
| Reading | Meaning |
|---|---|
| 400 ft AGL — no authorization needed | outside the FAA grid, uncontrolled airspace |
| 200 ft AGL — LAANC | controlled airspace; LAANC approves up to that height automatically |
| 200 ft AGL — LAANC, further coordination | LAANC takes the request, but a person reviews it, so not same-day |
| 200 ft AGL — FAA DroneZone | this square is not LAANC-enabled; authorization goes through FAA DroneZone, filed well ahead |
| 200 ft AGL — LAANC covers recreational only | LAANC here is for recreational flyers, not Part 107 (shown when your category is Part 107 or not set) |
| 200 ft AGL — FAA DroneZone (LAANC here is Part 107 only) | recreational pilot: this square's LAANC doesn't take 44809 flights |
| 200 ft AGL — authorization required | the grid does not say whether LAANC covers this square |
| 0 — no-fly without an FAA waiver | ceiling 0: nothing can be approved through LAANC |
This line, the FAA airspace section and the verdict all come from one calculation, so they cannot disagree. While the airspace lookup is running, or if it failed, the row is absent rather than showing 400 ft: a grid cell that was never read must not look like open sky.
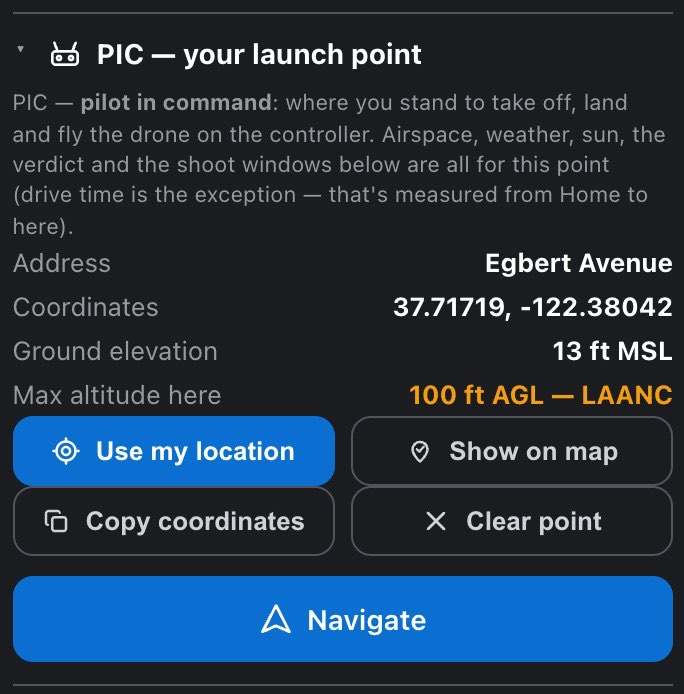
The buttons. Four act on the point, in two rows: the top pair changes where the point is, the bottom pair takes it with you or takes it away.
| Button | What it does |
|---|---|
| Use my location | Sets the PIC point where you are standing, from one location fix. It counts as a new spot, exactly like tapping the map. While it works it reads Locating…; if the fix fails: Couldn't read your location — check the location permission and try again. |
| Show on map | Flies the map back to the point. It also slides the brief away, so you actually see where it flew. |
| Copy coordinates | Puts the coordinates on the clipboard with six decimals, for LAANC apps, the FAA NOTAM tool or whoever is meeting you there. For a second and a half the button reads Coordinates copied, or Copy failed if the clipboard refused |
| Clear point | Removes the point, and the Shot planner subject and the altitude probe with it |
Under them, on a row of its own, Which way I'm facing (Hobby and Pro, explained below), and last, full width, Navigate.

7.6.1 Navigate
The last control in the section, because it is the last thing you do with the brief: everything above decides whether to go, this one starts the drive. It opens Google Maps driving directions to the PIC point. It hands the drive to Google Maps, and FlyDrone stays where you left it.
It is blue, not yellow: yellow in this app marks something that spends a paid lookup, and a directions link spends nothing, no daily spot and no allowance. The icon is a plain navigation arrow rather than Google's own mark.
7.6.2 Which way I'm facing Hobby
A compass for the moment on site when the map is right and you are not. In a valley or under trees you can know exactly where you stand and still not know which ridge in front of you is which. Press Which way I'm facing and the app reads the device's compass and draws a solid green ray with a dot at its tip out of the PIC point, pointing the way the device is pointed. A Facing row in the section prints the bearing, for example 225° SW. Turn on the spot until the ray lies over what you are looking at, and the map and the landscape agree. Hold the device flat like a map or upright like a viewfinder; both work, and so does everything between.
While it runs the button reads Stop compass. It keeps running when the brief is closed, which is the point of it on a small screen, and stops only when you press Stop compass or when the point moves. The Altitude explorer section (Pro) has the same switch; with a probe on the map it adds a row that tells you how far to turn: turn 31° left, turn 12° right, or straight ahead within 5°. See Altitude explorer.
The button is there but grayed out until the point came from your own location: Use my location in this section (or before any point is set), or PIC here in the top bar. Under the grayed button a note says so: Needs the point to be where you are: press Use my location above (or PIC here in the top bar). That is the feature working, not a missing permission: the ray comes out of the PIC point, so for a spot you only tapped on the map it would be a confident line about nothing. Move the point anywhere else, by a map tap, a search or a row in My spots, and the compass switches off with it.
Two things leave the button out of the section entirely, which is why you may be reading about a button you cannot find:
- A Free account. The compass sits on top of the safety answer, not inside it, so it starts at Hobby. On Free it is simply absent, with no pill.
- A device with no compass. The app listens for a moment when the section opens and leaves the control out if no compass answers. Phones and tablets answer at once.
What it tells you when something goes wrong, in words rather than a wrong ray:
- Waiting for motion & orientation access… while the system asks. iOS asks for motion access the first time; in the iPhone and iPad app the prompt comes from the system.
- Motion & orientation access was refused: only the system can give it back. Allow it for the app (or the browser) in the device's settings, then switch the compass on again.
- Reading the compass… while the first heading arrives.
- The compass has stopped answering. Move the phone in a figure of eight to recalibrate it, then switch this back on. The sensor answered and then went quiet.
- You are 0.4 mi from the PIC point. When you switch the compass on, the app takes one location fix; if you are more than 150 m (about 500 ft) from the point, it says so. The ray is still drawn from the point, not from you.
A standing note under the reading reminds you that it is your device's compass and inherits its errors: a car, a tripod head or a power line pulls it, and some devices report magnetic rather than true north. Line the ray up against something you can see before trusting it at a distance.
7.7 Best windows
The ranked shoot windows for your forecast horizon. The full title says how far ahead it looks: Best windows for next 24 h by score on Free, 48 h on Hobby, and N days on Pro. Each window is a row you can press to jump the timeline to its best moment (Jump →), and a Current score row gives the score of the hour on the timeline. If a safety check failed, the list is hidden with ↻ Reload missing data, which retries only the sources that failed. The chip is empty unless the forecast failed, when it is a red Reload. How the windows are built and scored is in Best windows.

7.8 How chips behave in every section
Before the sections one by one, three chips that any of them can show:
| Chip | Means |
|---|---|
| Loading (gray) | the section's data is still on its way. Not every section shows it; some simply have no chip until the data lands |
| Reload (red, a button) | the data failed to load. Press the chip itself to fetch it again. A failed check is never shown as green |
| no chip | nothing to report yet, or (for Camera settings) a section your plan does not open |
Every other chip is specific to its section and listed with it. Chips, like the tiles, follow the hour on the timeline.
7.9 FAA airspace
Airspace and restrictions: the FAA grid and how your square is authorized, TFRs hour by hour, stadium game days, National Park Service land and city parks, restricted zones and helipads.
The FAA UAS Facility Map grid cell your launch point sits in: the ceiling in feet above ground, the facility that manages it, its ATIS frequency where one is published, and, as a separate fact, how this square is authorized.
| Chip | Means |
|---|---|
| Uncontrolled (green) | the launch point is outside the grid |
| Auth required (blue) | inside the grid with a ceiling above 0: you need an authorization before flying, whatever the route |
| No-fly (red) | inside the grid with a 0 ft ceiling |
| Auth at drone (blue) | Pro, with a shot planned: the launch point is outside the grid but the drone's planned position is inside it |
The chip says Auth required even where LAANC approves in seconds. That is deliberate: an instant approval is still an approval you have to request. The PIC row and the LAANC row below say how easy it is.
Inside the grid the section shows:
- Max altitude (LAANC) when LAANC actually grants the height (automatic or further coordination), or Max altitude (grid) otherwise, with the ceiling in the ceiling scale's color.
- Facility: the airport the cell belongs to.
- ATIS: the airport's recorded broadcast of weather, runway and approach in use. At airports that split it, there are two rows, ATIS (arrival) and ATIS (departure). It is a frequency to listen to; nobody on it will answer.
- LAANC: one of Automatic approval (green), Further coordination (amber), Not available here (amber), Recreational flyers only (amber), or, at a 0 ft ceiling, Nothing to approve here (amber). The row is left out when the grid does not say.
- A note on what to do:
- LAANC auto-approves up to 200 ft AGL here — request it in your LAANC app (e.g. Aloft Air Control) and you'll have it in seconds.
- Up to 200 ft AGL here, but this square takes requests for further coordination only: a person reviews it, so it is not same-minute. Send it well before the shoot.
- This grid square isn't LAANC-enabled — no instant approval here, even where the same airport offers it a square away. Authorization has to go through FAA DroneZone, filed well ahead of the flight.
- LAANC here covers recreational flyers (49 USC 44809) only — under Part 107 you need a DroneZone authorization. With no pilot category set it adds Flying for fun? Set your pilot category: LAANC is instant for you here.
- For a recreational pilot: LAANC auto-approves recreational flights up to 200 ft AGL here…, or LAANC here covers Part 107 only. A recreational flight needs an FAA DroneZone authorization, filed well ahead of the flight.
- The grid gives 200 ft AGL here, but doesn't say whether this square is LAANC-enabled — check your LAANC app before you plan around it.
- At ceiling 0: a red No-fly without authorization badge and Ceiling 0 — LAANC won't auto-approve here whatever the facility offers; an FAA waiver is required.
A square can allow 400 ft and still not be on LAANC; a square can be on LAANC only by further coordination; and at 0 ft nothing can be approved through LAANC at all. That is why the ceiling and the route are separate lines.
Two Class D areas have no grid at all. The FAA grid leaves out the US Class D that belongs to two Canadian airports: Sault Ste Marie, ON, over Sault Ste Marie, MI, and Abbotsford, BC, over Sumas, WA. Inside them the section shows Max altitude (Part 107), the facility (for example Abbotsford, BC (CYXX) — US Class D, Lynden WA), LAANC: Not available here, and US Class D around a Canadian airport, with no FAA facility map — so no LAANC. Authorization has to go through FAA DroneZone, filed well ahead of the flight; the FAA sets the altitude when it grants it. On the map they are a dashed amber outline in the FAA airspace layer.
Outside the grid you get the plain Part 107 answer: Launch point is outside the controlled-airspace grid — generally up to 400 ft AGL under Part 107. Always verify locally.
With a shot planned (Pro), the section also checks where the drone will actually be. A launch point in uncontrolled airspace does not make a trajectory that crosses into a controlled cell legal, so a Drone position row appears with that cell's ceiling (or ceiling unreadable) and facility, and a note that LAANC authorization is required for it.

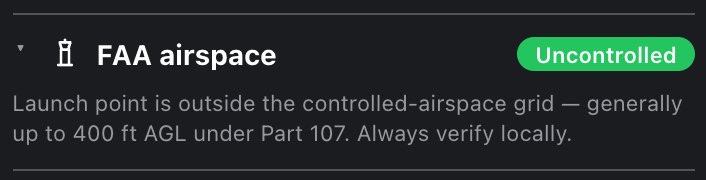
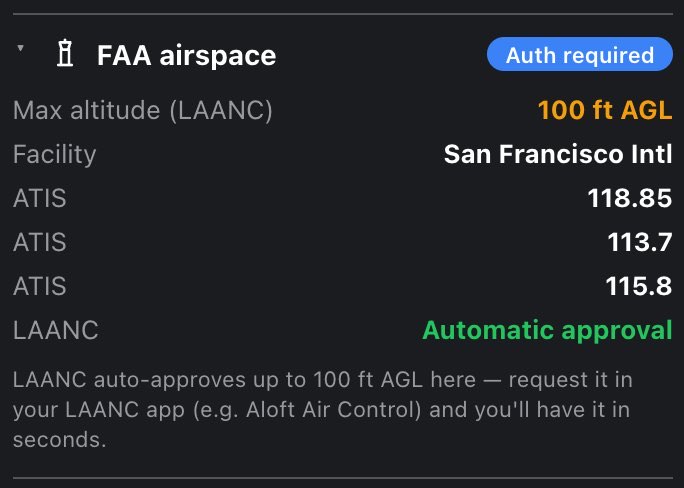
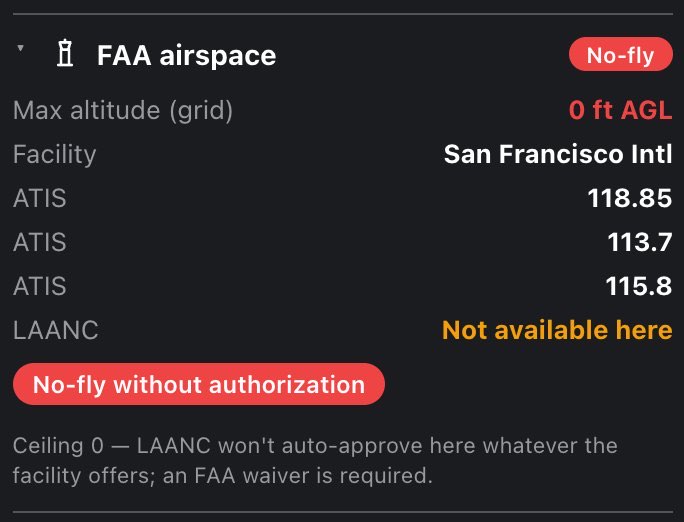
7.10 TFR & NOTAMs
Temporary flight restrictions: the standing national-defense TFRs plus the live FAA list (VIP movements, wildfires, stadium events and the rest). The live list is checked on our server, which tests every active TFR in the country against your point by its boundary, not a shortlist by state: TFRs are filed under the state their center sits in and their shapes cross state lines, so a shortlist would miss exactly the ones near a border.
| Chip | Means |
|---|---|
| OK (green) | every live TFR's boundary was tested and none covers the point |
| Partially checked (amber) | some TFRs could not be tested, or the live feed was unreachable |
| Scheduled (amber) | the point is inside a live TFR that is not in effect during the hour on the timeline |
| No fly (red) | the point is inside a TFR that is in effect during that hour |
When a TFR is in effect. The FAA publishes live TFRs ahead of time. A VIP visit on Wednesday is already on the list on Sunday. So the app reads each TFR's effective times from the FAA and judges it hour by hour, the same way the verdict and the timeline do. If the TFR is in effect at any moment of an hour, the whole hour counts: a TFR from 4:15 PM makes the 4 PM hour a no-fly hour. Outside those hours, the TFR is a caution, and Best windows can still offer them. Two exceptions stay a no-fly at every hour: the standing national-defense TFRs, and any TFR whose times can't be read. A TFR published with daily hours, common for wildfires, counts as in effect for its whole period, nights included.
Five outcomes, each said plainly:
- Inside a TFR. An Inside TFR row with the restriction type in red, a Restriction row with its name, an In effect row for each of its windows when the FAA gives them, the FAA's description, and FAA TFR details ↗. When the point sits inside more than one TFR, each gets its own rows.
- Scheduled TFR. The same rows, headed Scheduled TFR with the type in amber, and the note Not in effect at the selected time — plan around its hours. Move the timeline into one of its windows and the row turns to Inside TFR.
- Verified clear. Shoot point isn't inside a verified active TFR.
- Partially checked. The same line (or the scheduled rows), then in red 3 active restrictions in the area couldn't be verified — check before flying: followed by a link for each, NOTAM id · type ↗. At most five links are listed; the rest are counted: …and 4 more on the FAA TFR list. A restriction counts as unchecked only when it has a boundary the app could not read. A NOTAM with no boundary at all (the FAA's standing text notices) is not counted, or the chip would be amber everywhere, all the time.
- Live feed unreachable. Live TFRs (VIP movement, wildfires, stadium events) couldn't be checked right now — only standing national-defense TFRs were. Verify on the FAA TFR site before flying. The chip reads Partially checked and the TFR tile reads Unverified, live feed unreachable.
Stadiums. When an FAA-listed stadium's 3 NM circle reaches your point, the section adds a row with the stadium's name and its distance in amber, and a note that game-day TFRs (3 NM, below 3,000 ft, from an hour before to an hour after MLB, NFL, NCAA Division I football and major motor races) apply here. The details are in Stadium events, right below.
The section always ends with the point's coordinates and a link to FAA NOTAM Search ↗. Use it before you fly.
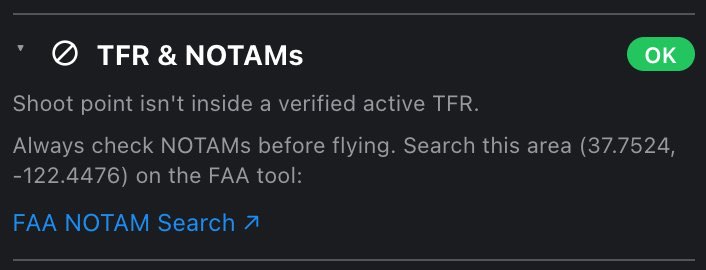
7.11 Stadium events
This section appears only when your point is inside an FAA-listed stadium's 3 NM circle; everywhere else it is left out, so do not look for it. It lists the events at that stadium across your planning horizon and says whether the game-day TFR covers the hour on the timeline.
| Chip | Means |
|---|---|
| TFR active (red) | a scheduled event's TFR window covers the hour on the timeline |
| 2 scheduled (amber) | events that raise a TFR are on the list, but not at this hour |
| Not happening (gray) | the only events found are postponed or canceled |
| None found (gray) | no qualifying event was found |
| Loading / Reload | the schedule is loading, failed, or only partly loaded |
The first row names the stadium and its distance from your point. Then each event: its name, the league, and its start time; a start time in red means the TFR covers the hour you are looking at. Postponed and canceled games stay on the list, grayed and marked, because "nothing at all" and "postponed" tell a pilot different things; they raise no TFR. When a TFR is live, a red line says so: A game-day TFR covers this spot at the selected time. Within 3 NM of the stadium, nothing may fly below 3,000 ft AGL from an hour before the event to an hour after it ends. Those hours are also struck out of the timeline and the recommended windows.
NM is not mi. The FAA writes this TFR in nautical miles, and one nautical mile is 1.15 statute miles, so the circle reaches 3.45 miles out, not 3. That is why the section can show a stadium 3.1 mi away and still call the TFR live. Distances are shown in your own units; the 3 NM is quoted the way the NOTAM writes it, and the circle on the map is that same 3 NM. (The visibility minimum in Clouds & fog and Air quality is 3 statute miles, because that is the unit Part 107 uses there. Two different threes.)
Limits the section states itself:
- It covers MLB, NFL and NCAA football, whose schedules name the venue. Major motor races raise the same TFR and are not in this lookup: at a speedway, check the track's calendar yourself.
- The end of the window is an estimate. The rule runs to an hour after the event ends, which nobody knows in advance, so the app holds the window open until seven hours after the start, rather than risk closing it early. Rain delays and lightning holds are routine.
- An empty list says No qualifying event found at this venue across the planning horizon. That is none found, which is not the same as none scheduled.
The schedule is read by your device directly from the sports feed, not through our servers, because the feed refuses requests from data centers. It is asked for one day at a time, for each league, across your whole planning horizon plus a day either side; a day that answers still counts when another doesn't. It is one more source that can fail, and it fails loudly: if the schedule could not be read, or only part of it loaded (Part of the schedule didn't load, so this list may be incomplete — treat it as unchecked.), the verdict becomes Manual verification required and the Best windows list warns that its hours are inside the stadium's ring with an unread schedule.
7.12 Parks
Whether you are standing in a park, and whose rules apply. The authoritative National Park Service boundary is checked first; if your point is in an NPS unit, that answer wins over the OpenStreetMap park data.
| Chip | Means |
|---|---|
| OK (green) | not inside a mapped park or NPS unit |
| Check with NPS (amber) | inside an NPS unit (official boundary) |
| No drones (red) | a mapped park whose rules prohibit drones (for example a park run by the Park Service that the official boundary did not cover) |
| Restricted (amber) | a wildlife refuge, or a protected area where restrictions are likely |
| Check rules (amber) | a city or regional park: rules vary, many need a permit |
| Loading / Reload | either lookup is still running or failed |
- Inside an NPS unit: NPS unit with its name, Drones: Check with NPS, and a note: the Park Service restricts launching, landing and operating drones in its units (Policy Memo 14-05). That is an NPS land rule, not FAA airspace, and the FAA map will never show it.
- Inside another park: In park, Managed by (when known), a Drones row (Prohibited (NPS), Restricted (wildlife refuge), Likely restricted or Check local rules), a sentence on what that means, and a link to Park website / rules ↗. When the park has no website on record, a Wikipedia ↗ link is shown instead.
- Not in a park: Shoot point isn't inside a mapped park or NPS unit.
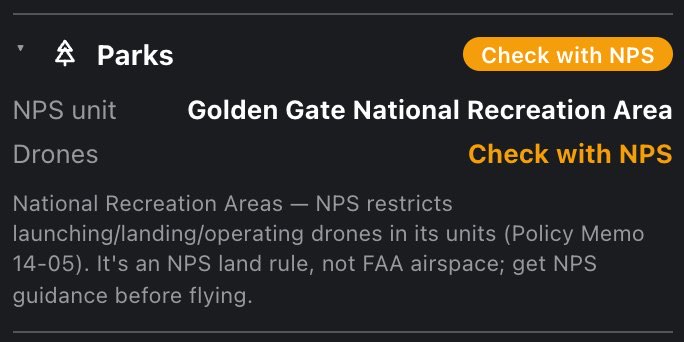
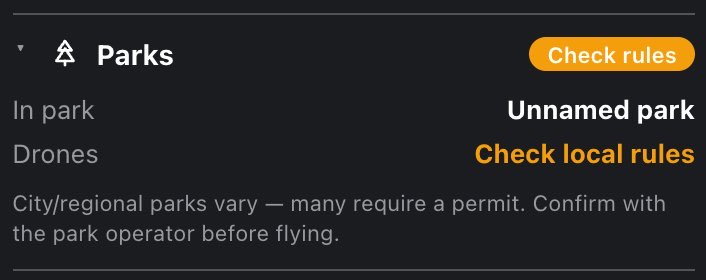
7.13 Restricted zones
Two sources in one section. First, the FAA's national security UAS flight restrictions (14 CFR 99.7): permanent areas over military bases, Coast Guard stations, Energy Department sites and other federal facilities, and the National Defense Areas along the southern border, where no drone may fly at any hour. Second, ground where launching is prohibited or needs someone's permission, mapped as areas from OpenStreetMap. Both are drawn on the map in violet when the layer is on.
Inside a national security restriction the chip is No-fly and the section shows Restricted area with the installation's name, FAA area with the FAA's name for that polygon where it differs, Agency (DOD, DHS, DOE…), and Drones: Prohibited — 14 CFR 99.7, with a sentence giving its height range from the FAA record, for example surface to 400 ft AGL. If that list can't be read, the verdict reads Manual verification required: it is a source that could have said no.
The OpenStreetMap zones are rules about where you stand, not airspace:
| Chip | Means |
|---|---|
| Clear (green) | not inside a national security restriction or any of the zones below |
| No-fly (violet) | a national security restriction, or a zone where drones are prohibited: military ground, airfield grounds, and a prison or its buffer where state law bans drones outright |
| Restricted (violet) | any other zone: permission needed or usually refused |
| Exempt (green) | a prison whose state law exempts your flight as Part 107 |
| Reload (red) | the lookup failed |
The chip is violet, the zones' own map color, for both kinds; the words carry the severity. Inside a zone the section shows In zone with its name, a Drones row with the zone's rule, and a sentence explaining it:
| Kind | Drones row | Treated as |
|---|---|---|
| Military installation or range | Military zone — drones prohibited | No-fly |
| Airport or heliport grounds | Airfield grounds — launching here needs explicit authorization | No-fly |
| Correctional facility | Correctional facility — drones usually prohibited, or the state's own rule (below) | Restricted, or No-fly where state law bans drones outright |
| Hospital grounds | Hospital grounds — don't launch here (medevac helicopters come and go without notice) | Restricted |
| Power plant or substation | Critical infrastructure — don't launch here | Restricted |
| Commercial, industrial or retail land, or a place of worship | Private business grounds — launching needs the owner's permission | Restricted |
| School, college, university or kindergarten | School / campus grounds — takeoff usually needs permission | Restricted |
| Stadium | Stadium — TFR during major events (the sentence: FAA bans drones within 3 NM below 3,000 ft AGL from 1 h before to 1 h after big-league games. Fine otherwise.) | Restricted |
Prisons and state law. Eighteen states have a law about drones and prisons that a map can apply. On the map each prison follows the law of the state it stands in; for your point the app reads the state the point is in. In five of these states the ban reaches past the fence: within 500 ft in North Carolina, South Carolina, Nevada and Alabama, and within 100 ft in Connecticut. South Carolina's limit becomes 1,500 ft on January 1, 2027; until then a point between 500 and 1,500 ft gets a caution that names the date. On the map these buffers are a dashed violet outline around the prison. A point inside one shows Near with the prison's name and distance (Central Prison · 371 ft away) instead of In zone, and the sentence under it quotes the statute.
Where the law bans drones outright (North Carolina, South Carolina, Nevada, Texas, Idaho, Missouri, Louisiana, Tennessee, Wisconsin, Minnesota, South Dakota), the zone is a No-fly. Where it applies only to a fenced or posted facility (Connecticut, Florida, Oregon, Vermont), or its exemption has an unclear reach (Alabama), it stays Restricted and the Drones row names the condition, for example Florida bans drones over it if it is fenced or posted.
Six states exempt commercial or FAA-authorized flights: Connecticut, Florida, Oregon, Vermont, Iowa and Delaware. Your pilot category settles it. As Part 107 the chip reads Exempt and the Drones row says so, for example Iowa exempts commercial flights; carry proof of the commercial purpose. Where another zone covers the same spot, such as hospital grounds, the section shows that zone instead, with the prison's line as a note under it. On the map the prison is no longer a no-fly and Connecticut's 100 ft outline is gone. As Recreational, Iowa and Delaware are a No-fly and the other four stay Restricted. With no category set the app reads them as for a recreational pilot and adds (commercial flights exempt: set your pilot category). Federal prisons are also covered by the FAA's national security restrictions above, and those stay a no-fly whatever your category.
Outside all of them: Not inside an FAA national security restriction or a mapped restricted zone — military, prison, airfield, hospital, campus, critical infrastructure, stadium or private grounds. OpenStreetMap is volunteer-mapped: a missing polygon is not a permission.
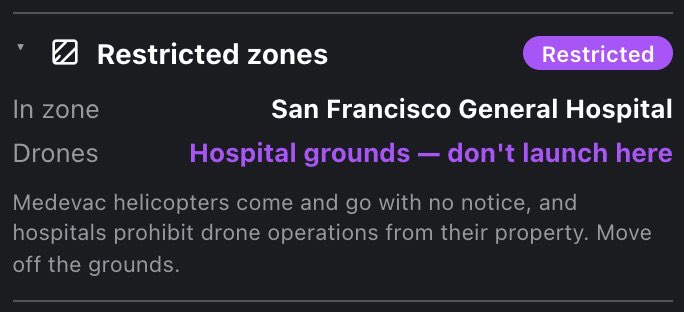
7.14 Sun
Weather, light and hazards: wind against your drone's limit, the cloud base and the 500 ft rule, rain, air quality, wildfires and smoke, GPS and the Kp index, and the light from golden to blue hour.
Where the light comes from and when it changes.
| Chip | Means |
|---|---|
| Daylight (green) | the sun is up, outside golden hour |
| Golden hour (gold) | within the golden hour after sunrise or before sunset |
| Night (gray) | the sun is below the horizon, blue hour included |
Rows, while the sun is up: Light direction with an arrow and shadows fall NE; Sun position (compass direction and azimuth); Altitude in degrees. After sunset those three become one row, Sun: below horizon. Then always: UV index, Sunrise, Sunset, Golden hour (morning), Golden hour (evening), Blue hour (morning), Blue hour (evening), Daylight (Part 107) (sunrise to sunset), and Time to golden: now, a countdown, or —. Times are the spot's local time, in your 12/24-hour setting.
Blue hour is civil twilight (the sun down to 6° below the horizon): legal to fly under Part 107 with anti-collision lighting. The chip already reads Night then, because the sun is down; beyond civil twilight it is night.

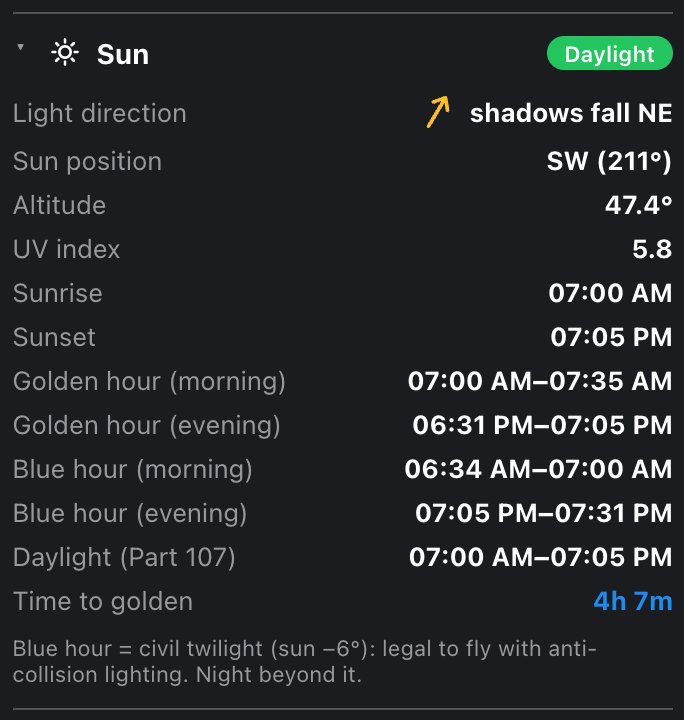
7.15 Wind
Wind at the ground and aloft, measured against your aircraft's rated wind limit (from Settings → My fleet), not a generic threshold.
| Chip | Means |
|---|---|
| Light (green) | the worst wind is under 72 % of your drone's limit |
| Breezy (amber) | the worst wind is at 72 % of the limit or more |
| Strong (red) | the worst wind reaches the limit |
| Reload (red) | the forecast failed |
"The worst wind" is the highest of four numbers: surface wind, surface gusts, wind at 400 ft, and the estimated gust at 400 ft. The verdict and the fleet advice use the same blend, so they cannot contradict the chip. For example, with a limit of 23.9 mph, Breezy starts at about 17 mph.
Rows:
- Wind @ Ground: speed and from direction, with an arrow pointing where the wind blows to.
- Wind @ 400 ft AGL: the same at flight altitude. When a planned shot (Pro) has a ceiling more than 25 ft above 400 ft (the structure exception), this row moves up to that altitude, marked (est), with a ~ before the speed.
- The wind scale: a colored bar from calm to 25 mph. The pointers above the bar are 400 ft (blue wind, red gust); the pointers below it are the ground (light-blue wind, yellow gust). A white tick on the bar is your drone's wind limit. The gust at 400 ft is an estimate, scaled from the ground gust factor, because the forecast has no upper-level gust.

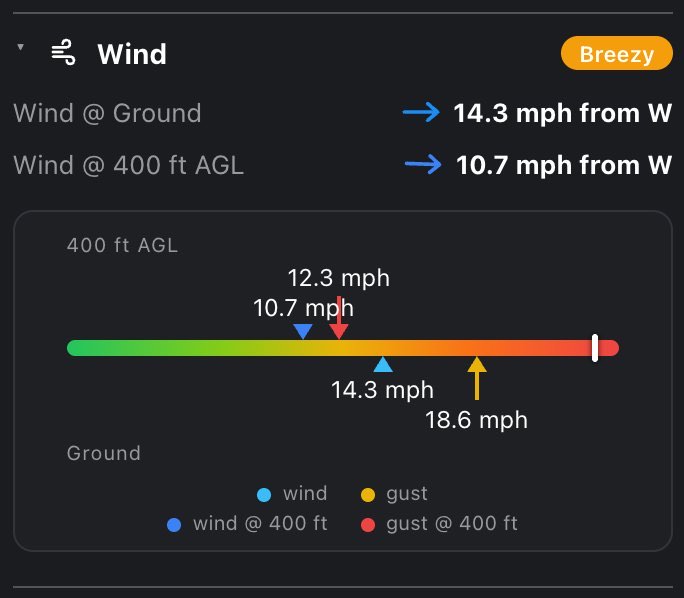
7.16 Clouds & fog
A legal section, not a comfort one: Part 107.51(d) requires staying 500 ft below clouds, so a low cloud base caps your altitude, and a base under 500 ft leaves no legal altitude at all.
| Chip | Means |
|---|---|
| Clear (green) | cloud cover 25 % or less |
| Some cloud (green) | 26 to 70 % |
| Overcast (gray) | over 70 % |
| Low clouds (amber) | cloud base under 900 ft |
| Fog / low deck (red) | cloud base under 500 ft |
| Fog (red) | the forecast reports fog this hour |
| Reload (red) | the forecast failed |
Rows: Cloud cover in %; Cloud base, from the model where it reports one, otherwise estimated from the temperature and dew point and shown as ~1,200 ft (est), or clear with no cloud to speak of; Fog, In the forecast or None forecast; Dew point spread, the temperature minus the dew point.
Notes that appear only when they apply:
- Usable ceiling, only when the base is under 900 ft: Part 107.51(d): stay 500 ft below clouds — usable ceiling here is about 300 ft AGL (with (estimated from humidity) when the base is an estimate), or, under 500 ft, that's fog … no legal altitude remains. The estimated base counts toward this and the chip only when the sky is at least half covered.
- Fog in the forecast: visibility drops below the 3-statute-mile Part 107 minimum and you lose line of sight.
- Dew point spread: under 2.5 °C (4.5 °F) it turns red with Air is nearly saturated — fog can form fast, and the lens and props will pick up condensation; under 5 °C (9 °F) it turns amber with Air is getting damp — worth watching around dawn.
7.17 Precipitation
| Chip | Means |
|---|---|
| Dry (green) | chance under 30 % and nothing falling |
| Possible (amber) | chance 30 % or more, or any rain in the forecast hour |
| Likely (amber) | chance 60 % or more |
| Storm (red) | a thunderstorm is forecast |
Rows: Chance in %; Type (Drizzle, Rain, Rain showers, Freezing rain, Snow, Snow showers, Thunderstorm, Thunderstorm with hail and so on, or None); and, only when something is actually falling, Amount, in in/h if your distance unit is miles or mm/h if it is kilometers. A thunderstorm adds Thunderstorm forecast — lightning, downdrafts and gust fronts. Don't fly this hour. At 60 % or more without a storm: Rain likely — most drones aren't weather-sealed; moisture kills motors and ESCs.
7.18 Temperature
| Chip | Means |
|---|---|
| the temperature itself, e.g. 64°F (green) | between freezing and 40 °C |
| Freezing (blue) | 0 °C / 32 °F or colder |
| Extreme heat (red) | 40 °C / 104 °F or hotter |
Rows: Temperature, Feels like, Dew point and Humidity. At freezing: LiPo capacity and flight time drop sharply; keep batteries warm. In extreme heat: watch for motor/battery overheating; land at the first warning.
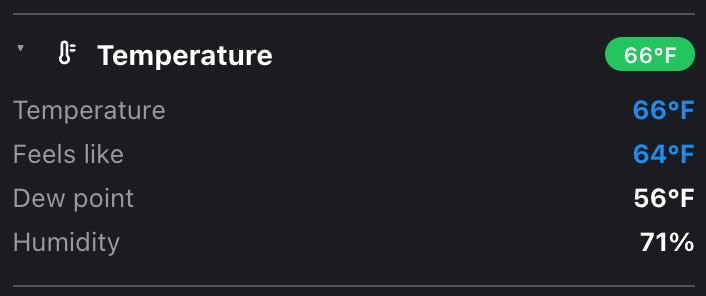
7.19 Air quality
The US AQI and PM2.5 for the hour, plus flight visibility judged against the 3-statute-mile Part 107 minimum. The chip shows whichever of the two is worse.
| Chip | Means |
|---|---|
| Good, Moderate, Unhealthy (sensitive), Unhealthy, Very unhealthy, Hazardous | the AQI category, in the EPA's colors (AQI 0–50, 51–100, 101–150, 151–200, 201–300, over 300) |
| Low visibility (amber) | visibility under 3 statute miles (4.8 km) |
| Poor visibility (red) | visibility under 3 km |
| Reload (red) | the air-quality forecast failed |
Rows: US AQI in its category color, PM2.5 in µg/m³, and Visibility with its class:
| Class | Visibility |
|---|---|
| clear | 9 km (5.6 mi) or more |
| OK | 3 statute miles (4.8 km) or more |
| below min | 3 km to 3 statute miles |
| poor — no fly | under 3 km |
The air-quality forecast runs about four and a half days ahead. For an hour past its end there is no reading rather than the last one repeated: the section says No air-quality forecast this far ahead yet., shows no chip, and keeps only the Visibility row (which comes from the weather forecast). The Air quality tile reads — no forecast yet, and the spoken brief says the figure is not reported here. Only Pro sees this, on a forecast horizon longer than about four days (Pro's default is 5).
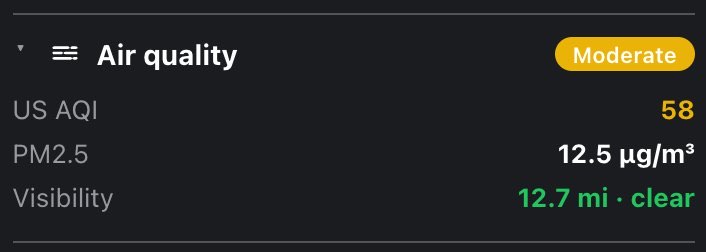
7.20 Wildfires & hazards
Active wildfire incidents and perimeters, the NOAA smoke forecast for the hour, and elevated USGS volcano alerts.
| Chip | Means |
|---|---|
| Clear (green) | nothing nearby and every source answered |
| In fire perimeter (red) | the point is inside an active fire perimeter |
| Fire nearby (amber) | an active fire within 5 mi |
| Smoke (amber) | smoke thicker than background air forecast overhead this hour |
| Volcano ORANGE (amber) | an elevated-alert volcano within 50 km (31 mi); the word after Volcano is its USGS color code |
| Partly checked (amber) | one of the four sources did not answer |
| Loading / Reload | loading, or the whole check failed |
- Inside a perimeter it is a hard stop: a Fire perimeter row with the fire's name in red, and N acres — aerial firefighting operates here; flying is prohibited around fire operations.
- A fire nearby shows its name and distance in amber. The distance is measured to the nearest edge of the mapped perimeter when there is one, or to the incident's reported location otherwise; the note under it says which, because on a big fire the two differ by miles.
- Smoke forecast shows the class for the hour on the timeline in µg/m³ (0 - 3, 3 - 25, 25 - 63, 63 - 158, 158 - 1000). NOAA's forecast is hourly for about two days, so scrub the timeline and it changes, like the gray smoke shading on the map. The thinnest class, 0–3, is printed plainly with At this level it is background air, not a haze you would see. and no caution. Past the end of the forecast the row goes away rather than repeating the last hour.
- A volcano row gives the name, the color code (red when RED, amber otherwise) and the distance.
- Couldn't verify wildfire perimeters, the smoke forecast — the verdict carries a caution. names whichever sources did not answer, with a Retry button right in the line.
- With nothing found: No active wildfire or mapped perimeter within 5 mi, no smoke forecast overhead at this hour, no elevated volcano alerts nearby.
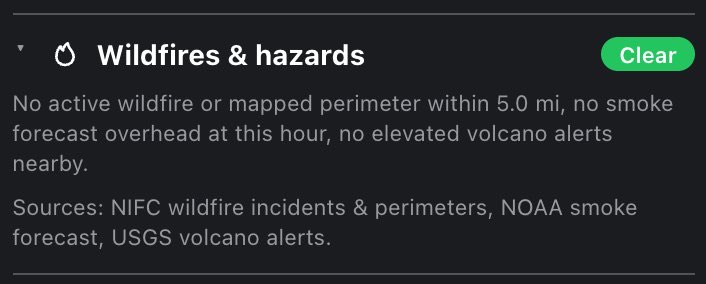
7.21 GPS & satellites
How many navigation satellites are above 5° elevation at this spot and time (GPS, GLONASS, Galileo and BeiDou, from CelesTrak orbits), how many are likely usable for a lock, and the geomagnetic Kp index.
| Chip | Means |
|---|---|
| 31 usable (green) | the estimated usable count |
| 31 usable (amber) | the same, during a geomagnetic storm (Kp 5 or more) |
| Reload (red) | orbits or the Kp forecast failed, or one constellation's orbits did not load |
Rows: Visible satellites (the total); the split GPS · GLO · GAL · BDS; Est. usable for a lock ≈ N; and Geomagnetic (Kp) with its value and category: quiet (under 4), unsettled (4 to 5), storm (5 to 7, amber), severe storm (7 or more, red).
The usable estimate is the visible count scaled down by Kp, because storms break locks before satellites disappear: all of them below Kp 4, 90 % at Kp 4, 75 % at Kp 5, 60 % at Kp 6, 45 % at Kp 7 and above. If a constellation's orbits did not load, the section says so outright (… orbits didn't load, so the counts above leave it out — the real sky is better than this. Tap Reload to try again.) rather than letting a thin count look like a thin sky.
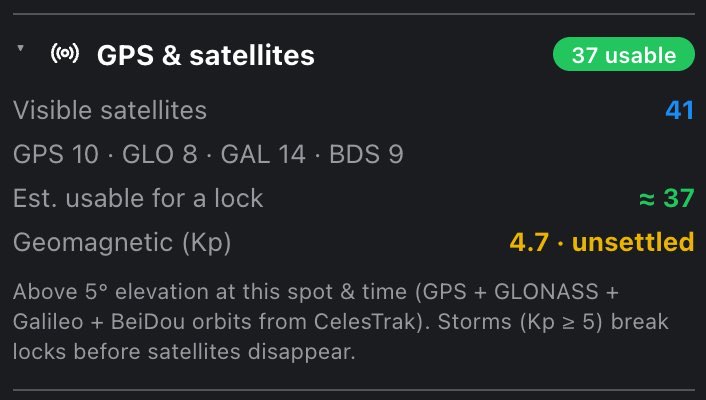
7.22 Camera settings Hobby
Camera, movement and your fleet: camera settings down to the ND filter for the light at your spot and hour, movement settings as numbers for DJI Fly, and the drones in My fleet.
What to dial in for the light at this spot and hour. Three blocks, in the order a shooter thinks:
Exposure meter forecast: Scene EV (ISO100) and Illuminance in lux, for this spot, this hour and this cloud cover.
Desired camera settings: what you want to shoot at. Four pickers:
- fps: 24, 25, 30, 50, 60, 90, 100 or 120 (default 30)
- f/: the aperture (default f/4, see below)
- ISO: 100, 200, 400, 800, 1600 or 3200 (default 100)
- Shutter°: 45, 90, 180, 270 or 360 (default 180°)
The aperture is not a preference: it belongs to the aircraft you fly (Settings → My fleet), and on a multi-lens drone to the lens picked there. Most drones have no iris at all, and on those the f/ picker turns into a plain number you cannot change, with a note: The DJI Mini 3 / Mini 4 Pro has no iris: f/1.7 is the only aperture it flies, so in bright light the ND filter is what holds the 180° shutter. Drones that really stop down offer their own range and no more (The DJI Mavic 3 Pro / Pro Cine · 24 mm Hasselblad stops from f/2.8 to f/11 — the rest of the ladder is another camera's.). On a multi-lens drone, switching lenses in My fleet can change the aperture, and with it the filter. A catalog entry that covers several cameras keeps every f-stop on offer and asks you to pick the one your camera shows. Your f/4 preference is kept and snapped to what the lens can do.
This matters more than it sounds: a stop of aperture is a stop of ND. The same midday sun that wants an ND32 at f/4 wants roughly ND256 at a Mini's f/1.7.
Recommended camera settings: what to actually set, as a grid of fps, f/, ISO and Shutter°, then two wide cells, ND filter (or none) and White balance in kelvin. Excess light goes into the ND filter. Missing light is bought back by giving up ISO first, then aperture, then shutter angle, then frame rate, cheapest loss first; anything that had to give is shown in amber, with a note (ISO raised to 800 for exposure., Aperture opened to f/2.8 — shallower depth of field., Still ~1.5 stops under even at the limits — plan a brighter hour.). With an ND: ND16 cuts 4 stops — that is what keeps the shutter on the 180° rule in this light. The white balance line names the preset it matches (White balance ≈ daylight.). Daylight runs from about 3200 K at the horizon to 9500 K when only skylight is left; after sunset, matching it exactly neutralizes the blue hour, which is usually not why you came.
| Chip | Means |
|---|---|
| ND16 (green; any ND name) | your desired settings hold; pack that filter |
| Good light (green) | your desired settings hold with no filter |
| Compromise (amber) | something had to give (ISO, aperture, shutter or fps) |
| Too dark (red) | still short of light at every limit; this also cautions the verdict |
| no chip | Free account |
On Free the section shows what it would answer (What to dial in for the light at that hour…) and Tap Hobby on the heading for the plans., with no chip: the chip names the ND filter, which is the very answer the section is locked on.
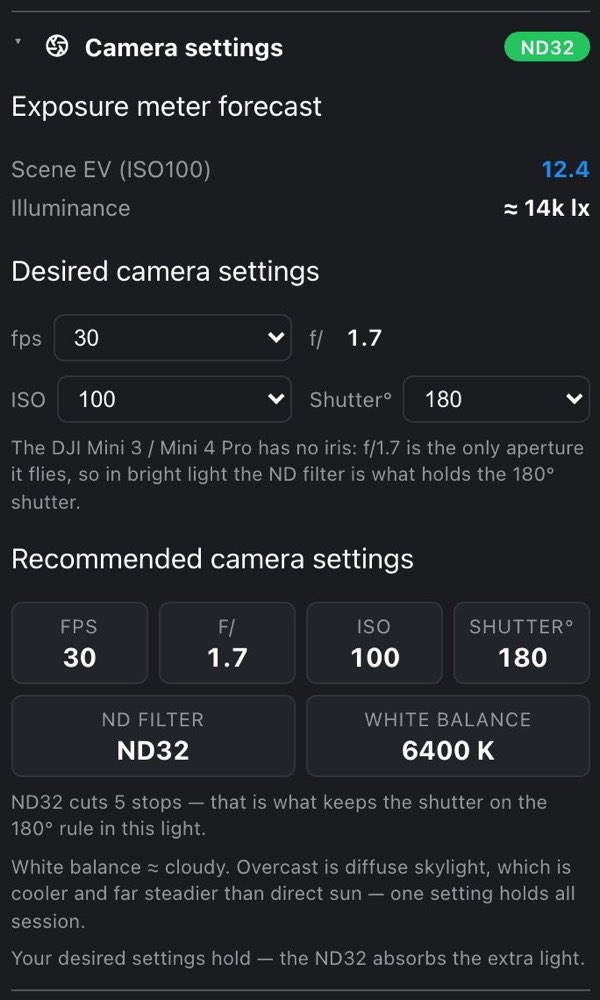
7.23 Movement settings Hobby
Pick how you are shooting, read the numbers off, type them into DJI Fly. It is not called "gimbal" because only part of it is: the tilt wheel moves the camera, the speed caps and the brake are the aircraft, expo is how the sticks respond, and only the follow mode is the head itself.
Shooting style, seven choices; Cinematic — slow reveals, long moves is the default:
| Style | DJI Fly tab |
|---|---|
| Cinematic — slow reveals, long moves | Cine |
| Cinematic — fast, epic shots | Normal |
| Reveal — tilt up from the ground, rise over a ridge | Cine |
| Orbit — circling a subject, keeping it framed | Cine |
| Tracking — following a moving subject | Normal |
| Standard — documentary, general flying | Normal |
| Action — chasing, sport, fast subjects | Sport |
The closed heading shows that tab (Cine, Normal or Sport), so you know which tab to open before you start typing. The line under the picker repeats it: For the 24 mm wide at 30 fps. Most of these go under the Cine tab in DJI Fly → Gain & Expo Tuning — the two below are elsewhere.
Four groups of named rows, in this order:
| Group | Rows |
|---|---|
| Camera tilt — the wheel | Max Control Speed (Tilt), Tilt Smoothness |
| Aircraft | Max Angular Velocity, Yaw Smoothness, Brake Sensitivity, Max Horizontal Speed, Max Ascent / Descent |
| How the camera follows the drone | Gimbal Mode (Follow or FPV), Synchronised Pan Follow (On or Off), with a line on why; both live in DJI Fly's control settings, not under Gain & Expo |
| Expo — stick response | Up/Down, Yaw, Pitch/Roll |
A row marked · wind is one the gusts moved off the style's own figure: wind buys smoothing, not speed. When a wide lens puts every style under DJI's slowest pan cap, the yaw row reads Max Angular Velocity — DJI's minimum. The Aircraft group appears only on drones with a full 3-axis gimbal: on tilt-only drones (DJI Neo, DJI Avata 2) and on rigs that fly an external cinema gimbal it is left out. On an external-gimbal rig the section also says the tilt figures belong in that gimbal's own controller.
Under it all is one limit: Nothing may sweep faster than 14.7°/s on this lens — 5.6s to cross the frame — or the footage judders. (that is the figure for a Mini's 24 mm at 30 fps). The rate comes from your lens's horizontal field of view and your frame rate, anchored to the ASC Manual's recommended panning speeds (at 24 fps, a point should take about seven seconds to cross the whole frame). A telephoto crosses its own frame far sooner than a wide lens at the same degrees per second, so this number belongs to the lens: on a Mavic 4 Pro the 168 mm tele and the 28 mm wide differ about fivefold. Slider scales in DJI Fly are not published and differ by model and firmware, so the app names degrees per second and estimates the slider. The smoothing is judged from the gusts against that airframe's own wind limit, and it is advice rather than a measurement: unlike the rate, there is no published chart behind it.
The two cinematic styles are worth comparing: both hold the camera well under that ceiling (the slow one at 55 % of it, the fast one at 65 %) and differ on the airframe: 5 m/s horizontal against 15. Scale in an epic shot comes from crossing ground, not from sweeping the head.
The section has no chip. On Free it shows a two-line teaser and Tap Hobby on the heading for the plans., with no summary.

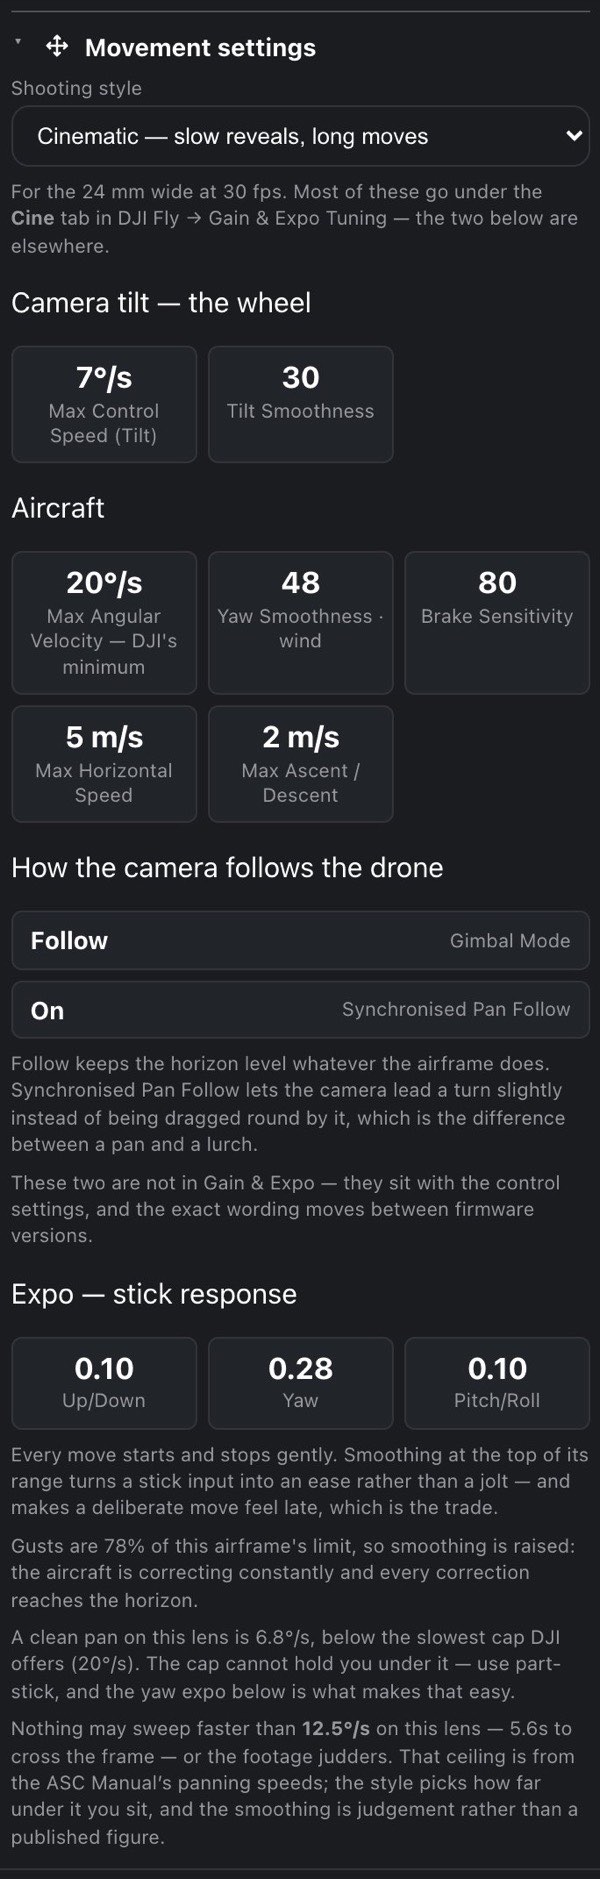
7.24 Drive from you Hobby
Distance and live-traffic drive time from Home to the PIC point, fetched only when you press Get drive time. See Drive from you for the details and the daily allowance.
7.25 The Pro tools Pro
Shot planner, Altitude explorer, Spot finder and Trip planner follow as one block. Each has its own chapter: Shot planner, Altitude explorer, Spot finder and Trip planner.
7.26 My spots
The last section, and the place a point becomes a saved spot. It starts with This spot: the street address of the point (or its coordinates until the address arrives), so you know what you are saving.
- Save current spot (with a bookmark icon) adds the point to My spots. A new spot starts at 5 stars. At your plan's limit (5 spots on Free, 20 on Hobby, unlimited on Pro) the button opens the plans instead.
- Once saved, the button goes quiet and reads In My spots (with a heart), so it can never remove a spot by accident; removing is done in the list below, beside the spot. Next to it a Rating row of five stars sets the spot's rating: press a star to set that many, or press the highest lit star again to clear the rating to 0.
- On Pro, a checkbox Show this spot in the community layer (on by default), on its own line under the button, decides whether the spot feeds the anonymous community layer. Below Pro every spot counts toward it.
Under that is the full My spots list, headed by a counter, 3 / 5 saved (on Pro just 12 saved), with its sort buttons ★ / Score / Near. The list, its buttons and the community layer are covered in My spots and the community layer.
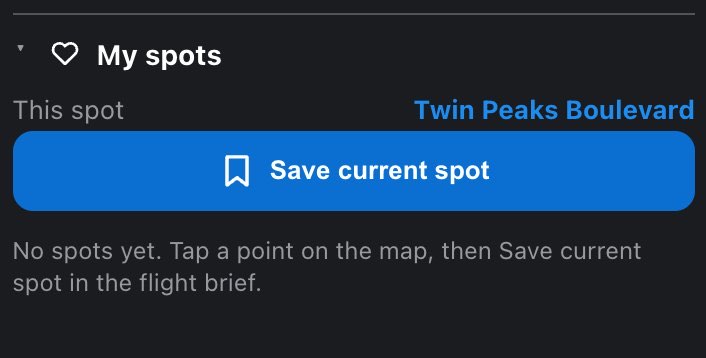
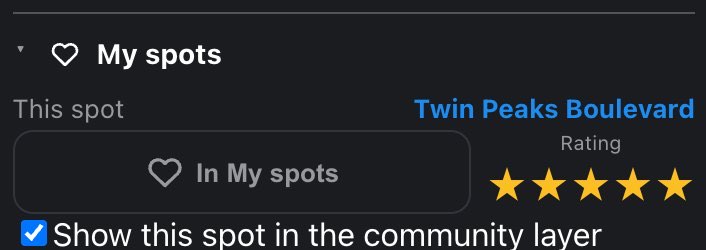
8 Spoken brief Pro
The speaker button reads the flight brief out loud.
It exists for one situation: you are standing at the launch point, the sun is on the screen, and the answer you drove out for is on a device you cannot read. Everything about it follows from that.
8.1 Where the speaker is
The speaker is in the top bar, between the probe and the basemap buttons.
It is there on every plan. Below Pro, pressing it opens the plans instead of reading. It shows a speaker with sound waves while the mode is on (and lights up), and a speaker with an × while it is off.
8.2 It is a mode, not a button you press per brief
While the speaker is lit, every new point you place is read as soon as its data lands: you never touch the screen again. Turn it on over a point you have already set, and it reads that one straight away. If you turn it on with no point, it waits and starts on its own when you set one.
Pressing it again stops mid-sentence and switches the mode off, so off, then on, is how you hear a brief a second time. There is no separate replay button.
A reading starts over on its own whenever the answer changes:
- A new point. Placing a point mid-sentence stops the reading at once; it waits for the new spot's data before speaking again, rather than finishing a description of a place you have walked away from.
- A different hour on the timeline, or a different verdict.
- Any change to Settings → Spoken brief or to Units: voice, speed, Say why, which figures are read or their order, and any unit. The reading restarts in the new form.
A forecast refreshing in the background does not interrupt it.
The mode is remembered on this device, across reloads. Browsers and apps do not remember permission to make sound, though, so after a restart the first tap you make anywhere (placing a point counts) quietly re-arms the audio, and that brief reads normally.
8.3 What it reads, and in what order
Every brief opens with the verdict; that is not a setting. Then, if Say why is on, the reasons behind it. Then the figures you chose, in your order, and a short closing phrase.
Settings → Spoken brief controls the rest. The section wears a Pro pill, but you can set it up on any plan; only the speaker itself is Pro.
| Setting | Choices |
|---|---|
| Voice | Female (default) or Male |
| Speed | 0.9×, 1× (default), 1.1×, 1.2×, 1.3×. The pitch does not change: the recording is stretched, not replayed faster. It stops at 1.3× because past that the stretching starts to be audible on speech |
| Say why, not just the verdict | on by default. The reasons are the part you cannot read in sunlight |
| The list | the Summary tiles' figures except Pilot (a switch, not a reading), sixteen of them, each with a tick box and up / down arrows to move it earlier or later |
Ticked by default, in this order: Ceiling, TFR, Wind, Visibility, Clouds, Sunset. Next window and the rest follow unticked, ready to tick. Under the list a line counts what you chose and how long it takes: 6 of 16, about 30 seconds to read. With nothing ticked: Nothing ticked — the brief will read the verdict and stop. There is no cap; the length is the limit.
The arrows matter more than they look. The Summary tiles have no ordering, because you look at a grid and your eye picks its own path. You cannot skim speech: it arrives in the order it was recorded, so put the figure you came for near the front.
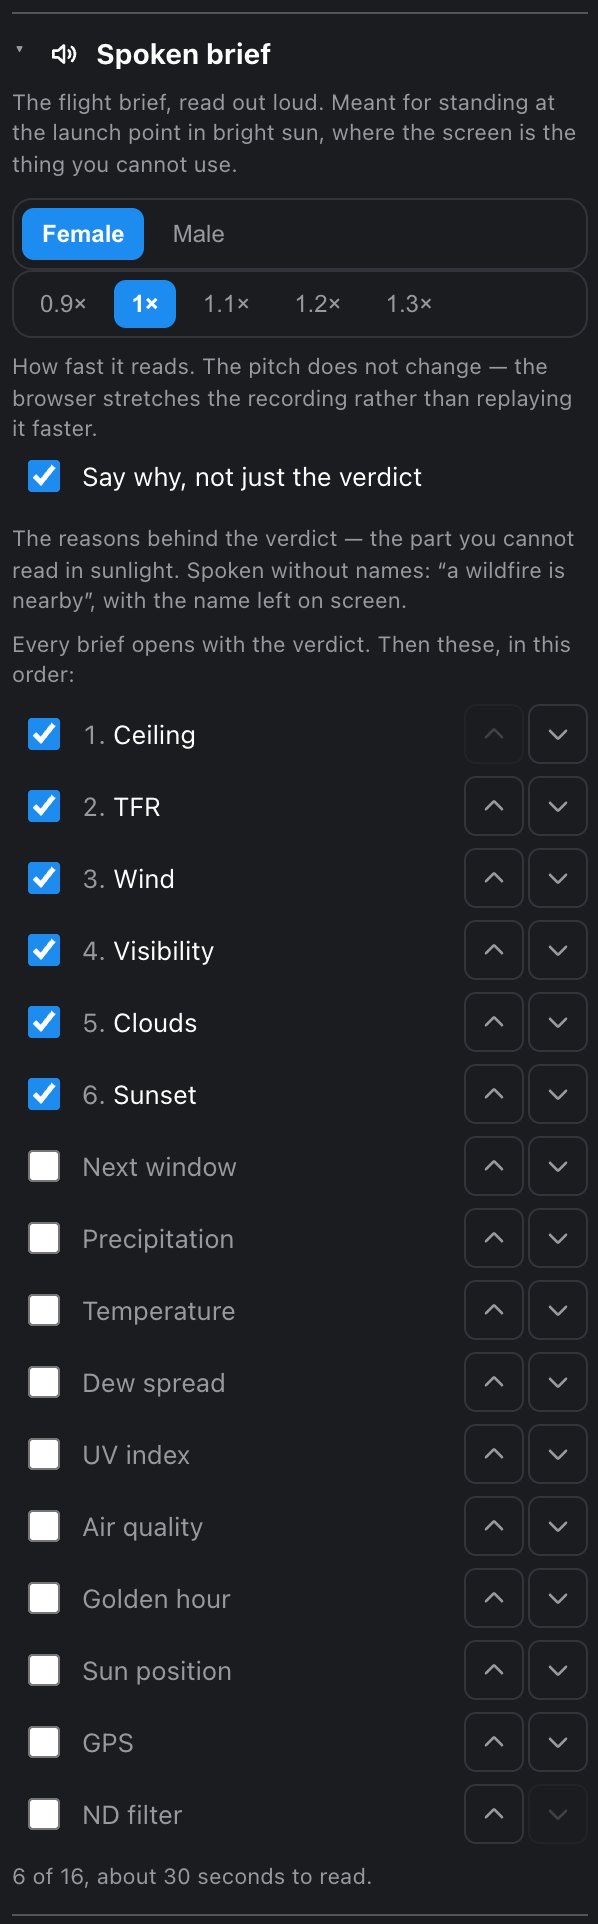
8.4 What it will not say
Names. The screen says inside the Palisades wildfire perimeter (12,400 acres). The voice says a wildfire perimeter is here and aerial firefighting operates in it. The instruction is the same, and the name is on the screen in your hand. Every recording is made in advance, which is what makes the feature quick to start, and no vocabulary can hold the name of every fire, park and airport in the country.
A precision it does not have. Cloud base is read rounded to the nearest 100 ft (50 m in metric), and countdowns to the nearest five minutes, and wherever the voice rounds it says about: Base about three thousand two hundred feet.
Nothing, silently. If a figure could not be read, the brief says so (the forecast did not load, that could not be checked) rather than skipping it. A missing safety number that simply is not mentioned sounds exactly like a clear sky. If the verdict is still being worked out, it says the checks are incomplete rather than reading a calm list of numbers under no headline.
If a recording cannot be fetched, that line is read by your device's own voice instead. You will hear the voice change; that is deliberate.
And if nothing at all could be played, every line lost and not even the device voice reached, the speaker button turns red. Silence in a field looks exactly like a feature working quietly, so it is reported rather than swallowed. Check that the volume is up and that you have a connection.
8.5 Sound on a phone or tablet
The first tap on the speaker is what lets the app play sound at all: browsers and web views refuse audio that no tap asked for. That is why the mode lives on a button rather than in Settings.
iPhone and iPad, the FlyDrone app. The brief plays even with the ring / silent switch on silent: the app asks iOS to treat it as spoken media, the way a podcast or navigation app does. Whatever else was playing pauses while the mode is on, and the app hands the audio back when you switch the mode off, so your music can pick up again.
iPhone and iPad, in Safari. The same works in the browser on iOS 16.4 or newer, which is when Safari first let a page ask. On older iOS the silent switch wins and there is no way around it from a web page: flip the switch or use the app.
Android, app or browser. There is no silent switch to get past. The brief plays on the media volume, so turn that up.
9 Layers and points of interest
Map layers and the legend: every layer and what it draws, why one looks empty when zoomed out, points of interest, the legend, Map, Satellite and Terrain, 3D buildings, and Hide all.
Everything drawn over the base map is a layer you can switch on or off. The switches live in two Settings sections: Layers (airspace, restrictions, hazards, weather, your spots) and Points of interest (practical places: parking, restrooms, gas and so on).
Open Settings by dragging the grip at the left edge of the screen, or by pressing it. The drawer is narrow, so the map stays visible beside it: switch a layer and watch it appear.
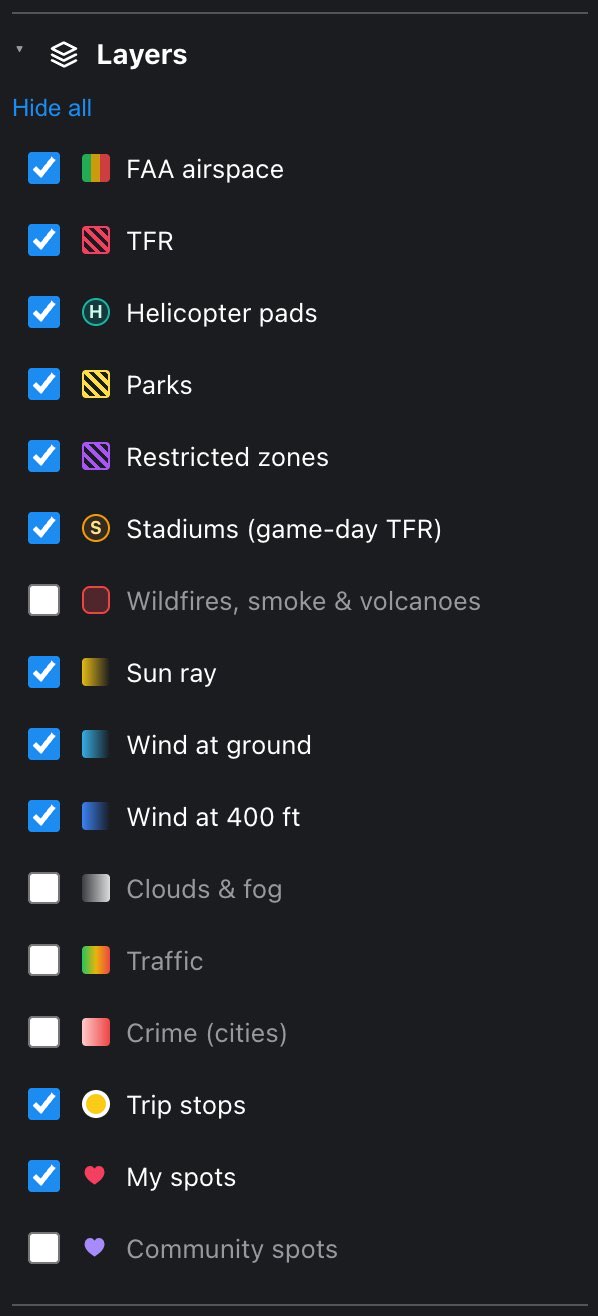
9.1 The layer switches
Each row has a checkbox, a small swatch that shows how the layer looks on the map, and the layer's name. The button above the list reads Hide all while anything is on, and Show all when everything is off; it flips every row at once, your own spots included.
A new install starts with the layers that bear on whether you may fly on (airspace, TFRs, parks, restricted zones, stadiums, helicopter pads), plus the sun ray, both wind arrows, your saved spots and your trip stops. The heavy shading (wildfires and smoke, cloud cover) and the feeds that are not part of the verdict (traffic, crime, community spots) start off.
| Layer | What you see on the map | Source | Starts |
|---|---|---|---|
| FAA airspace | A grid of squares around controlled airports, colored by the highest altitude the FAA pre-approves there: red 0 ft, orange 50, amber 100, yellow 200, lime 300, green 400 ft. A dashed amber outline marks the two US Class D areas of Canadian airports, which have no grid | FAA UAS Facility Maps and FAA airspace rules | On |
| TFR | The standing National Defense Airspace TFRs — a handful of military sites such as Beale AFB in California, Grand Forks and Dallas — as red hatched areas with a red outline. Short-term TFRs (fires, VIP visits, events) are not drawn: the brief's TFR section checks them for your point | FAA | On |
| Helicopter pads | A teal H inside a 200 m circle | OpenStreetMap | On |
| Parks | Parks, National Park Service units, wildlife refuges and protected areas as yellow hatched areas | NPS and OpenStreetMap | On |
| Restricted zones | Violet hatched areas: the FAA's national security restrictions, and military ground, prisons, campuses, hospitals, airfield grounds, critical infrastructure (power plants, substations) and private business grounds. A dashed violet outline around a prison marks the buffer its state's law draws (see Restricted zones) | FAA and OpenStreetMap | On |
| Stadiums (game-day TFR) | An amber ring with an S: the 3 nautical mile (5.6 km) circle that becomes a TFR on game day. The ring turns red when a game is confirmed at the time on the timeline | FAA stadium list | On |
| Wildfires, smoke & volcanoes | Red fire perimeters, a flame at each reported fire, gray smoke shading (darker is thicker) for the hour on the timeline, and a ▲ at volcanoes on alert, colored red, orange or amber by alert level | NIFC, NOAA, USGS | Off |
| Sun ray | A line from your PIC point toward the sun at the time on the timeline. On Pro, while the time sits inside a recommended window, a fan of rays shows how the light moves across that window | Computed | On |
| Wind at ground | An arrow at your PIC point showing where the surface wind blows to | Forecast | On |
| Wind at 400 ft | The same arrow for the wind at 400 ft above ground. The name follows your altitude unit (Wind at 122 m in meters) | Forecast | On |
| Clouds & fog | Cloud-cover forecast shading that follows the timeline | MSC GeoMet (Environment Canada) | Off |
| Traffic Hobby | Live traffic flow colored on the roads | TomTom | Off |
| Crime (cities) | Translucent red circles with a 200 m radius, one per reported incident; where many overlap they stack into solid dark red | City open-data portals | Off |
| Trip stops Pro | Your planned day: yellow dots, lettered A–G once the route is calculated, and the yellow route line | Trip planner | On |
| My spots | Your saved spots as red hearts with a number | You | On |
| Community spots Hobby | Where other pilots save spots: hearts colored by average rating | FlyDrone pilots | Off |
The sun ray and the wind arrows need a PIC point; with no point set they have nothing to start from and draw nothing.
Some rows are missing on some plans. A switch that could never draw anything on your plan is left out rather than shown dead: Traffic and Community spots are not in the list on Free, and Trip stops is not in the list below Pro (without the Trip planner there are never any stops).
Layers change the picture, never the answer. A layer you switch off is still checked: the verdict reads every safety source whether it is drawn or not. The one thing a hidden layer takes with it is its markers. A saved spot you have hidden is a spot you cannot tap on the map (the My spots list still has it).
Crime needs its caveat. There is no nationwide source of incidents with coordinates, so this layer covers only cities that publish point-level open data. Rural and scenic places are simply not covered, and an empty map there means "no data", not "no crime".
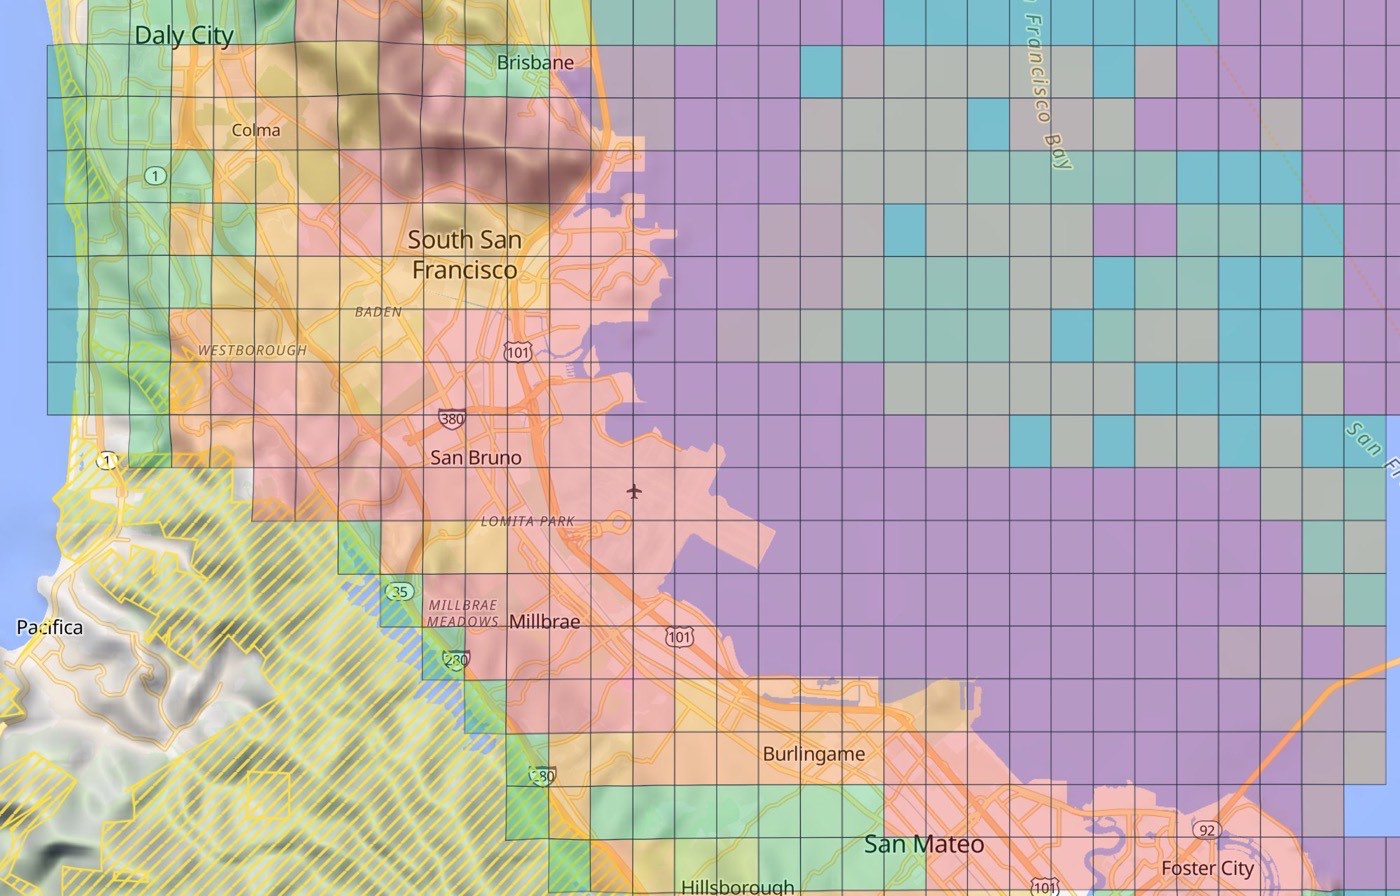
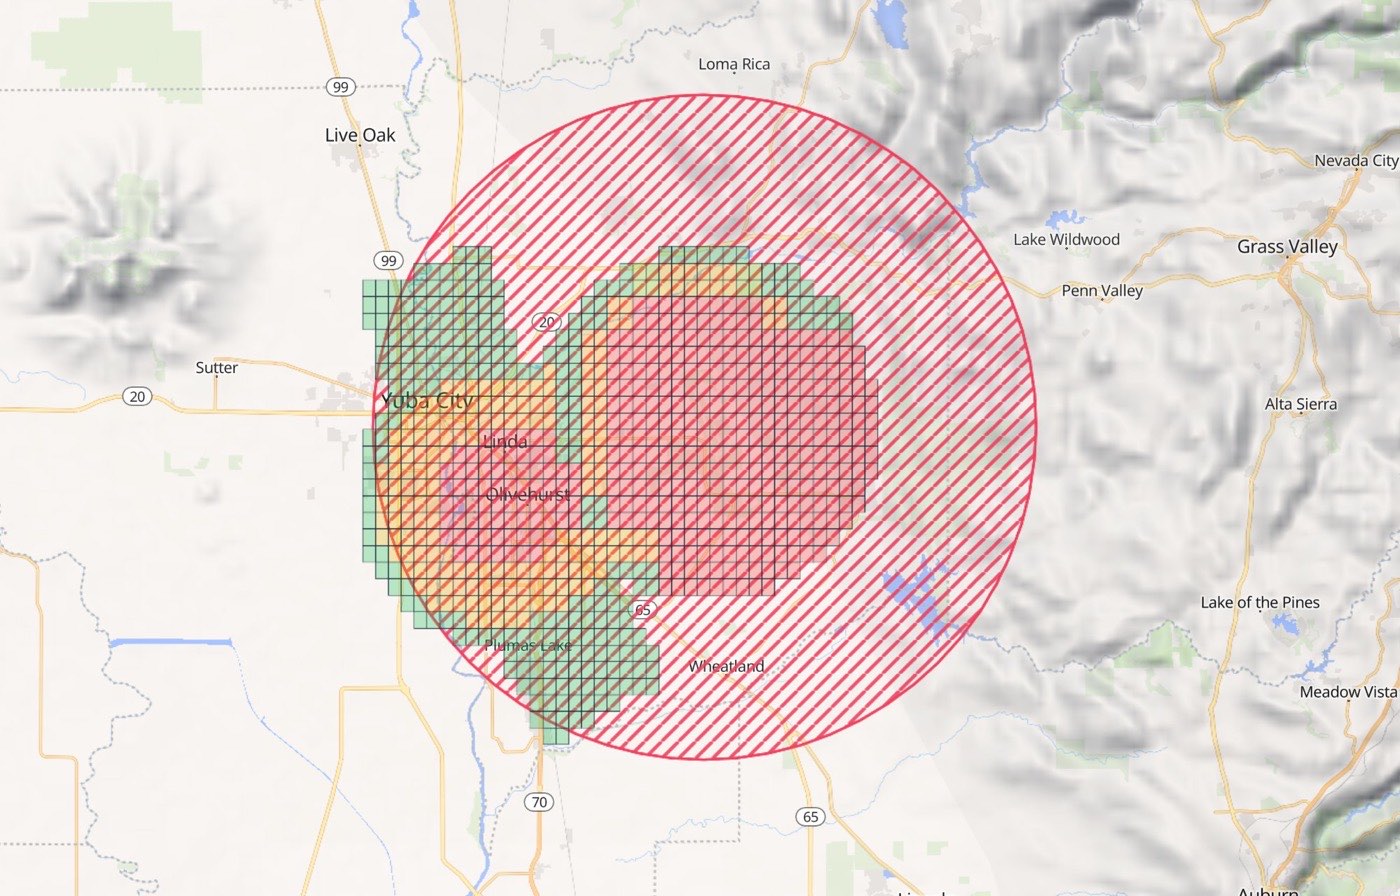
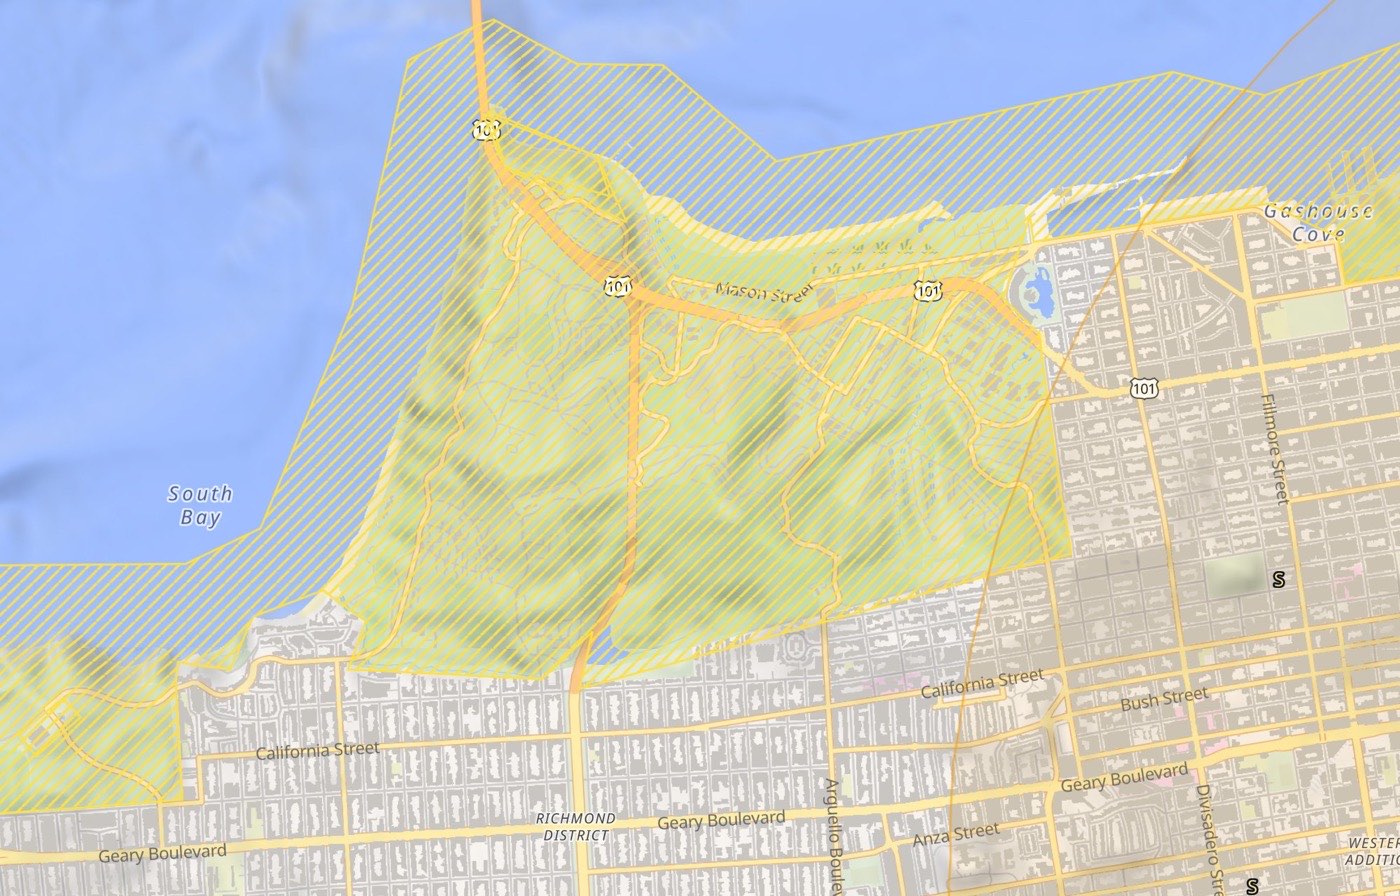
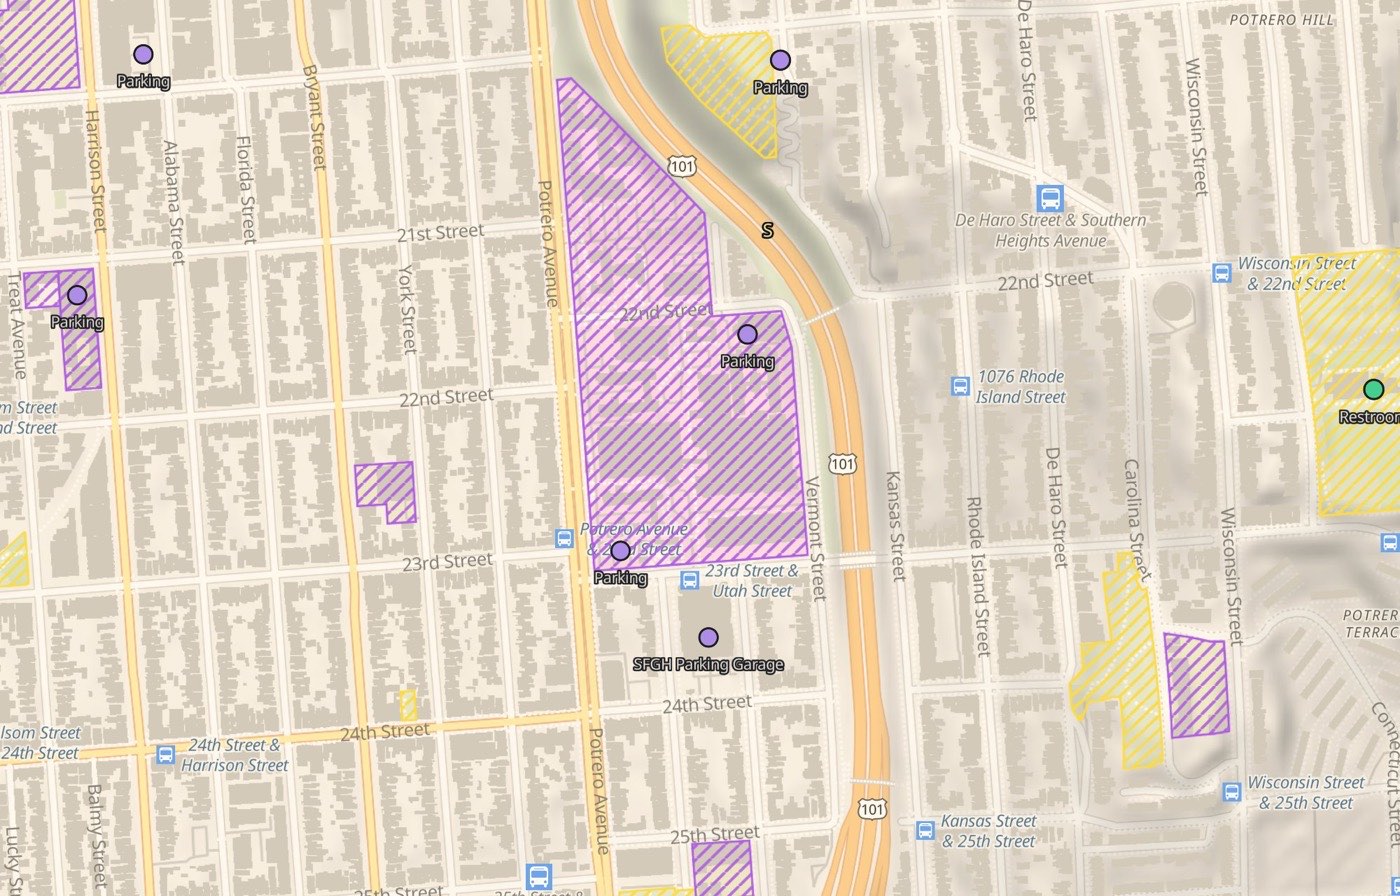
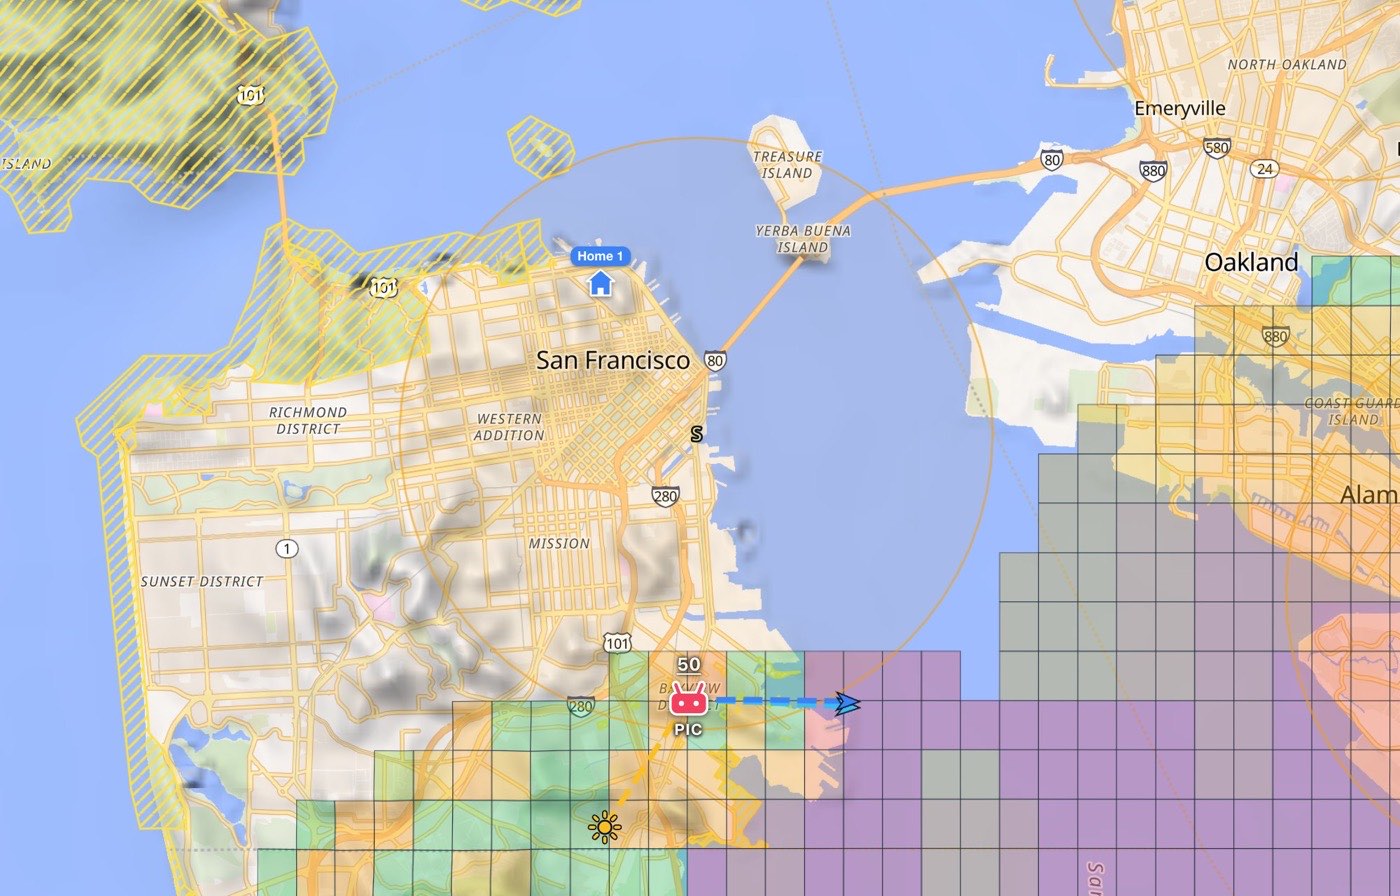
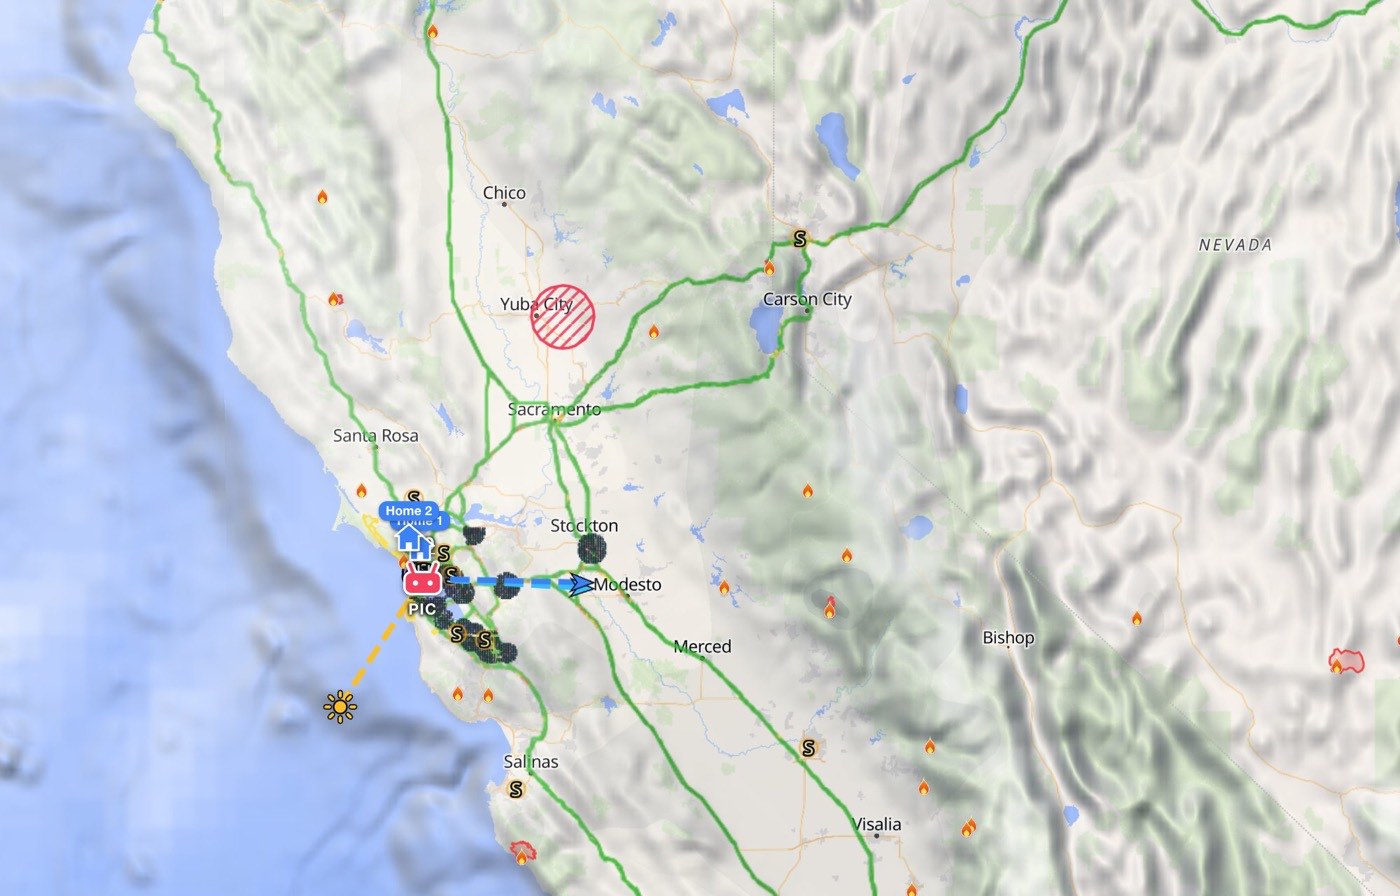
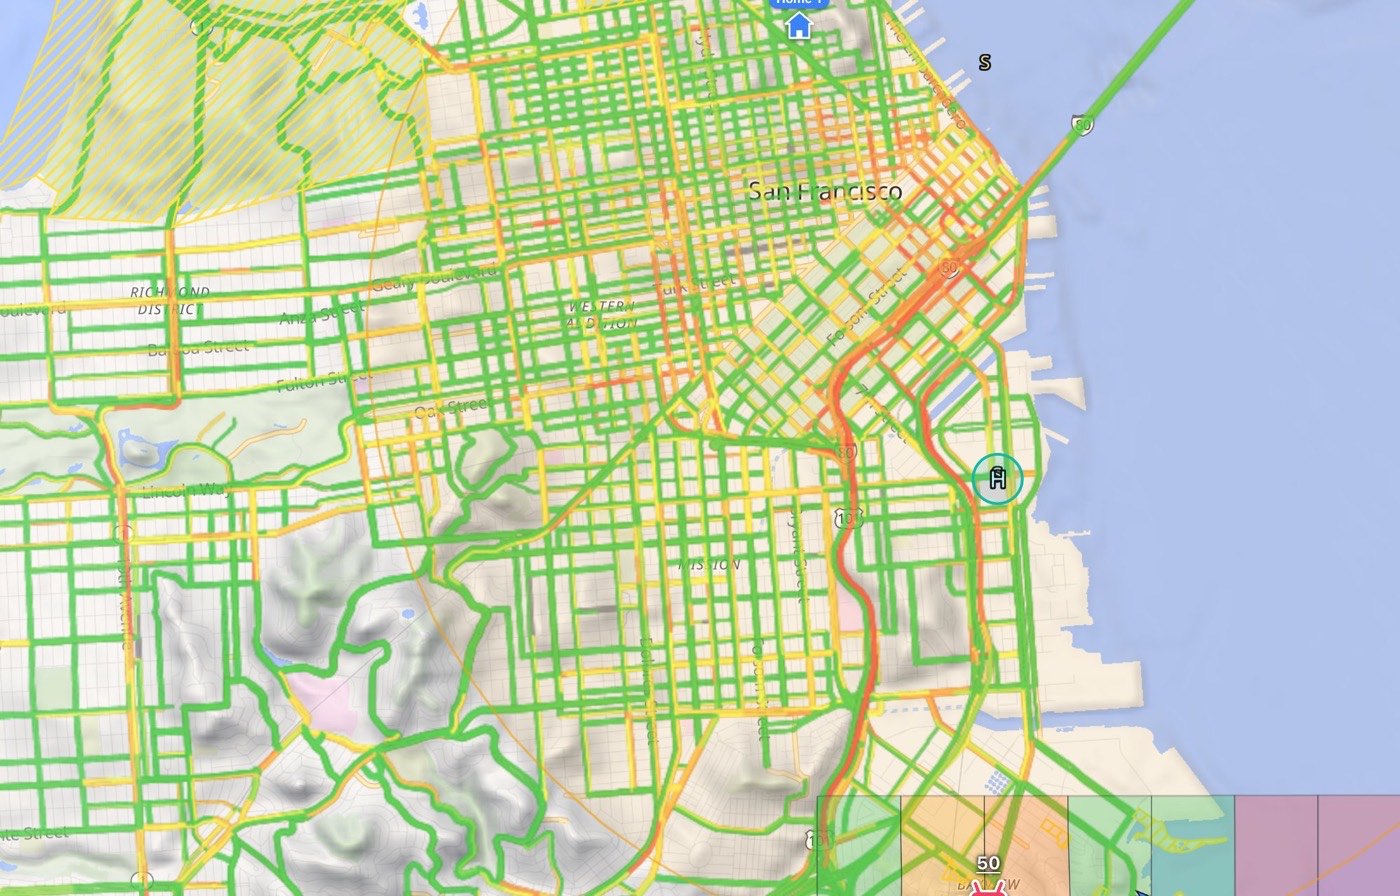
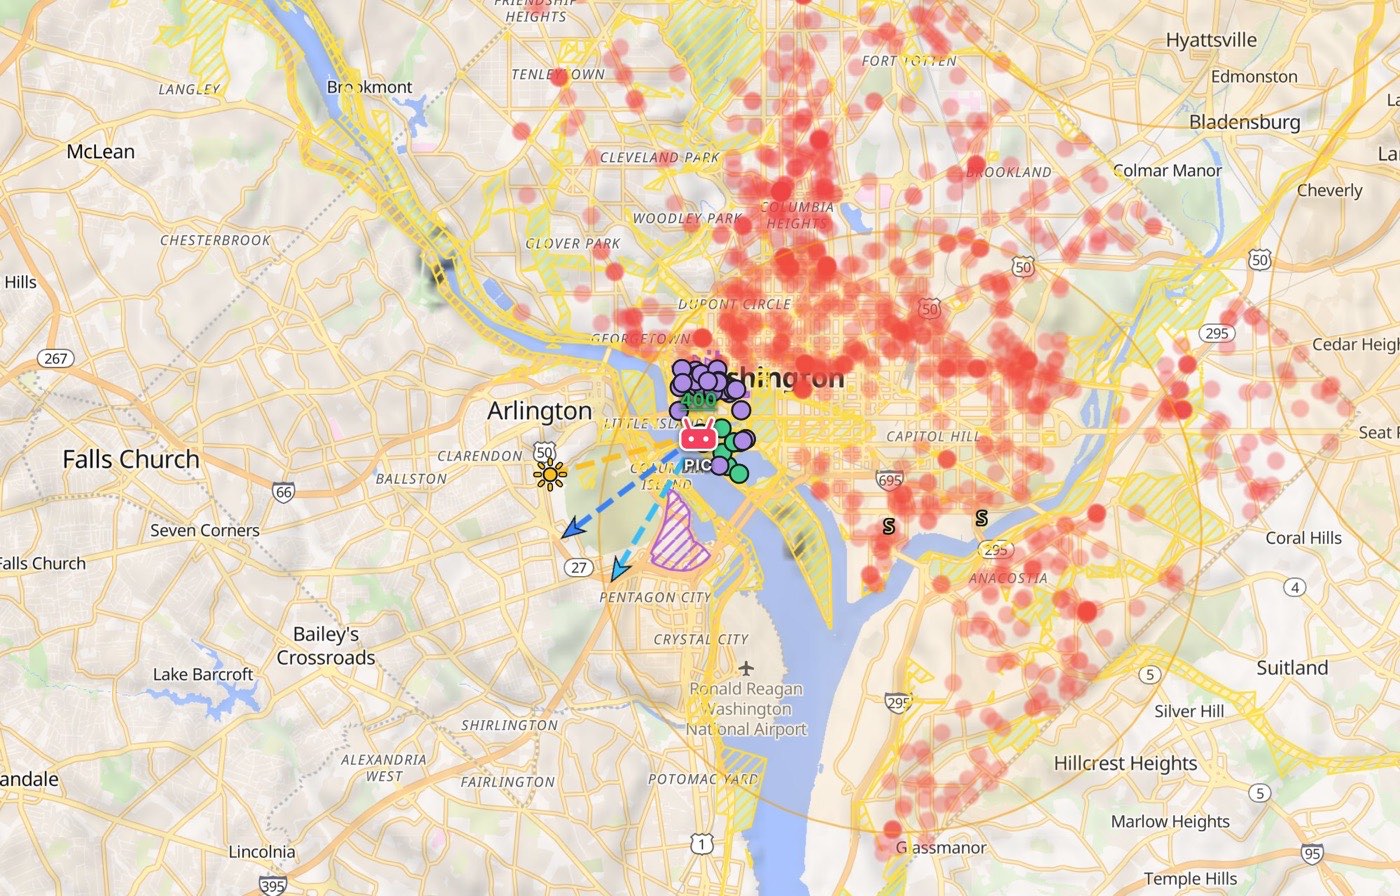
9.2 Why a layer can look empty: zoom
Most layers are loaded for the part of the map you are looking at, and only once you are zoomed in far enough. Zoomed out beyond that point, a layer loads nothing new for the area you pan to (whatever it had already drawn stays), and nothing on screen says so. If a layer seems empty, zoom in.
| Layer | Loads from zoom | Roughly how much map that is |
|---|---|---|
| Community spots | 12 | 4–10 miles across the screen. Zoomed out further, the community hearts disappear completely |
| Points of interest, Parks, Restricted zones | 11 | 8–20 miles across |
| Crime (cities), Helicopter pads | 10 | 15–40 miles across |
| FAA airspace, and the national security restrictions in Restricted zones | 8 | 60–150 miles across |
| TFR | 6 | 250–600 miles across |
| Wildfires, smoke & volcanoes | 5 | 500–1,200 miles across |
The distances are for San Francisco's latitude; the smaller figure is a phone screen, the larger a desktop map. Stadiums, clouds and traffic have no zoom limit.
9.3 Points of interest
Settings → Points of interest is a separate list of practical places, fetched from OpenStreetMap for the part of the map you are looking at (from zoom 11, up to 300 places per view). Each kind is a colored dot:
| Kind | Dot color | Name outside the US |
|---|---|---|
| Vista | Sky blue | Viewpoint |
| Parking (public only) | Violet | Car park |
| Restroom | Green | Toilet |
| Gas | Orange | Petrol |
| Grocery | Pink | Supermarket |
| Hotel | Yellow | Hotel |
All six start off, so a new map is not covered in pins. Zoom in closer (zoom 13) and each dot also shows the place's name. The names of the kinds follow the country your Home 1 is in: US names in the US (and before a Home is set), the other names everywhere else. The list has its own Hide all / Show all button.
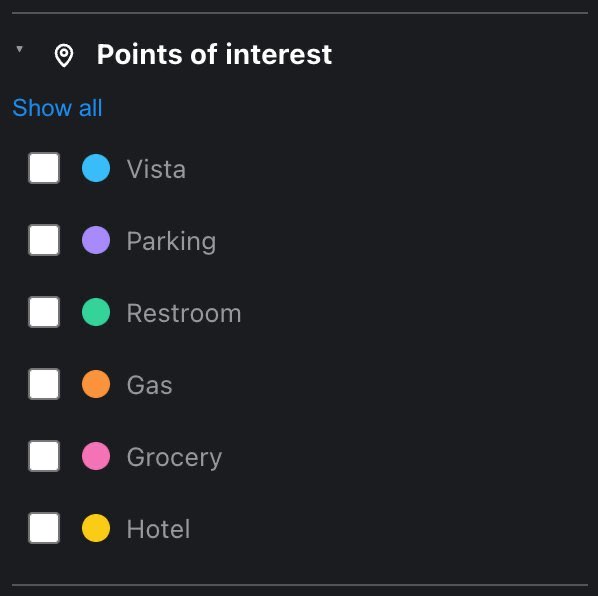
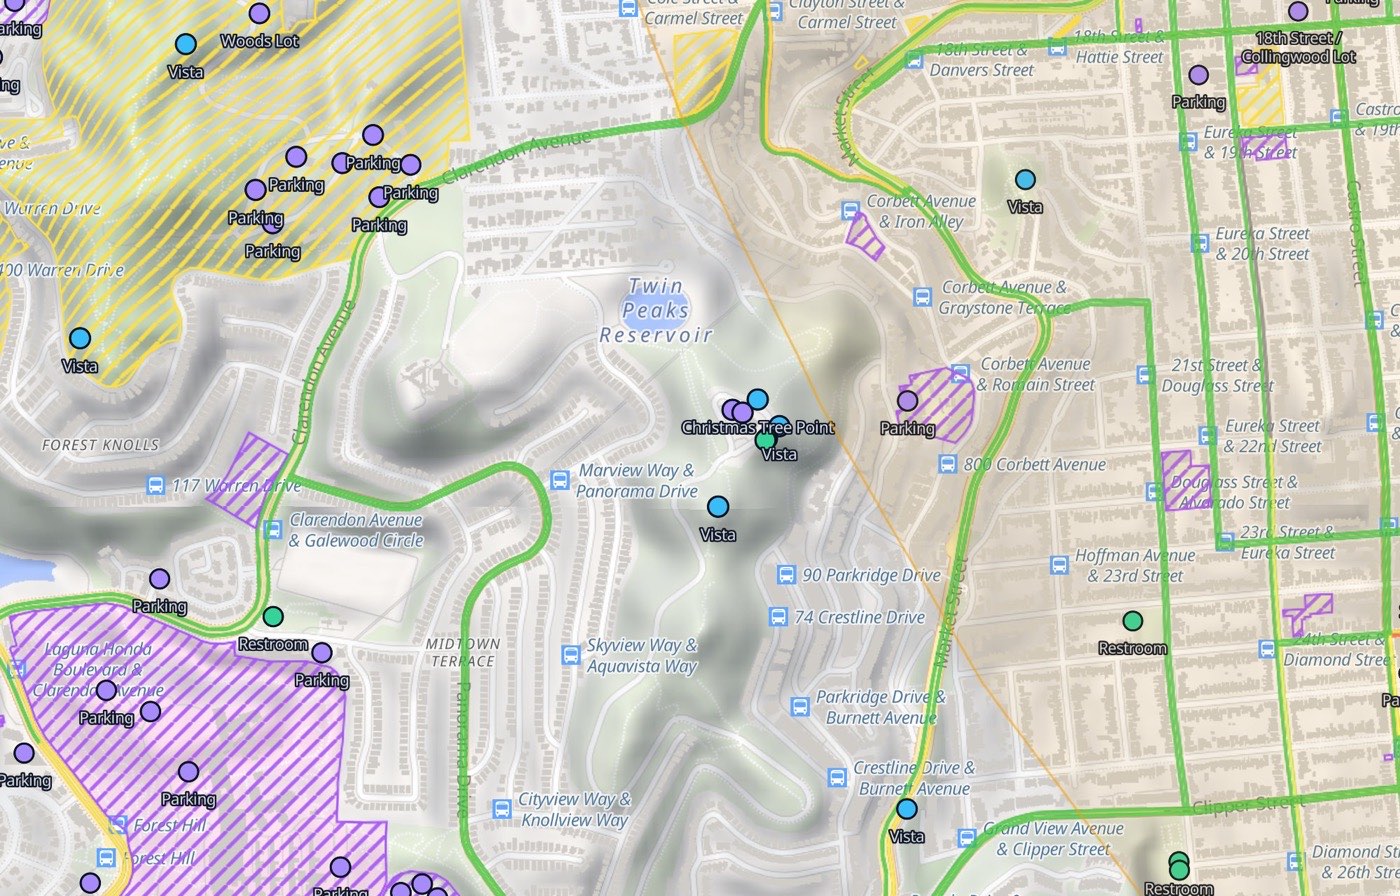
9.4 The legend
The legend explains what is drawn. It lists only the layers you have switched on, so it grows and shrinks with your choices:
- UASFM ceiling (ft AGL): the airspace grid's color scale, 0 to 400 ft.
- Ceiling over your point (only while a PIC point is set): the colors of the altitude number above your point. They grade the paperwork, not the altitude: no authorization needed, LAANC — approved in seconds, authorization, but not today — or unconfirmed, and 0 for no-fly without an FAA waiver. The sample number is shown in your altitude unit. This is the one thing on the map that shares a palette with nothing else, so it is spelled out under the grid's scale where the two can't be confused.
- One row each for TFRs, cloud cover, traffic, crime, parks, restricted zones (plus State-law buffer around a prison for the dashed outline), stadiums, wildfire / smoke / volcano and helicopter pads.
- Community spots · avg rating: the heart colors for 1★ to 5★.
- The points of interest you have on, with their dots.
- A scale bar in your distance unit.
The sun ray, the wind arrows, your own spots and trip stops have no legend row: they are explained in the chapters about them.
On a tablet the legend is a box in the bottom-left corner of the map. It is open at every launch; its ✕ folds it into a small Legend button, and pressing that brings it back. While the Settings drawer is open the box moves right, so the drawer never covers it.
10 Settings
Settings holds everything that is yours to choose: your account and plan, your Homes and drones, what the map draws, what the brief leads with, your units, your taste in light, and the way to reach us.
Where it is. Settings is the left drawer, 280–360 px wide depending on the screen. When it is shut only a narrow grip shows at the left edge. Press the grip to open or close it, or drag it; a drag past halfway opens or closes it fully. In landscape, Settings and the flight brief can be open at the same time; in portrait, opening one closes the other, and turning the tablet to portrait with both open closes Settings. Tablets have no Settings button in the top bar: the grip is the way in.
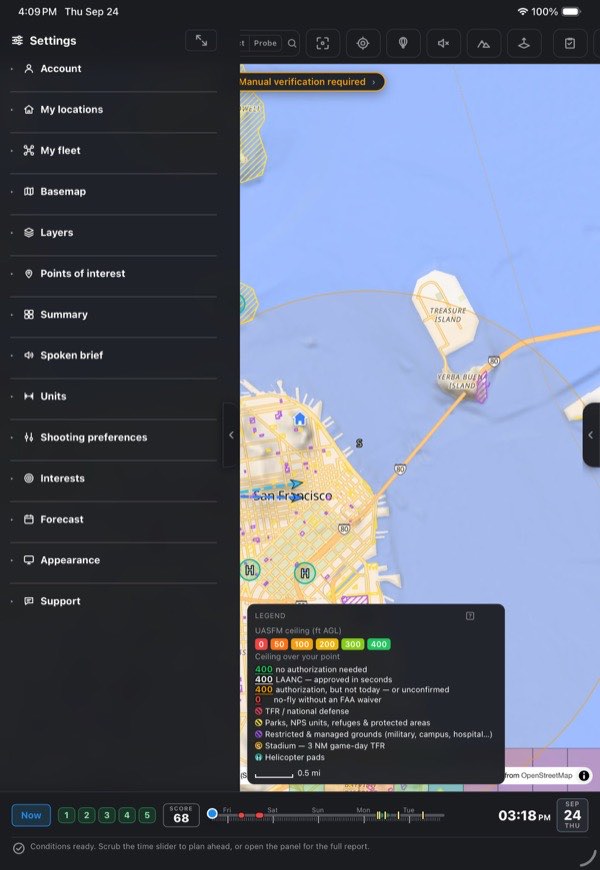
Sections start closed. Only the headings show; press a heading to open or close that section. The button to the right of the Settings title opens or closes all of them at once: arrows pointing outward mean Expand all sections, arrows pointing inward mean Collapse all sections.
Plan pills. A Hobby or Pro pill on a heading or a row means that part needs a plan above yours. It appears only when your plan is below it, and pressing it opens the plans.
What is stored where. Your settings (everything below Account), your Homes and your fleet are kept on this device: a new phone, tablet or browser starts with its own. Your plan, your saved spots and your saved routes belong to your account and follow you to every device you sign in on.
The sections, top to bottom:
- Account
- My locations
- My fleet
- Basemap
- Layers
- Points of interest
- Summary
- Spoken brief
- Units
- Shooting preferences
- Interests (Pro only; not in the list on other plans)
- Forecast
- Appearance
- Timeline (phone only)
- Support
10.1 Account
The top line shows the email you are signed in with, and Sign out beside it. An Apple Hide My Email address is not shown: you see your name instead, or Apple ID (email hidden).
Signs in with … names the ways you can sign in to this account: Google, Apple, or Google and Apple. Next to it, Add Google or Add Apple adds the one you don't have yet, on every device.
Adding a way to sign in joins it to this account, so an account you made with Google can also be opened with Apple (or the other way round) without becoming two accounts. The iOS and Android apps also offer the joining at sign-in: when a sign-in would start a brand-new account (for example, Apple's Hide My Email gave a different address), they ask Merge with your other account?, and you sign in the way you did before.
The plan line. On a paid plan it reads FlyDrone Hobby or FlyDrone Pro, followed by a date and what happens on it:
| The line says | Meaning |
|---|---|
| renews date | The subscription renews on that date |
| trial ends date | You are in a free trial; the first charge is on that date |
| cancels date | You have cancelled; the plan stays until that date, then you are on Free |
| → Hobby date | You have switched from Pro to Hobby; Pro stays until that date |
Under it are the controls, which depend on where the plan was bought:
- Bought on the web (flydrone.app, paid through Stripe) and you are in a browser: Change plan opens the plans, and Manage opens Stripe's billing page, where you change the card, see invoices or cancel.
- Bought in the iOS or Android app (through the App Store or Google Play) and you are in the app: Change plan opens the plans, and Manage opens the store's own subscription screen, where you cancel or change payment.
- Bought on the other side: no buttons, just a line saying where to go, Manage in the App Store or Google Play (in a browser) or Manage on flydrone.app (in the app). A plan is managed only where it was paid for, but it unlocks every device you sign in on either way.
On Free the line reads Free plan with an Upgrade button that opens the plans. See Plans, limits and budgets for what each plan includes.
Reset all settings. The row reads Start over with the default settings. Pressing Reset all settings first shows what it will do:
This puts the map, layers, points of interest, summary, spoken brief, units, shooting preferences, interests, forecast, appearance and timeline back to their defaults, on this device only. Your locations, fleet, saved spots and routes stay as they are.
Keep settings backs out; Reset settings does it, and the row then says Settings are back to their defaults. In detail:
- The basemap goes back to Terrain, the layers and points of interest to their starting switches, the Summary tiles and the Spoken brief settings to their defaults, the Shooting preferences sliders to the middle (and 3 h), the forecast to its defaults, text size to Standard, and your Interests list is emptied.
- The Spoken brief mode (the lit speaker) is switched off.
- Units go back to the ones for Home 1's country: US units in the US or with no Home set, metric elsewhere. From then on they follow Home 1 again until you change one.
- If your theme was Navy, the page reloads in Gray.
- Staying as they are: your Homes, your fleet, your saved spots, your saved routes, the Trip planner's settings, and the Desired camera values and movement style you chose in the flight brief.
It affects this device only, because that is where settings live.
Delete account. The row reads Delete your account and its data. Pressing Delete account shows a confirmation: This permanently deletes your account, saved spots, routes and settings on every device. Keep account backs out; Delete permanently does it. Your contributions to the community layer and any messages you sent to Support are removed too, and the app signs you out. In a browser you are asked to sign in once more to confirm it is you; in the apps, only if you signed in more than a few minutes ago. Close that sign-in window and the deletion stops with Sign-in was cancelled, so nothing was deleted. If Sign in with Apple is one of your sign-in methods, the confirmation adds Apple asks you to confirm, and FlyDrone is disconnected from your Apple ID. Apple's sign-in then comes up every time, however recent your session: deleting the account also disconnects FlyDrone from your Apple ID, so it leaves the Sign in with Apple list in your Apple ID settings. If that step fails, the deletion stops with Couldn't disconnect Sign in with Apple, so nothing was deleted. Please try again. A deletion that fails for any other reason says so, for example Couldn't delete the account right now. Your account still exists — please try again., or Couldn't reach FlyDrone. Check your connection and try again. when you're offline.
Cancel an App Store or Google Play subscription in the store first. Deleting the account does not stop a subscription bought in the iOS or Android app: it is a contract with Apple or Google, and it keeps renewing until you cancel it in the store's subscription settings. The confirmation says so when that applies. A subscription bought on flydrone.app is different: it is cancelled immediately when the account is deleted.
10.2 Pilot category
Recreational | Part 107, the same switch as the first Summary tile; the two always show the same answer, and it follows your account to every device. You answer it first on the agreement screen. An account made before the question existed starts on Part 107 if it holds a Hobby or Pro plan, and with neither half lit otherwise.
The category belongs to the flight, not to your certificate: a Part 107 pilot flying for fun flies under 49 USC 44809. What it changes:
- The ceiling beside a structure. The structure exception (14 CFR 107.51(b)) is Part 107 only. A recreational flight stops at 400 ft AGL in uncontrolled airspace, whatever stands next to it.
- LAANC. A recreational flight gets instant LAANC where the grid square is enabled for 44809 flyers, and goes through FAA DroneZone where LAANC covers Part 107 only.
- The checklist asks for the TRUST completion certificate instead of the Part 107 Remote Pilot Certificate.
- Clouds. The 500 ft cloud clearance stays for both; for a recreational flight the line calls it safe practice rather than citing Part 107.
- Prisons. Six states exempt commercial or FAA-authorized flights from their prison drone law. As Part 107 those prisons are a note in the verdict; as recreational, Iowa and Delaware are a no-fly (see Restricted zones).
Not set reads every rule the strictest way: no structure exception, LAANC read as for Part 107, and no prison-law exemption. Where a structure would lift the ceiling, the shot planner and the Altitude explorer say so: Flying under Part 107? Set your pilot category to use the structure exception here…
10.3 My locations
The two Homes. Each row shows the Home's address (or its coordinates, if the place has no address), then two buttons:
- Locate reads your device's position once and writes it into that Home, then flies the map there. While it works it reads Locating…. If the position can't be read, a line says Couldn't read your location — check the location permission and try again.
- Map arms a one-tap pick: the button reads Tap the map…, Settings and the flight brief get out of the way, and your next tap on the map sets that Home. Press the button again to cancel.
Pressing the address flies the map to that Home and closes Settings (on a phone or tablet the drawer slides away).
Home 1 is where your day starts: drive times, the Spot finder and the Trip planner all run from it. It is filled in once from your position the very first time the app opens, and after that it moves only when you move it: with Locate, with Map, or with the search bar's Home target. Its country also decides your default units and the names of the point-of-interest kinds.
Home 2 Pro is an optional destination: set it and a shooting day runs one-way, Home 1 → stops → Home 2, instead of returning home. Its row has the same Locate and Map buttons, plus a ✕ that clears it, so trips become round trips from Home 1 again. Below Pro the row just says one-way trips with a Pro pill.
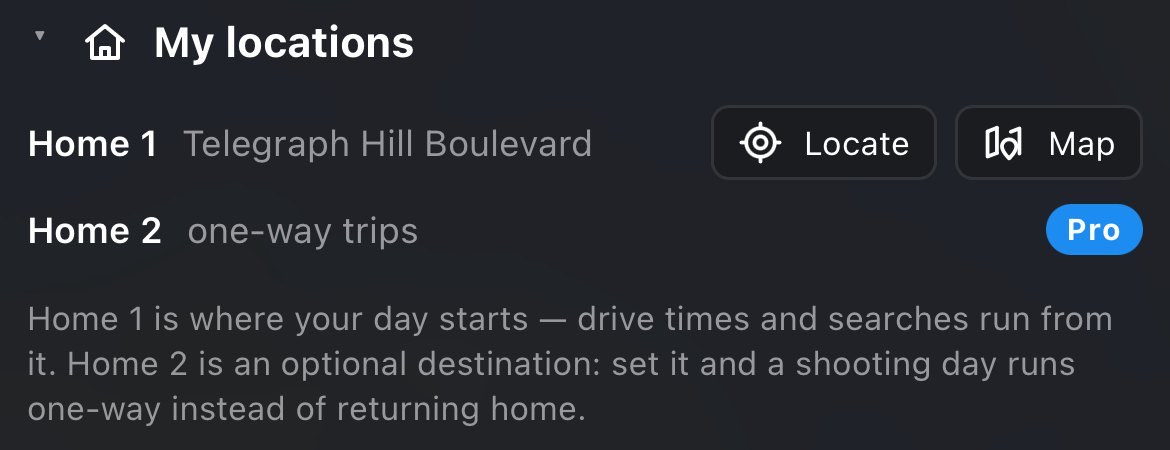
10.4 My fleet
The drones you own, and the one you are flying. The drone you pick is the one everything is judged for: its rated wind limit drives the verdict, the timeline and the recommended windows, and its size sets the visual line-of-sight range the Shot planner frames within.
- With no fleet yet, the section shows a list of every supported drone. Pick yours and it is saved as your fleet.
- Each drone is a row: a dot, the name, and a dimmer line such as wind limit 23.9 mph · VLOS 0.3 mi (in your units). Press a row to fly that drone; the lit dot marks the active one.
- ▲ / ▼ move a drone up or down the list (put the one you use most at the top); ✕ removes it from the fleet.
- + Add a drone… is a list of the drones not yet in your fleet. It is there while you have room for another.
- Lens appears under the list only when the active drone has more than one camera (a Mavic 3 Pro, for example). Pick the camera you'll shoot with; the Shot planner and the Camera settings section use it. Switching drones goes back to its first camera.
Everyone gets one drone; Pro keeps up to ten. On Free and Hobby the fleet holds one, and under it a note says Fly more than one drone? Keep the whole fleet (and reorder it) with Pro. with an Upgrade button. To change your one drone, remove it with ✕; the list of all drones comes back and you pick the new one. With two or more drones (Pro), the verdict also tells you which of your drones the wind allows.
The flight brief shows which drone is being judged, with a Change link that opens Settings straight at My fleet. See Which aircraft the verdict is for.
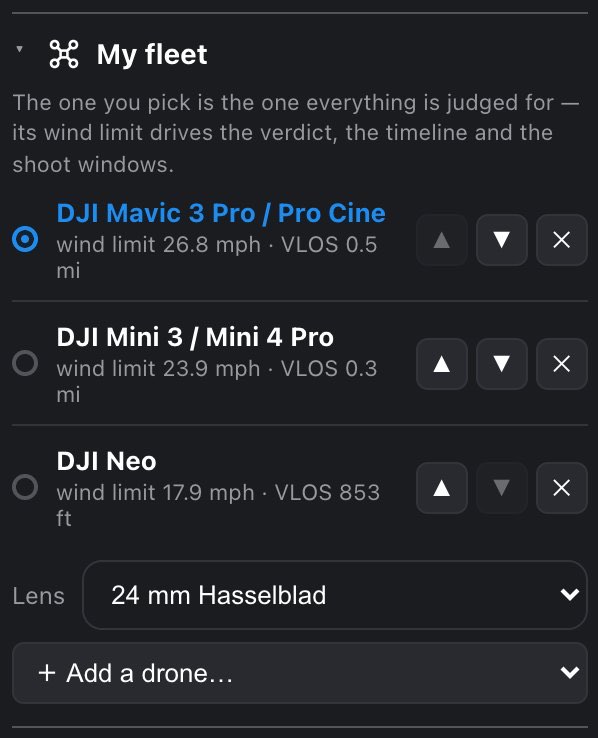
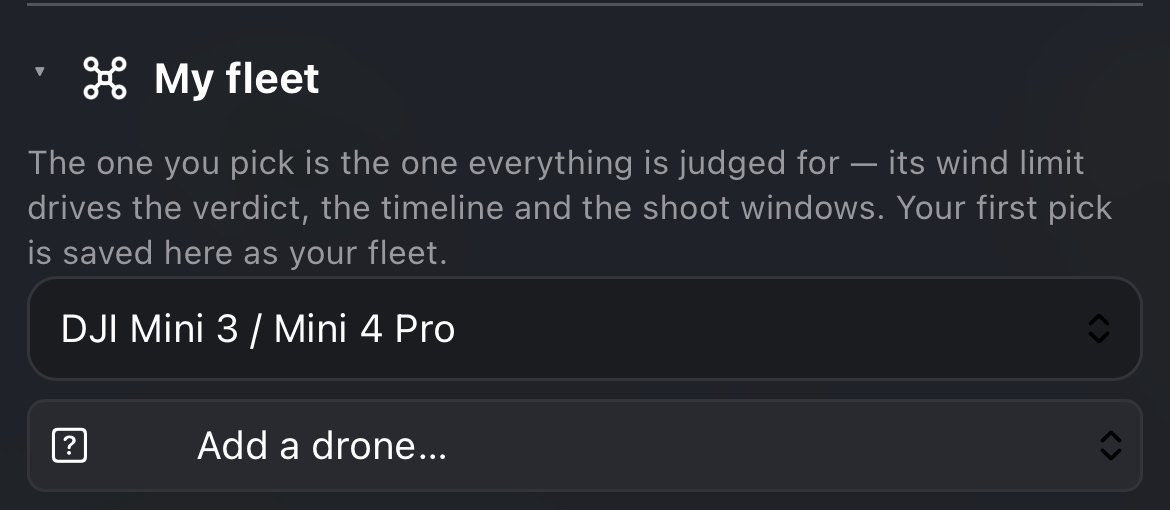
10.5 Basemap
Three buttons: Map, Satellite and Terrain.
- Map: the plain street map. Clearest for streets, labels and context.
- Satellite: aerial imagery with place names over it, for what the ground actually looks like.
- Terrain: the street map with shaded relief. A new install starts here. With Terrain chosen the section adds Shaded relief; tilt the map to see it in 3D. Tilt the map and the relief becomes 3D.
The basemap button in the top bar cycles the same three in the same order (Map → Satellite → Terrain).
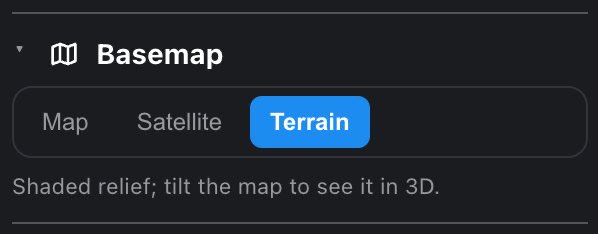
10.6 Layers and Points of interest
The two lists of map switches. See Layers and points of interest for every switch, what it draws and when it starts on.
10.7 Summary
Which figures the Summary block at the top of the flight brief shows as tiles, two to a row. Tick the ones you want; the note under the list counts them, for example 7 of 10 shown.
- Seventeen figures to choose from: Pilot, Next window, Ceiling, TFR, Wind, Clouds, Visibility, Precipitation, Temperature, Dew spread, UV index, Air quality, Sunset, Golden hour, Sun position, GPS and ND filter. On Free, ND filter is not offered (Free has no exposure data behind it), so there are sixteen.
- Up to ten. Once ten are ticked, the other boxes go gray and the note says untick one to add another.
- With none ticked, the Summary shows the verdict only.
- The order is the brief's, not the order you ticked: the pilot category first, then airspace, then weather, then light, then the aircraft's readings.
- Starting tiles: Pilot, Next window, Ceiling, TFR, Wind, Clouds, Visibility and Sunset.
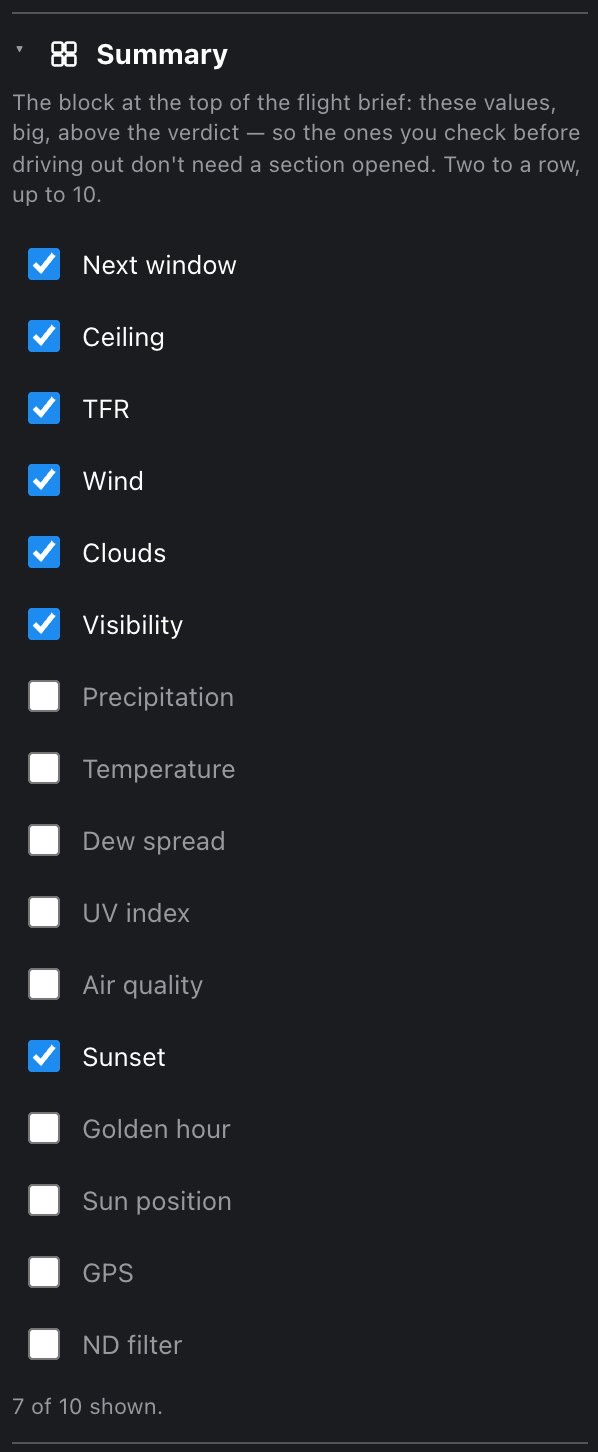
10.8 Spoken brief Pro
The voice (Female or Male), the reading speed (0.9× to 1.3×), Say why, not just the verdict, and the list of figures to read, with arrows to set their order and an estimate of how long the reading runs. You can set all of it on any plan, but the speaker that plays the brief needs Pro. See Spoken brief for how it works.
10.9 Units
| Row | Choices |
|---|---|
| Temperature | °F, °C |
| Wind speed | mph, m/s, km/h |
| Distance | miles, km |
| Altitude | feet, meters |
| Time format | 12h, 24h |
Defaults follow Home 1's country: in the US (or before any Home is set) °F, mph, miles, feet and 12h; everywhere else °C, km/h, km, meters and 24h. As soon as you change any one unit yourself, the app stops adjusting them for you. Reset all settings hands them back to the country default.
The distance unit also decides how rain amounts are written (in/h or mm/h). The FAA's own figures stay in feet in the airspace legend, because that is how the FAA publishes them.
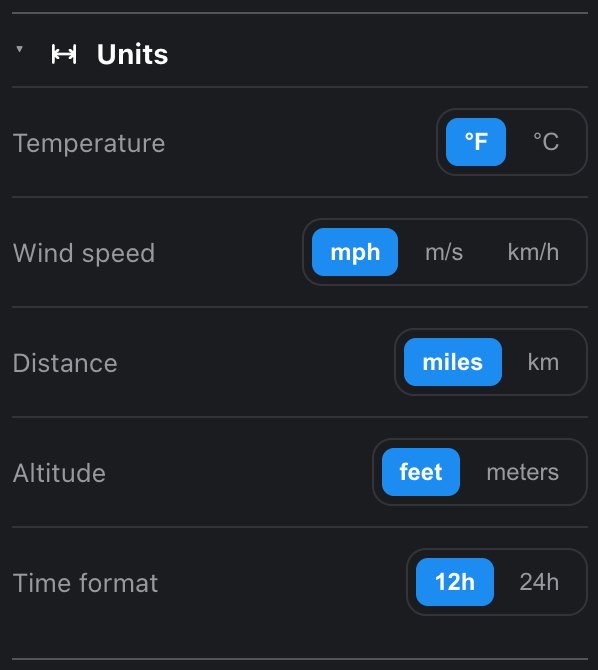
10.10 Shooting preferences
Four sliders that bias the recommended windows toward your taste. They reweight the score of each hour; they never overrule a safety verdict.
| Slider | From — middle — to | Starts |
|---|---|---|
| Light | Night — Golden — Day | Middle |
| Time of day | Morning — Anytime — Evening | Middle |
| Sky | Cloudy — Sunny | Middle |
| Max window length | 1 h to 10 h | 3 h |
The longest-window slider caps how long one recommended window may grow, so "when is best" stays pointed instead of smearing over six hours. See Best windows for how the score and the windows are built.
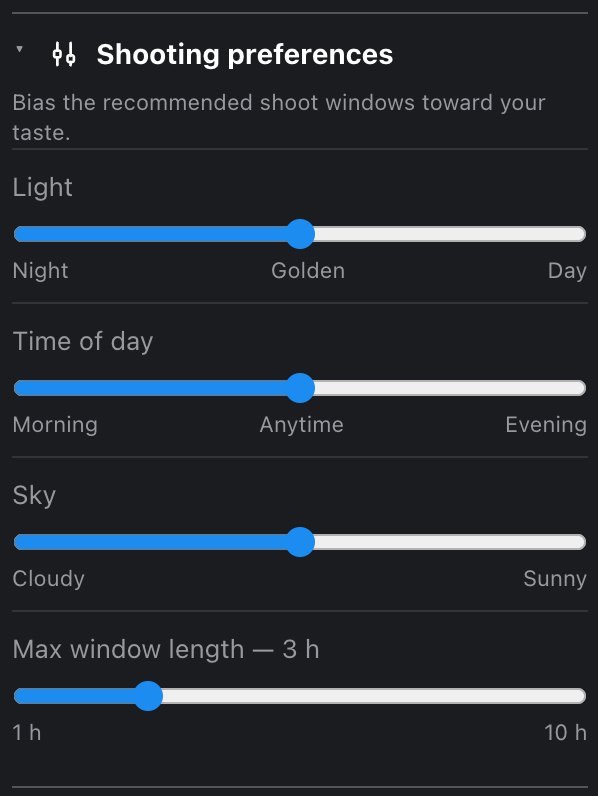
10.11 Interests Pro
What the Spot finder scouts for, most important first: lighthouses, waterfalls, bridges, abandoned places. This section exists only on Pro; on other plans it is not in the list.
- Type an interest into Add an interest… and press Enter or +. Each one can be up to 40 characters; the same interest twice is ignored.
- Up to 10 interests. At ten, the input disappears.
- Each interest is a chip with × to remove it.
- Order matters: the Spot finder treats the first as the most important. There is no drag to reorder, so to move one to the end, remove it and add it again.
See Spot finder.
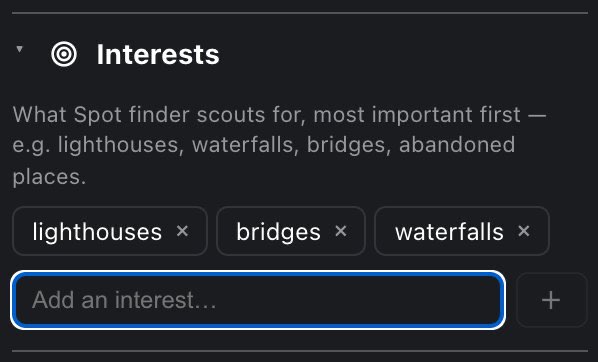
10.12 Forecast
How far ahead the app plans, and how many recommended windows it shows.
- Free: the section reads Planning horizon: 24 hours with a link, Upgrade for a longer forecast →. Free shows one recommended window.
- Hobby: Planning horizon: 48 hours and Upgrade to Pro for up to 7-day forecasts →. Hobby shows three windows.
- Pro: two rows of buttons. Plan ahead: 2d to 7d (starts at 5d). Recommended windows: 3, 4 or 5 (starts at 5).
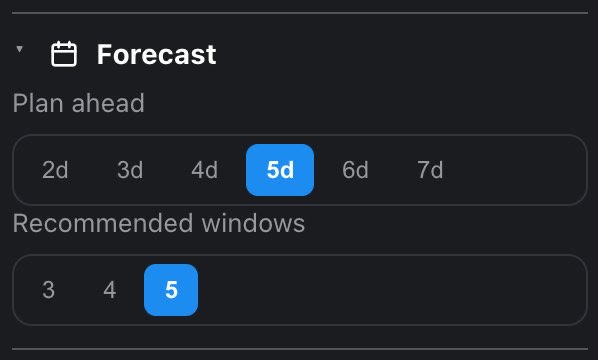
10.13 Appearance
- Theme: Gray (the default) or Navy. Both show the same sections in the same order, opened and closed the same way, so switching never rearranges anything: Gray separates sections with a thin line, Navy draws each as a card. Switching reloads the app, because the map's colors are fixed when it loads and a half-repainted screen would be worse than a blink.
- Text size: Standard or Large. Large makes the panels' text bigger (the map and this guide stay as they are), for bright sun and gloves. It applies at once, with no reload.
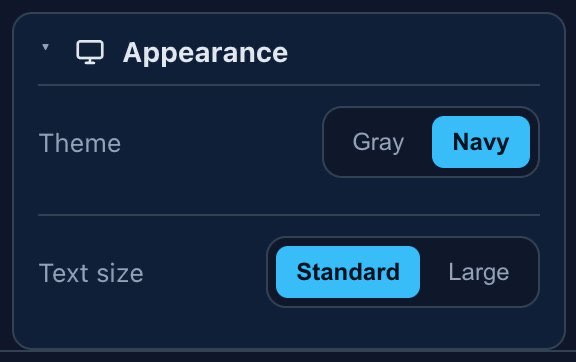
10.14 Timeline
On a phone only: both belong to the timeline at the bottom of the map.
- Time bubble while dragging (on at first): the bubble above the slider that repeats the day, date, time and score while your finger covers the clock.
- Haptic clicks (on at first): a light click under your finger on the barrel, where something changes on the slider, and when a hold on the clock starts shuttle. In the Android app it is the phone's own click, so it stays silent if the phone's touch feedback is off. Safari on iPhone can't vibrate.
Both are kept on this device. Reset all settings turns both back on.
10.15 Support
The last section, and not a setting: the way to write to us.
- Pick what it is: Bug, Idea, Account or Other. Account is for sign-in, your plan, membership or a payment. The hint in the message box changes to match (for a bug: What happened, and what did you expect? Steps to repeat it help most.).
- Write the message, up to 5,000 characters.
- If a PIC point is set, a box Include my current PIC appears, with the point's coordinates. Tick it for anything that happens at one place; leave it off and the location is not sent. With no point set, the box isn't there.
- Press Send.
Under the box the form says what goes along with every message: app version, device type, your plan, browser and screen size. It also shows the email the reply will go to: We'll reply to …, your account's email. If the account has no email address, the form says so and Send stays off.
After sending, the form reads Thanks — it's sent. We'll reply to … with a Write another button. If it can't be sent, your text stays in the box and a line says why: Couldn't reach FlyDrone. Check your connection and try again. when you're offline, otherwise the server's reason or Couldn't send your message. Please try again. The message goes to support@flydrone.app and the answer comes to your email. You can send five messages a day; the count resets at 00:00 UTC.
A half-written message survives closing the section or Settings, but not closing or reloading the app.
11 My spots and the community layer
My spots and the community: saving a spot, its score and distance, sorting and moving spots, names and notes, and the anonymous community layer of where other pilots save theirs.
My spots is your list of saved places. It is a section of the flight brief, at the bottom, and it is also in the empty brief before any point is set, so a saved spot is always one tap away.
To save a spot, set a PIC point, open My spots in the flight brief and press Save current spot. The section names the place above the button (This spot and its address). Once saved, the button reads In My spots and does nothing more; removing is done in the list, next to the spot. A new spot starts with 5 stars; change them with the Rating stars beside the button or in the list. Tapping the lit top star clears the rating to 0.
How many: 5 spots on Free, 20 on Hobby, unlimited on Pro. The list's first line counts them (3 / 5 saved). Saving one more at the cap opens the plans instead.
Your spots belong to your account: they appear on every device you sign in on. Opening a saved spot never counts against the daily limit of new spots.
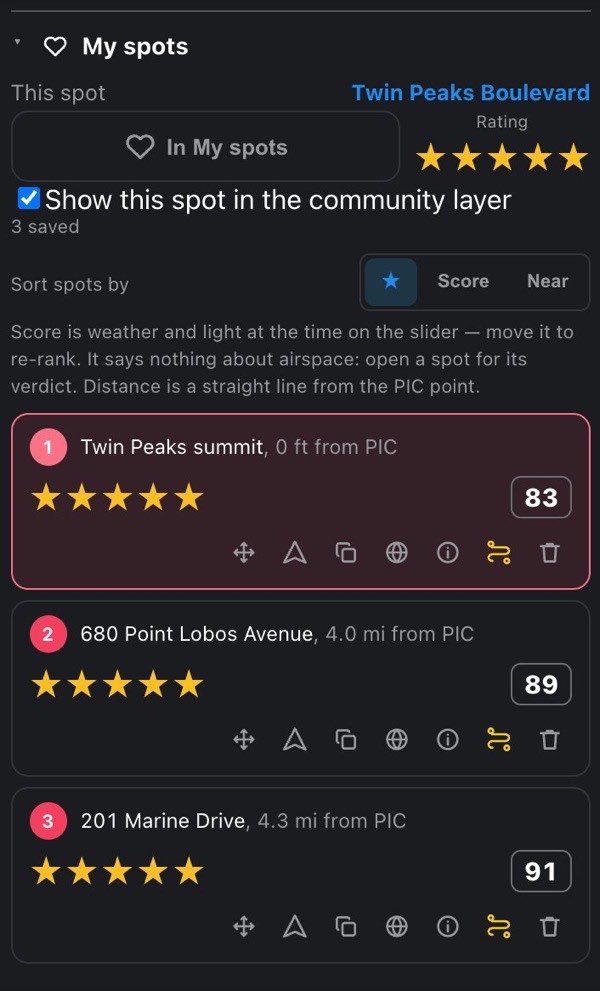
11.1 A row, line by line
Each saved spot is a row of three lines.
- Who it is. A small number, then the spot's name (or its address, or its coordinates when there is neither), then, dimmer, how far it is and from what: , 3.2 mi from PIC or , 3.2 mi from Home.
- What it's worth. Your stars on the left, and on the right the conditions score for the time on the timeline, or — when there is no score.
- What you can do, in this order:
| Button | What it does |
|---|---|
| Four arrows (move) | Moves the spot to a new place. See Moving a saved spot |
| Arrowhead (directions) | Opens Google Maps directions to the spot, in a new tab or your maps app |
| Two squares (copy) | Copies the coordinates, as 37.123456, -122.123456. Nothing on screen confirms it |
| Globe / lock Pro | Public or private. Globe: the spot feeds the community layer; lock: only you see it. Press to switch |
| Circled i (properties) | Opens the spot's name and description. See Spot properties |
| Route (a path with stops) | Adds the spot to the Trip planner's route, or removes it if it's already there (the button is lit then). Shown on every plan; below Pro it opens the plans. The route holds at most 7 stops; when it's full the button is off |
| Bin (remove) | Deletes the spot from My spots, at once, with no confirmation |
The number on the left is the order in which you saved the spots, and it is the same number the spot's heart carries on the map, so a row and a heart always match whatever order the list is sorted in. Removing a spot renumbers the ones saved after it.
Tapping a row (anywhere outside its buttons) makes that spot the PIC point and centers the map on it, so the whole brief is about it. The brief drawer slides away so you can see the spot. While it is the PIC point, the spot wears the PIC marker on the map instead of its heart.
On the map, each saved spot is a red heart with its number. Tapping a heart makes it the PIC point. The small × on the heart's corner deletes the spot, also without confirmation. A spot that is a stop on your trip route wears the yellow trip stop instead of a heart while Trip stops is on.
11.2 Score, distance and sorting
The conditions score is weather and light at the time on the timeline, scored the same way as the timeline itself and against the drone you are flying. Move the timeline and the scores update without new requests: one request already holds the whole forecast for every spot. With no PIC point set there is no timeline to move, and the scores are for the planned time.
The distance is a straight line, measured from the PIC point when one is set and from Home 1 otherwise. The row says which.
Sort spots by three buttons (your choice is remembered):
- ★: your rating, highest first (the starting sort).
- Score: conditions score, highest first.
- Near: distance, nearest first.
Spots with the same value keep the order you saved them in. A spot with no score or no distance goes to the bottom rather than counting as zero.
The score is weather and light only. It is not a verdict. Airspace, TFRs, parks and restricted zones are checked for one spot at a time and can't be checked for a whole list at once. A high-scoring spot can still be illegal to fly: tap the row to make it the PIC point and read its real verdict.
On a long list, only the nearest spots are scored: 100 with a forecast of up to 3 days, 50 with a longer one. The note above the list says so (Only the 100 nearest are scored.), and the others show —, which means not scored, not bad. If the conditions can't be loaded at all, the note says the scores are missing, not zero, and the app tries again a little later.
11.3 Moving a saved spot
The move button (four arrows) relocates a saved spot and keeps everything else about it: its stars, name, description and whether it is public.
- Select the spot first. Moving works on the spot you are looking at, so that nothing ends up somewhere you didn't see. If the row isn't the PIC point yet, the first press on move just selects it (the same as tapping the row), and the brief drawer slides away; open it again.
- Press move on the selected row. The button lights up, the brief drawer slides away.
- Tap the new place on the map. The spot moves there, the PIC point moves with it, and the address updates on its own.
Pressing the lit move button again cancels. So does arming another map pick (a Home, the Shot planner's subject, the probe) or deleting the spot. A tap on top of another saved spot is ignored and the move stays armed; tap a clear place.
If the spot is also a stop on your trip route, the stop moves with it, and a calculated schedule is cleared, because the route it was priced on no longer exists.
11.4 Spot properties
The circled i button opens Spot properties, a small dialog over the screen. The same button is on every row of My spots and of the Trip planner's stop list.
- Name: up to 60 characters. Empty, it shows the address (or coordinates) as a gray hint.
- Description: up to 500 characters, with the hint Why is this spot worth shooting?
- Address (when the place has one) and Coordinates, with copy and directions buttons beside the coordinates.
- For a Trip planner stop in a calculated day: Verdict at its slot, the verdict at the time the schedule puts you there.
There is no Save button: your edits are kept when you leave a field and when you close the dialog (the ✕, or a tap outside it).
Lists show a spot as name → address → coordinates, whichever exists first. Spots added from the Spot finder arrive with an AI-written name (the parking area to launch from) and a description of the subject and why it's worth shooting; both are yours to edit.
A saved spot and a trip stop at the same place are separate records: editing the name in My spots does not change the stop's name, and the other way round.
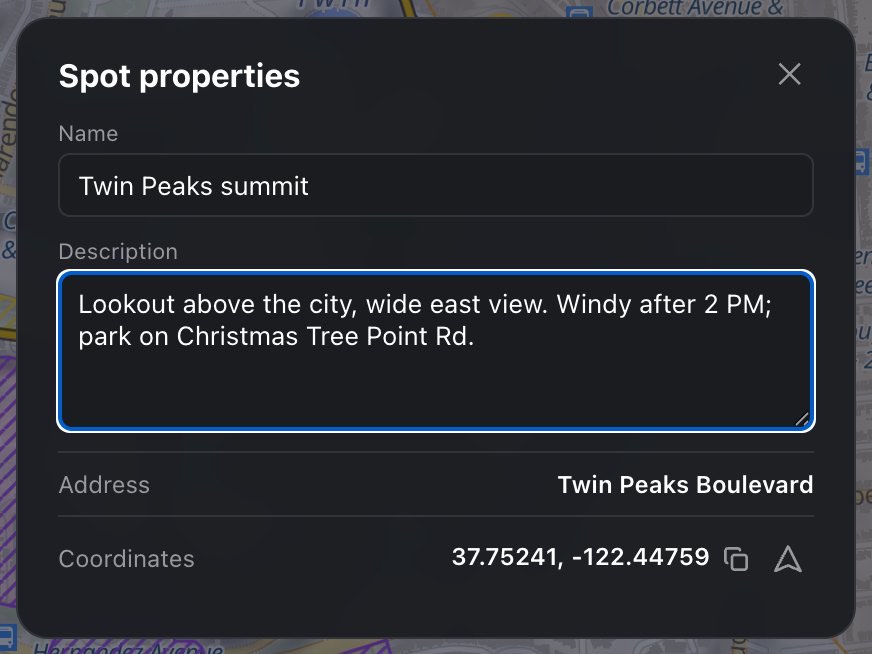
11.5 The community layer Hobby
The Community spots layer shows where other pilots save spots. Switch it on in Settings → Layers (the row appears on Hobby and Pro).
What you see. Hearts, each one an area of about 150 m where pilots have saved spots, colored by their average rating:
| Heart | Average rating |
|---|---|
| Near-black | 1★ |
| Dark blue | 2★ |
| Blue | 3★ |
| Light blue | 4★ |
| White | 5★ |
| Gray | Unrated (0★) |
Zoom in to see it. The layer loads only at zoom 12 or closer (a few miles across the screen). Zoomed out further the hearts disappear, with no message.
How it stays anonymous.
- Nobody's exact coordinates are shared. Each public spot is reported as the ~150 m cell it falls in, never the point itself.
- A cell appears only once at least two different pilots have a public spot in it. One pilot's spot alone is never shown to anyone.
- Several of your spots in one cell count once, at your best rating.
- At most 50 public spots per account feed the layer.
- Deleting your account removes your contributions.
Public or private. Every saved spot is public by default and feeds the layer, on every plan. Pro can keep any spot private: the globe / lock button on its row, or Show this spot in the community layer under the save button in the brief's My spots section. If you had private spots on Pro and your plan drops below Pro, they stay private and show a small lock after their name; there is no switch for them any more below Pro.
12 Shot planner Pro
Shot planner: pick a subject and the app solves the framing: where the drone hovers, how high, what the camera sees, the ring of legal and sun-lit positions, and the ceiling that follows the drone.
Plan the shot, not just the flight. Pick a subject and the app solves the framing: where the drone has to hover, how high, what the camera sees from there, and whether that spot is legal and well lit.
The Shot planner section sits in the flight brief, after the Hobby sections, and appears once a PIC point is set — every distance it gives is measured from that point. Below Pro the section shows one line about what it does; press Pro on its heading for the plans.
12.1 Set up the shot
Check the aircraft. The section's first row, Drone, names the aircraft and — for a drone with more than one camera — the lens, as in DJI Mavic 3 Pro · 70 mm. It is read-only here. Both are chosen in Settings → My fleet: the active drone, and the Lens picker under it, which only appears for a multi-camera drone.
Pick the subject. Press Pick subject on map — the button lights up and reads Now tap the subject on the map… — then tap what the camera will point at: a house, a lighthouse, a bridge. Pressing the lit button again cancels.
Arming the pick closes the side drawers so the map is yours; the next tap on the map is the subject, not a new PIC point.
The other way in is the search bar's Subject target (the placeholder reads Set subject by address…). It is disabled until a PIC point exists.
Wait for the building. The subject lands at once as a red dot; a dashed ring spins around it while OpenStreetMap is asked for the building under the tap (or within about 20 m of it), and the section's Subject row reads Looking up…. When the answer arrives the row shows the building's name, or Custom point when it has none, and the section heading gets a green Subject set badge.
Check the size. Two fields, Width, ft and Height, ft (or m, following your altitude unit), fill in from the building:
- Width is the footprint's longest span. The footprint itself is outlined on the map.
- Height fills in only when OpenStreetMap tags a height or a number of levels. Otherwise it shows ? — type it in if you know it.
Both fields are editable. With no footprint, two sliders appear under them for quick adjusting: Width from 1 to 200 m (3 to 650 ft) and Height from 0 to 150 m (0 to 500 ft). A subject without a footprint is drawn on the map as a dotted circle of that width.
Frame it. Two sliders set the shot:
- Fill of frame — N%, from 10 % to 90 %: how much of the frame's width (or height, whichever is tighter) the subject should fill.
- Camera tilt — N° down, from 5° to 90°. From 88° up it reads (top-down). More tilt puts the drone higher and closer for the same framing.
If no building is found, the section says No building found here — enter the subject's width to plan the shot. If OpenStreetMap could not be reached it says Couldn't check the map for a building here — enter the subject's width, or re-pick the subject to try again. The status line under the timeline repeats it (…open the panel and set its width…). Nothing is planned until there is a width.
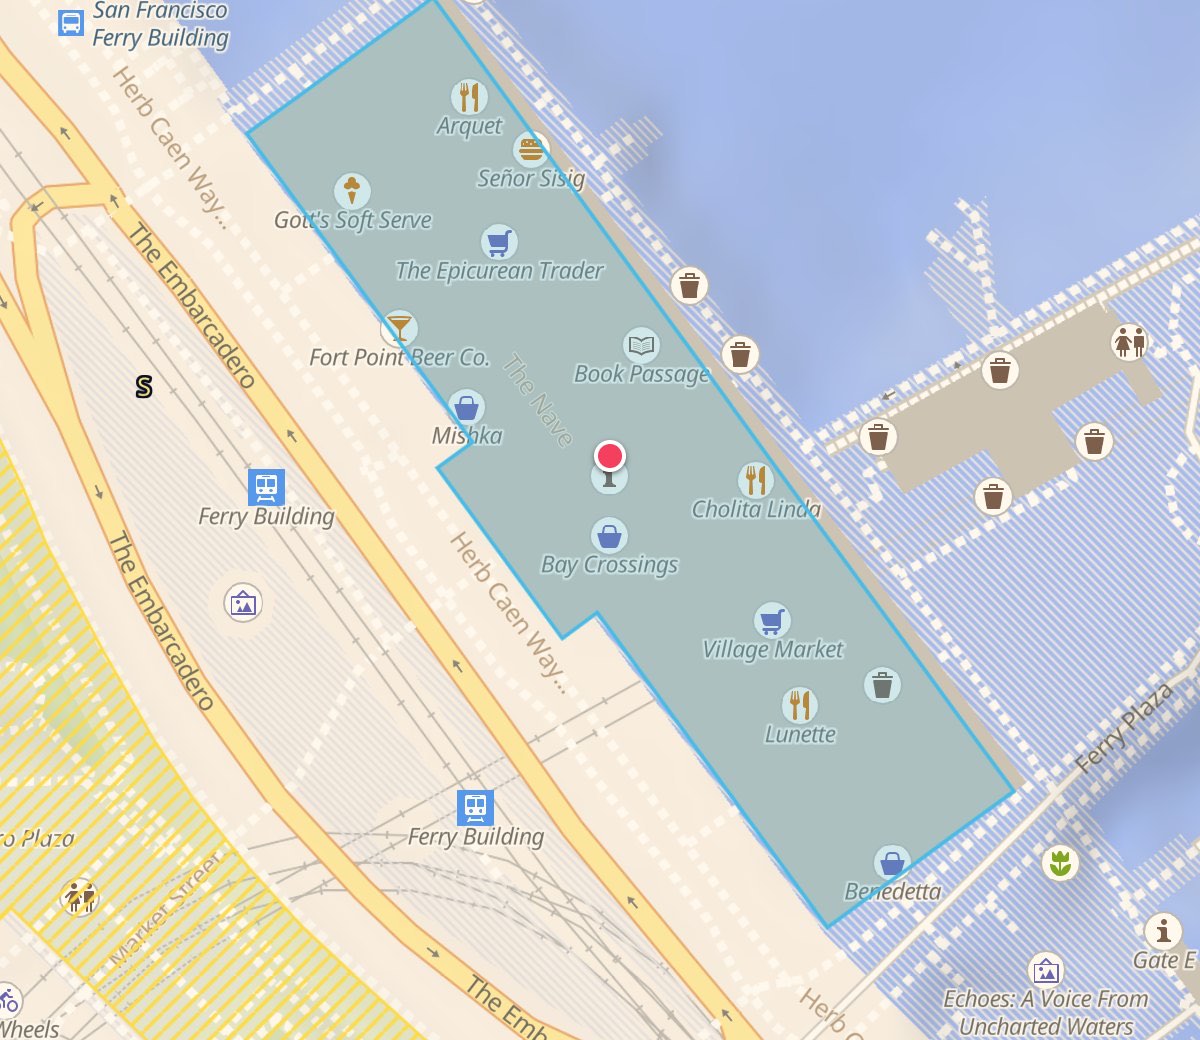
12.2 What the section shows
Once the subject has a width, the section fills in, top to bottom:
- The frame preview — a 16:9 picture of the shot. A subject with an OSM footprint is drawn as its real 3D shape, seen from the drone's spot and turning as the drone moves round; a custom point is a plain box. The faces are lit by the sun at the time on the slider, with the cast shadow; overcast flattens the light, and at night every face is one tone.
- Drone position on trajectory — N° (NE of subject) — a slider that moves the drone around the ring, 0–359°, marked N · E · S · W · N. Its track is the ring unrolled and wears the ring's colors, so you can find the legal, well-lit stretch without looking at the map.
- The numbers:
| Row | What it means |
|---|---|
| Distance to subject | The slant distance from the camera to the near face of the subject, at the subject's mid-height (the camera aims there) |
| Altitude | How high the drone must sit, shown with "AGL": the height from the tilt, plus half the subject's height |
| Pilot → drone (VLOS) | The real distance from the PIC point to the drone's spot. Green up to about 1000× your drone's diagonal, amber to about 2000×, red beyond that or beyond the forecast visibility. For a 250 mm Mini that is easy to ~250 m, hard to ~500 m |
| Distance from subject edge | The ring's radius, measured from the footprint's edge rather than its center |
| Frame width there | How much the frame covers across at that distance — the "will it fit" check |
| Ground resolution | cm per pixel (or inches per pixel with feet): whether the detail you want survives |
| Camera settings at drone position | A second exposure solve for where the camera actually points, from the drone's spot on the ring and the tilt. The ND advice follows the drone around the ring. Shown when the forecast has loaded |
| Light at this angle | front-lit, side light or into the sun, with the EV change against the front-lit exposure (for example side light · −0.6 EV). With the sun down: twilight sky · −x EV, or night — no directional light |
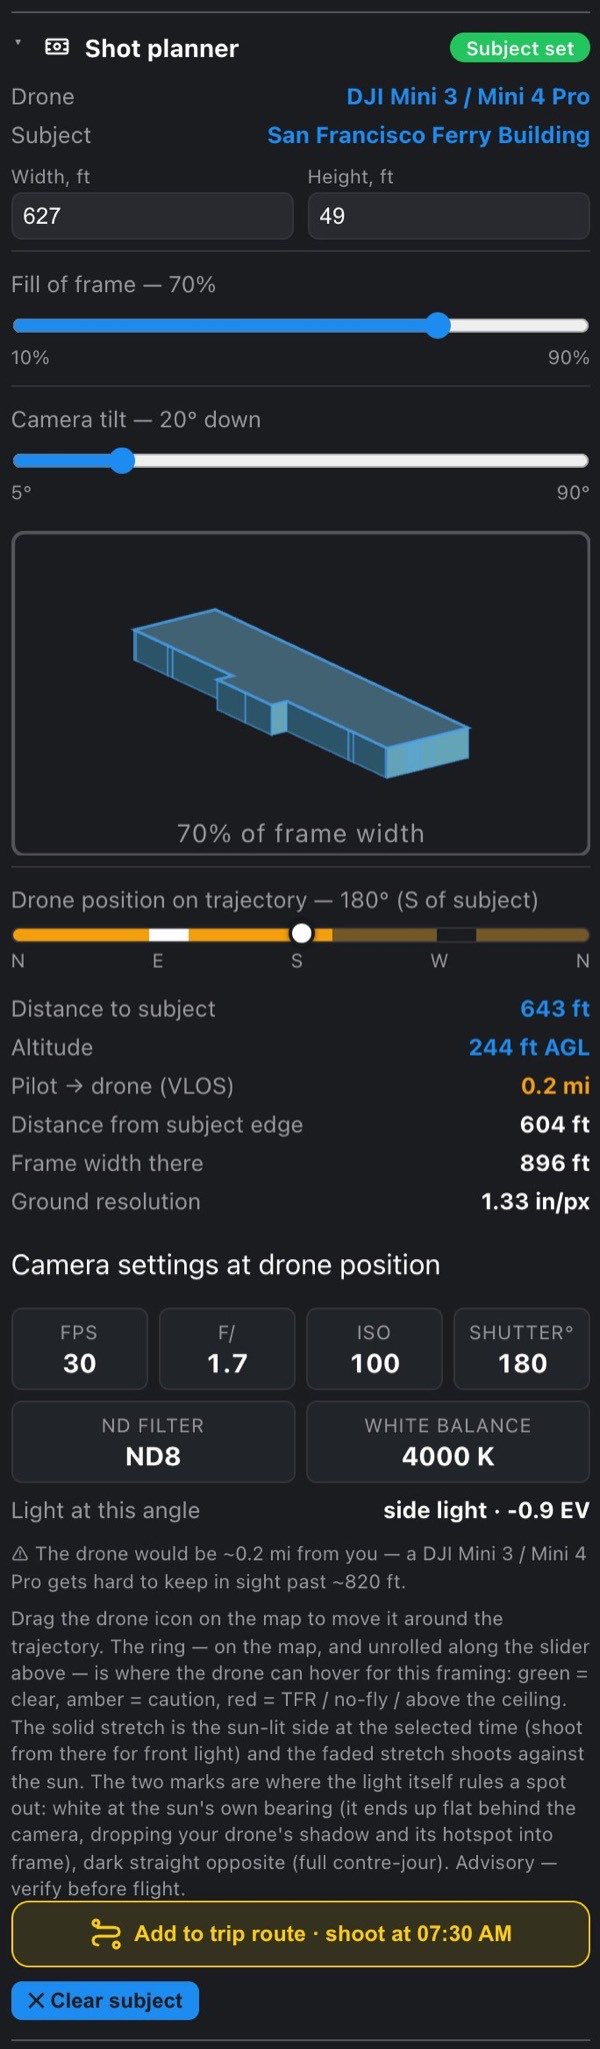
12.3 Reading the ring
The shooting ring on the map is every spot the drone could hover for this framing. It keeps the planned distance from the subject's edge, so around a big building it follows the facades instead of a circle through them. It carries four messages at once:
- Color — legality at that spot on the ring,
not at the launch point:
- Green — clear. Controlled airspace below its LAANC grid ceiling also stays green on the ring.
- Amber — a caution area: inside a mapped restricted-use zone, or within a stadium's 3 NM radius.
- Red — inside a TFR, a wildfire perimeter or a prohibited zone, or the altitude your framing needs is above the ceiling at that spot.
- Solid vs faded — the solid stretch is the sun-lit side: every position within 100° either side of the sun's bearing from the subject, side light included. The faded stretch shoots into the sun. With the sun below the horizon the whole ring is solid.
- The white arc — 12° either side of the sun's own bearing. Shooting from there puts the sun flat behind the camera: your drone's shadow and the bright hotspot around it land in frame.
- The dark arc — 12° either side of the opposite bearing: full contre-jour, a silhouette and flare unless that is the shot.
The two arcs are painted over the ring, on top of its legality color, and only while the sun is up.
Moving the drone. The drone marker sits on the ring.
Put a finger on it and swing it around the subject; the map does not pan while you drag. Or use the ring-position slider in the section. The brief is a drawer — close it to see the whole ring, and pull it back with the right-edge grip for the numbers.
A thin line runs from the PIC point to the drone, labeled with its distance — the same VLOS number as in the section.
The sun path. With the Sun ray layer on and the time slider inside one of the recommended windows, the map also draws a fan from the PIC point: seven rays across the window, from its start to its end, fading in from 15 % to 70 % opacity — the faintest is the window's start. That is where the light travels while you shoot, which decides whether a facade stays lit for the whole session. Rays for moments when the sun is down are left out.
12.4 The ceiling follows the drone
Part 107 caps you at 400 ft AGL — unless the aircraft is within 400 feet of a structure, and then it may go 400 ft above that structure's top (14 CFR 107.51(b)). The exception is Part 107's alone: with your pilot category set to recreational, or not set, the ceiling stays at 400 ft beside any structure.
The rule measures from the aircraft, not from your subject, so a ceiling belongs to a position: it is whatever the tallest structure within 400 ft of the drone allows. Move the drone around the ring and the number moves with it — 1,400 ft beside a tower, a plain 400 ft two blocks away where nothing is close.
The drone marker carries both numbers: the ceiling on top, the altitude your framing needs below.
| Sign | Meaning |
|---|---|
| White ceiling | The legal ceiling at that spot. It turns red when it is zero |
| An asterisk on the ceiling | It stands on the structure exception, not on plain airspace. Confirm the structure's real height, and stay inside its 400 ft radius for the whole flight |
| Green altitude | Clears both the law and the rooftops |
| Amber altitude | Within 50 ft of the ceiling, or something taller than the drone stands within 150 ft of it |
| Red altitude | Above the ceiling — or the drone would be inside a building |
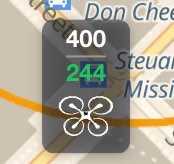
That red case is the one worth staring at: legal and survivable are different questions. Beside a 900 ft tower the ceiling is 1,300 ft, and a drone at 300 ft is perfectly legal while flying through the 20th floor.
Small buildings don't count — for the ceiling. By the letter of the rule a garden shed is a structure, which would put the ceiling at 410 ft almost everywhere and hide the plain 400 ft you actually have. So anything under 50 ft is ignored when the ceiling is worked out. It still counts as an obstacle: the collision colors read every structure, because a 10 ft roof is a real thing to fly into.
Two limits override the exception. In controlled airspace it doesn't apply at all — the LAANC grid ceiling is the limit and no structure raises it. And a cloud deck caps everything: 107.51(d) wants 500 ft of clearance below cloud, so a low cloud base beats a high legal ceiling.
Building heights come from OpenStreetMap and are estimates; a building with no height tag can't raise the ceiling at all, and in dense downtowns the list can be incomplete. Both errors run the safe way for the ceiling — it comes out lower than the law allows — but the obstacle check can miss a roof it never saw. Look up before you take off.
12.5 Warnings, and what reaches the verdict
The section prints its warnings under the numbers:
- Needs X — above the Y ceiling that applies here (Part 107). Widen the fill or tilt lower. When the ceiling at the drone stands on a structure, the bracket reads (400 ft over a structure beside the drone); for a recreational pilot it reads (49 USC 44809), and with no category set there is no bracket. When a structure would allow the altitude under Part 107, the line adds why it doesn't here: Flying under Part 107? Set your pilot category… or, for a recreational pilot, …recreational flights stop at 400 ft (49 USC 44809).
- Needs X — above this spot's Y LAANC ceiling. — in controlled airspace.
- ⚠ X is above the 400 ft Part 107 ceiling and is legal only under the structure exception (14 CFR 107.51(b))… — it names the structure's estimated top and its distance from the drone's spot, and reminds you to confirm the height, stay inside the 400 ft radius, and that the exception is not available in controlled airspace.
- ⚠ The drone would be ~X from you — a drone gets hard to keep in sight past ~Y. — past about 1000× your drone's diagonal.
- The drone sits below the roofline on purpose… — the camera aims at the subject's mid-height, so with a wide lens the drone can hover below the roof. Raise the tilt to climb above it.
The planned drone position also feeds the flight verdict at the top of the brief, because the drone can sit in different airspace than the launch point. These reasons can appear there:
- Planned drone position needs X — above the Y ceiling there (Not advised);
- Planned drone position is inside restricted airspace (TFR / no-fly zone / fire) (Not advised);
- …over a structure taller than its X — the aircraft would fly into it (Not advised), or A structure taller than the planned X stands within 150 ft of the drone's spot (caution);
- Planned drone position is in controlled airspace (airport) — LAANC authorization required… — when the drone's spot sits in a grid cell the launch point doesn't;
- Planned drone position is in a caution area (stadium 3 NM or restricted-use zone);
- ~N° of the trajectory is closed at X (ceiling, TFR or restricted zone) — the red arcs; the aircraft must not cross them — even when the drone's own spot is legal, because the shot is flown around the ring;
- Planned drone position X away — beyond the ~Y visibility, you can't keep VLOS, or …a drone this size disappears from sight past ~Y (caution);
- Still reading the buildings around the trajectory — the obstacle check isn't finished, Building data around the trajectory is incomplete — the ceiling may be conservative and the obstacle check partial, or Couldn't read the buildings around the trajectory — no obstacle check ran; look for rooftops and masts yourself. An obstacle check that hasn't finished is not one that came back clear;
- Still reading the airspace around the trajectory… or Couldn't read … around the trajectory… — while the TFR, zone and grid data for the ring are missing.

The frame preview lives in the section itself; there is no separate floating card on this layout.
12.6 Hand it to the day
Under the section, Add to trip route · shoot at HH:MM sends the PIC point to the Trip planner carrying the time on the slider as its desired shoot time and the ring position as its shot direction — the optimizer's top soft priority for that stop. Once added, the button reads ✓ In the trip route — remove and takes it out again. It is disabled when the route already has 7 stops. My spots is untouched: saving the spot stays a separate, explicit action.
Clearing the subject. Press ✕ Clear subject at the bottom of the section, or tap the red subject dot on the map (its tooltip: Shoot subject — click to clear). While a subject is set the Pick subject on map button is hidden, so to pick a different one clear it first — or search an address with the Subject target, which replaces it.
13 Altitude explorer Pro
Altitude explorer: the law measures 400 ft above the ground under the drone; your controller measures from takeoff. The probe turns one into the other near hills.
Two altitudes get confused constantly, and a hill is where the confusion turns into a violation:
- The law works in AGL — 400 ft above the ground beneath the aircraft.
- The aircraft works from the takeoff point. Your controller's zero is where you launched, and it stays there all flight.
On flat ground they agree and nobody notices. Fly toward a ridge 500 ft above your launch spot and they come apart by the whole climb: over that ridge you may legally be at 900 ft on the controller. A pilot who dutifully stays under 400 on the display is throwing away half the legal envelope; one who reads "400 AGL" off a chart and dials it in flies into the hillside.
The Altitude explorer is a measuring tool. It tells you how high you may be somewhere, never whether to fly — the verdict at the top of the brief is the go/no-go.
13.1 The probe
Probe mode is switched on and off by the balloon button in the top bar, or by Place probe on map in the Altitude explorer section.
In the top bar the balloon sits between PIC here and the speaker.
- The button is on the bar on every plan. Below Pro, pressing it opens the plans.
- On Pro it needs a PIC point — every number the probe gives is measured from it — and stays disabled until one is set.
- The search bar's Probe target also places it: search an address (the placeholder reads Set probe by address…) and the probe lands there with probe mode on. Like Subject, it is disabled without a PIC point.
Turn the mode on and the button lights up; in the section it reads Exit probe mode. Then tap the spot you're curious about.
Switching the mode on from the section closes the side drawers, so the map is yours for the tap.
The mode is modal: while it is on, every map tap moves the probe and none sets a planning point — that is what the lit button is telling you. There is no separate Remove: turning the mode off takes the probe away with it, and so does a double-tap on the balloon itself.
Once placed, the balloon can be dragged anywhere: unlike the Shot planner's drone, which is bound to its ring, this one goes where you put it, and its numbers recompute as it moves. Small nudge-drags are safe — the end of a drag is not a tap, so adjusting the probe never deletes it.
It is drawn as a balloon, not a drone, on purpose: it's an instrument you park somewhere to read what the air is like there, not an aircraft you fly. It carries three numbers:
| Line | What it is |
|---|---|
| Top | The legal ceiling AGL right there. An asterisk means it stands on the structure exception rather than plain airspace. Red when the spot is closed or the ceiling is zero |
| Middle (largest) | The same limit as your controller will show it — the number you actually fly to |
| Bottom | The ground there against your takeoff point: the climb itself,
+ or − |
The middle is the other two added, which is why it's the one to act on.
Colors on the middle number.
- Amber — ground within 400 ft of the probe stands 50 ft or more higher, so your legal ceiling drops as you fly that way.
- Red — that ground reaches the ceiling itself (fly at the number and you meet the hill), or the spot is closed outright by a TFR, a prohibited zone or a fire perimeter.
- ? (gray) — unknown, not zero: the ground under the probe is still loading, or the elevation model couldn't answer for that patch. The bottom number shows ? for the same reasons.
If you can't tell which ridge is which, turn on Which way I'm facing — it sits directly under Place probe on map in the section, for exactly this reason. The hard part of using the probe on site is not reading it, it's aiming it: the green ray shows where your phone is pointed, so the thing in front of you can be found on the map before you tap. With the probe down, the control also states the turn, for example Toward the probe — turn 31° left, or straight ahead within 5°. The control appears on paid plans, on a device with a compass, and works when the PIC point was set from your own location.
13.2 The section, where the numbers have names
Altitude explorer in the flight brief names every number and adds what the balloon has no room for. It opens with the disclaimer — A measuring tool — it tells you how high you may be somewhere, never whether to fly. The flight verdict above is the go/no-go. — then the Place probe on map / Exit probe mode button. Before a probe is down, a note explains the mode. With a probe down, from top to bottom:
- Probe — its coordinates, with Copy coords and Copy readout. The readout puts the coordinates and every number here on the clipboard for a pre-flight note. Each button says Copied or Copy failed for a moment.
- Show the probe on the map — flies the map to the probe, and closes the brief so you can see it land.
- Ground:
- At your launch point (MSL) — your controller's zero;
- Under the probe (MSL) (unavailable if the model couldn't answer);
- Difference — the rise or fall between them, the whole reason the two altitudes differ.
- On your controller, at the probe — the answer in big numbers: Not below and At most, both measured from your takeoff point. Below the floor something within 400 ft is taller than you; above the ceiling you are over the legal limit. The floor is the tallest ground or structure within 400 ft with nothing added to it — the obstacle itself, not a safe distance from it. The explanation sits on screen under the numbers rather than in a tooltip, because "not below" is the one most likely to be read as a safe altitude. Not below turns amber when it is above zero; the whole box turns red when the window closes (below).
- Altitude at the probe:
- Legal ceiling (AGL);
- Set by — what holds the ceiling there: the plain 400 ft rule, a structure nearby (107.51(b)) — X tall, the LAANC grid cell (airport) — a structure can't raise it, or the cloud deck — 500 ft below it (107.51(d)).
- Between you and it:
- Distance (VLOS) — judged against your own aircraft's size, amber past about 1000× its diagonal, red past about 2000×;
- Direction — bearing and compass point from the PIC point, for example 245° SW;
- Airspace at the probe — controlled — airport (amber) or no UASFM cell. It gets its own row because the FAA section higher up reads your launch point, and the probe can sit in a different grid cell;
- LAANC here — only inside a cell: automatic approval, further coordination (a person reviews the request), not available here (file in FAA DroneZone ahead of time), recreational flyers only (Part 107 needs DroneZone), Part 107 only (for a recreational pilot: DroneZone), or nothing to approve here (a 0 ft cell). It follows your pilot category. Everything except automatic approval is amber.
- Ground from your launch point to the probe — a profile chart, left to right from you to the probe: the ground in gray, the probe's ceiling as an amber dashed line, and your line of sight as a solid line in the app's accent color — a straight line from your eyes (1.7 m above the ground at the launch point) to an aircraft sitting at that ceiling. Ground crossing the dashed line is ground you'd have to climb over; ground crossing the sight line is ground the aircraft would be behind. While it loads the section says Reading the ground between you and the probe…; if it fails, Couldn't read the ground between you and the probe.
- Highest ground on the way (MSL), then:
- Line of sight over the ground — clear, or blocked below X: the altitude on your controller below which a ridge in between hides the aircraft. This is the way to lose VLOS that a flat map can't show: a drone a kilometer away over a valley is plainly visible, and the same drone at the same distance behind a hill is simply gone. Amber when blocked, red when clearing the ridge needs more than the ceiling allows.
- …on your controller — that highest ground as your controller will read it, red when it stands at or above the most you may hold at the probe.
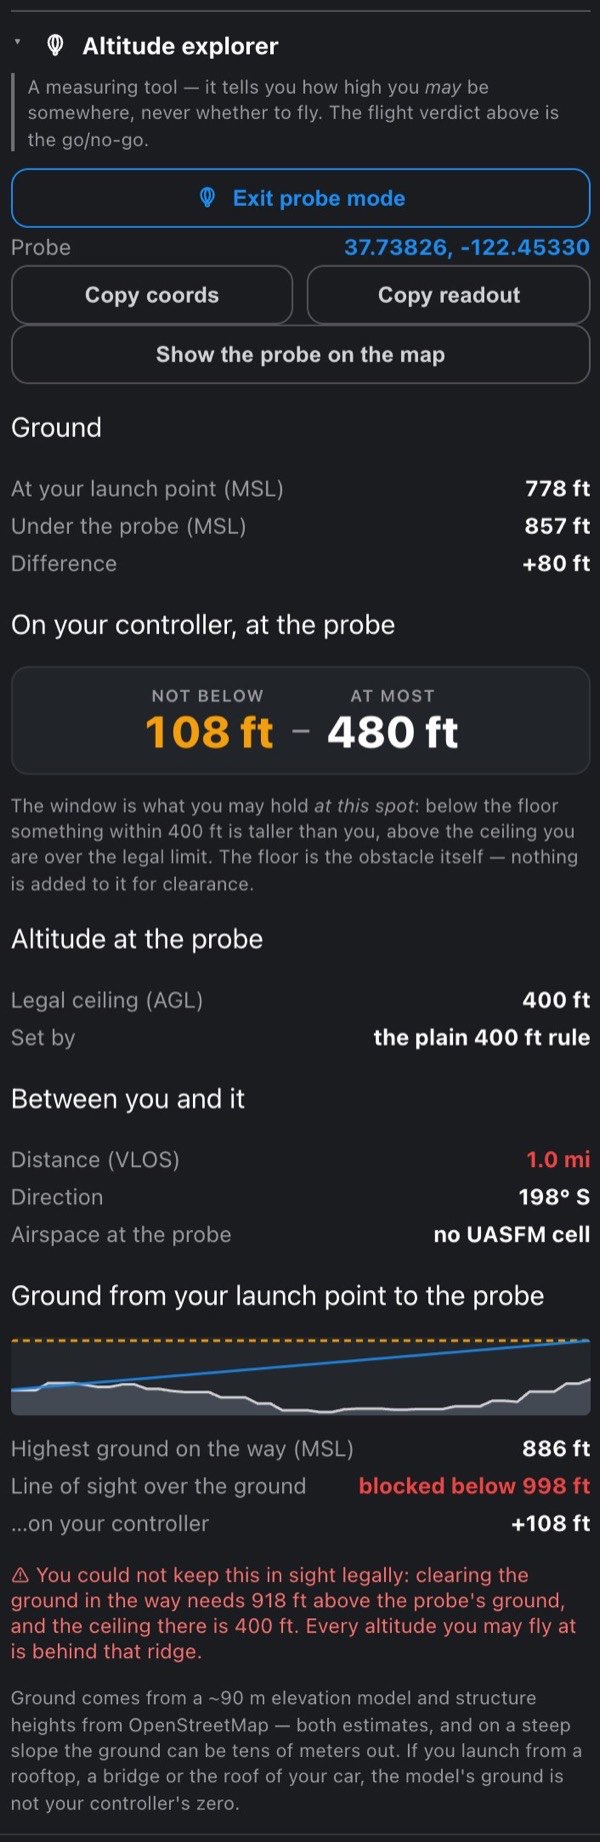
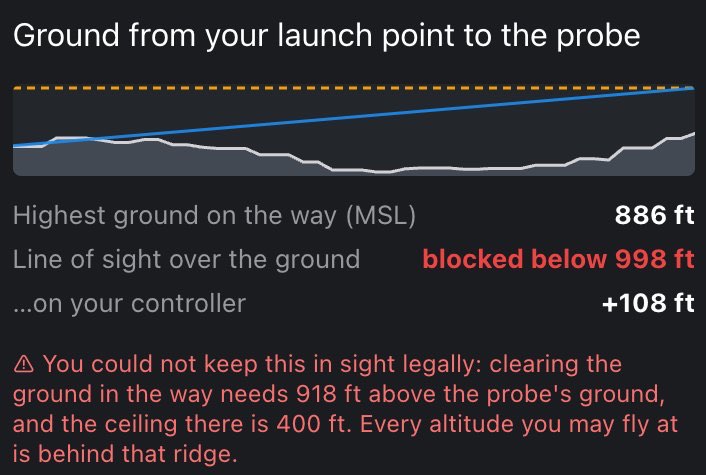
Notes at the bottom. The section ends with whatever applies:
- ⚠ This spot is closed — a TFR, a prohibited zone or an active fire perimeter covers it. The ceiling above is arithmetic, not permission.
- ⚠ Couldn't read … for this spot — a restriction source failed; verify it yourself.
- ⚠ Nothing to fly at here: the tallest thing within 400 ft reaches X, which is at or above the Y ceiling. Beside a 900 ft tower inside a 400 ft LAANC cell the floor is 900 ft and the ceiling 400 ft: no altitude there is both legal and clear. The section says so outright rather than leaving you to compare two numbers.
- ⚠ This ceiling stands on 14 CFR 107.51(b)… — the structure's estimated top and its distance from the probe. It is not a corridor: the aircraft must stay within 400 ft of that structure for the whole flight. Part 107 only.
- A structure here would allow up to X under Part 107's structure exception… (recreational) or Flying under Part 107? Set your pilot category… (not set) — the ceiling stays at 400 ft, and this says what a Part 107 flight would get.
- ⚠ You could not keep this in sight legally… — clearing the ground in the way needs more than the ceiling there; every altitude you may fly at is behind that ridge.
- Ground within 400 ft stands higher than under the probe, so the legal ceiling falls as you fly that way. — drag the probe onto the high ground to read it there.
- The rising-ground check hasn't run here — no elevation for this patch.
- Still reading the buildings and airspace around the probe.
- The estimate note, always.
Nothing in this section is ever green, on purpose. It measures; it does not clear you to fly, and a green number gets read as permission whatever the label says. The verdict at the top of the brief is the go/no-go.
Ground elevation comes from a ~90 m model and structure heights from OpenStreetMap — both estimates, and on a steep slope the ground can be tens of meters out. If you launch from a rooftop, a bridge or the roof of your car, the model's ground isn't your controller's zero either. Treat the middle number as a plan, not a permission.
14 Spot finder Pro
Spot finder: AI scouting for a shooting day: up to seven real launch spots, each a public parking lot next to a subject worth filming, checked against the verdict first.
AI scouting for a shooting day: up to 7 real launch spots, each a public parking lot next to a subject worth filming, checked against airspace before you ever see them.
The Spot finder section is in the flight brief, just after the Altitude explorer. It works without a PIC point too — it searches around your Homes — so it also appears in the empty brief. Below Pro the section describes itself; press Pro on its heading for the plans.
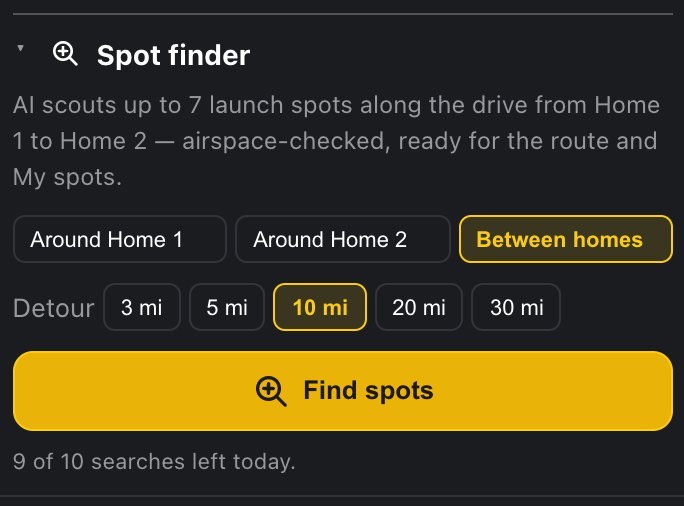
14.1 1 · Choose where to look
Set your Homes in Settings → My locations (Home 2 is Pro), then pick the area with the three buttons at the top of the section:
- Around Home 1 — within a Radius of it: 10 / 25 / 50 mi, or 15 / 40 / 80 km, following your distance unit.
- Around Home 2 — the same radius search around the destination, for a day you're shooting at the far end.
- Between homes — along the drive from Home 1 to Home 2, with the Detour you allow: 3 / 5 / 10 / 20 / 30 mi, or 5 / 10 / 20 / 30 / 50 km — how far off the route you'd go for a shot. It is measured sideways from the straight line between the Homes.
The area check allows 20 % slack on both the radius and the detour, because a straight line is always shorter than the drive: a subject 5.5 km off a 5 km corridor is kept.
The two Home-2 buttons stay disabled until a Home 2 exists. Without the Home a search needs, Find spots is disabled and the section says Set Home 1 first — Settings → My locations, or the search box up top. or Set both homes first — Settings → My locations.
14.2 2 · Say what you're after
Settings → Interests (Pro): what the Spot finder scouts for, up to ten, each up to 40 characters. Type one in Add an interest… and press + or Enter; × on a chip removes it.
- They are sent to the AI most important first, in the order you added them. They can't be reordered: to move one up, remove the ones before it and add them again.
- Concrete nouns work far better than moods: lighthouses, trestle bridges, sea stacks, abandoned mills beats beautiful places.
- With or without interests, the AI is told to look for real, named places that photograph well from the air — bridges, lighthouses, coastline, waterfalls, ridgelines, distinctive architecture, harbors, open landscapes — and never private homes or schools. Interests make it prefer the ones that match.
Interests are kept on this device.
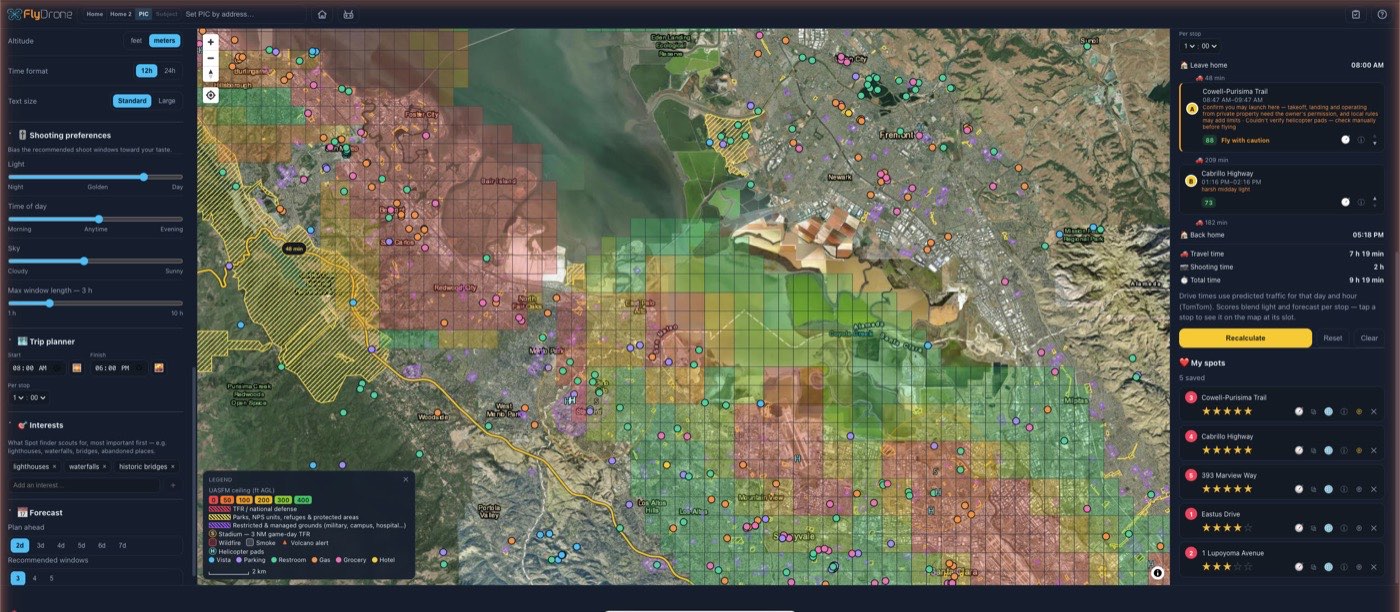
14.3 3 · Press Find spots
The button reads Scouting spots… while it runs; give it a minute. A real pipeline runs:
- The AI proposes up to ten photogenic subjects, grounded in Google Search — the main defense against invented places — ordered from most to least interesting for your interests.
- Each subject is checked against the area (with the 20 % slack), kept at least a mile from every other subject, and looked up on the map: if the geocoder finds it more than 3 km from where the AI put it, it is dropped as likely invented.
- The launch point is never the AI's guess. Each subject snaps to the nearest public parking within 800 m in OpenStreetMap; lots tagged private are skipped. No parking, no spot. Launch points also keep a mile apart.
- Every launch point runs the full flight verdict at the moment of the search — airspace, TFRs, parks, and the current weather too. Not advised spots are dropped before you see them. The rest carry their verdict: Good to fly, Fly with caution, FAA authorization required (common near airfields), or Manual verification required. A spot can be dropped or badged because of wind, fog or a storm at search time, not only because of airspace.
The first seven survivors, in the AI's order, are the answer. When the results arrive the map frames all of them at once, so a corridor search shows its whole spread.
If nothing survives you get Nothing usable in this area — try a larger radius or different interests. — or, for Between homes, Nothing usable along this drive — allow a bigger detour or different interests. Such a search still uses one of the day's searches: the AI was asked, and the filtering happened after.
14.4 4 · Take what you want
The results open as Found spots:
a window docked at the map's right edge, with the map still in view. Close it with ✕ in its header.
Every found spot is also a yellow ✕ marker on the map (with a mouse, hovering over one shows its name). The markers stay while the results exist and disappear when the results are closed.
Each row shows:
- the name — the parking lot's own name from OpenStreetMap, or ‹subject› — parking when the lot has none — and the verdict in its color;
- the address of the launch point;
- a line from the AI: Subject: ‹name›. ‹why it's worth an aerial shot›;
- two checkboxes, Trip planner and My spots, both on by default.
Tap a name and that spot becomes your PIC point and the map flies there, so the whole brief reads for it.
At the bottom:
- Add selected adds every ticked spot — to the Trip planner's route and to My spots, as ticked — and closes the results. It is disabled while nothing is ticked. Added spots carry their name, the AI's description and a shot direction (the bearing from the subject to the parking), which the Trip planner uses to time a facade's light. A spot already in the route or in My spots isn't added twice.
- Cancel closes the results without adding anything.
When the route is too full. The route holds 7 stops. If you ticked more new ones for it than it has room for, the footer changes to The route fits 7 stops and has N free — you checked M new for it. with:
- Replace current stops — the route becomes exactly the spots you ticked;
- Add first N — the first N ticked spots that fit (shown only when there is room for at least one);
- Cancel — close the results without adding anything.
14.5 Budget and caching
10 searches a day (5 on a trial), because each one costs real AI money. The allowance resets at 00:00 UTC. At the foot of the section (once a PIC point is set) a line keeps count: 3 of 10 searches left today, or No searches left today — the allowance resets at 00:00 UTC. Over the limit a search says Daily Spot finder limit reached (10/day) — resets at 00:00 UTC.
- Repeat searches are free. The AI's answers are cached for about a week, keyed by the Home's position rounded to about 1 km, the radius (or, between homes, Home 2 and the detour) and your exact interest list. Run the same search again from roughly the same Home and it costs nothing — and returns the same subjects.
- Only a paid-for AI call counts. If the AI fails or returns nothing readable (The spot search returned nothing usable — try again.), the search is given back. If anything else goes wrong (the parking lookup, the connection), the section says Couldn't finish the spot search — try again in a minute; repeating the same search won't use another one. That holds: an AI answer that arrived is cached, and one that failed was given back.

14.6 What the search is good at — and what it isn't
- It finds subjects worth pointing a camera at, then hands you a legal, parkable place to stand near them. It is a scouting assistant, not a permission check for the parking lot itself.
- A subject with no public parking within 800 m is dropped, however photogenic. Every result is somewhere you can actually stand, so the list is shorter and truer.
- Not advised results never reach you, but caution and authorization ones do, carrying their badge — a stadium, a national park unit or a nearby airfield is context you should see rather than have hidden.
- The verdict is for the moment of the search. The day you shoot has its own weather; the Trip planner and the brief judge that.
- Coverage follows OpenStreetMap. Thinly mapped country roads have fewer tagged parking areas than a city, so a rural radius can come back short even where the subjects are magnificent.
AI suggestions can be imperfect. Verify the spot and the local rules on site.
15 Trip planner Pro
Trip planner: a whole shooting day: up to seven stops ordered and timed against predicted traffic, with the forecast and the light at each stop.
Plan the whole shooting day: up to seven stops, ordered and timed against traffic, weather and light, starting from Home 1.
The Trip planner section follows the Spot finder in the flight brief, and like it appears in the empty brief too. Below Pro it describes itself; press Pro on its heading for the plans. Everything here is advisory — recheck conditions before flying.
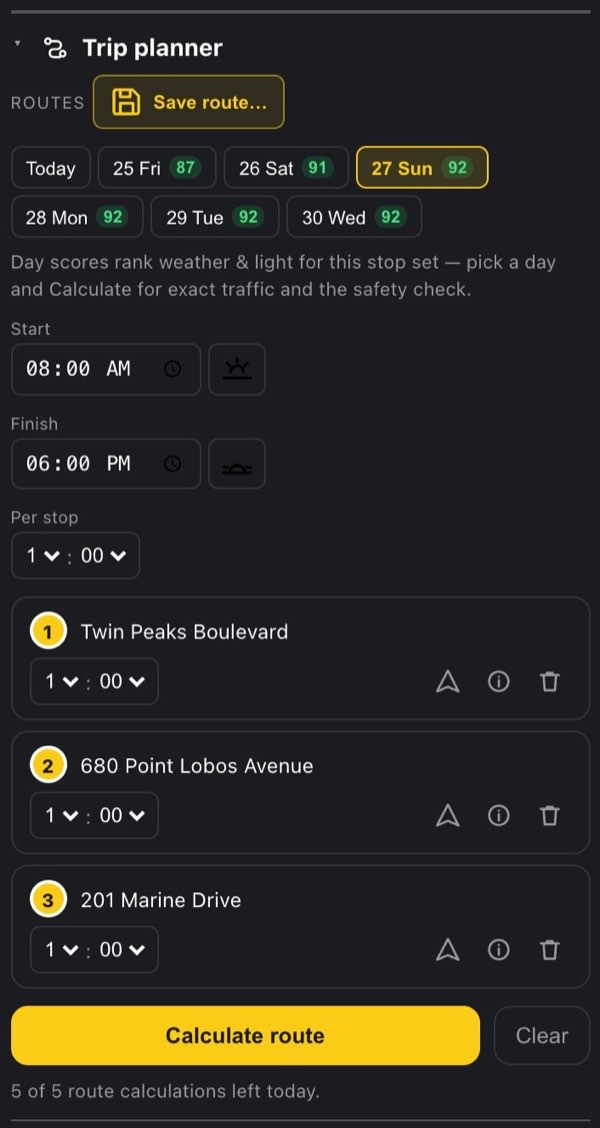
15.1 1 · Add up to 7 stops
- From My spots — the route button on a spot's row adds it; pressing it again (lit, tooltip In the trip route — remove) takes it out.
- From the Shot planner — Add to trip route · shoot at HH:MM: the stop carries your chosen shoot time and shot direction.
- The current point — ⊕ Add current point to the route, at the top of the section whenever the PIC point isn't a stop yet.
- From the Spot finder — tick Trip planner on the results and press Add selected.
All of them are disabled once the route holds 7 stops (The route is full (7 stops max)). Adding a stop never touches My spots, and a stop that is a saved spot inherits its name, description and shot direction.
Stops show on the map as small yellow dots and get their A–G letters once calculated; a saved spot that is a stop wears the yellow circle instead of its heart. The stops and the day's route line are a layer of their own — Settings → Layers → Trip stops takes them off the map when you want the scenery back. The plan is untouched: it stays calculated and stays in the panel, and a saved spot goes back to being a heart — as long as My spots is on too, since that's the layer the heart belongs to.
Where the day starts and ends. The route starts at Home 1 and returns there. With Home 2 set (Pro, Settings → My locations) the day runs one-way, Home 1 → stops → Home 2, automatically; changing or clearing Home 2 clears the computed route. With no Home 1 yet, a note under the buttons says The route starts at Home 1 — set it in Settings → My locations.
15.2 The stop list
Before a calculation each stop is a row, numbered in the order you added it:
- the name (or address, or coordinates) — tap it to make that stop the PIC point and fly there;
- a stopwatch and a time when the stop has a desired shoot time from the Shot planner;
- the time at this stop, an hours : minutes picker. It shows the section's Per stop default until you change it; × beside an overridden time returns it to the default;
- Directions — opens driving directions to the stop in your maps app;
- Spot properties — the stop's name, description, address and coordinates (with copy and directions); for a stop in a calculated schedule it also shows the verdict at its slot. The same dialog as in My spots;
- Remove from the route (trash can).
15.3 Saved routes
A Routes row sits at the top of the section once there is a saved route or a stop:
- Save route… saves the current stop list. It asks for a name (40 characters at most), pre-filled as Route N; ✓ or Enter saves, × or Escape cancels. Saving under a name that already exists replaces that route without asking.
- Each saved route is a name chip: tap it to load its stops — this replaces the current list — then pick any day.
- × on a chip deletes that route at once, without asking.
A route keeps its stops with their names, per-stop times, desired shoot times and shot directions — not the date or the working hours, which change between uses. You can keep up to 20 routes. With 20 saved, typing a new name turns ✓ off and says 20 routes saved — delete one, or save under an existing name to replace it. Saving under a name you already have still works. Saved routes live on your account, like My spots.

15.4 2 · Pick a date
A row of date chips covers the next seven days: Today, then the weekday and date (for example Thu 25). No date is picked at first — pick one before calculating.
Each chip carries a 0–100 weather-and-light score for this stop set: the best plan the optimizer can find for that day, with drive times estimated from straight-line distance at about 65 km/h (40 mph). The same estimate is used for every day, so the comparison across days is fair, and it costs nothing — exact traffic and the safety check are priced only when you Calculate.
- Green 70 and up, amber 40–69, red below 40.
- A chip without a number is a day the stops don't fit, or whose start time has already passed, or one the forecast couldn't be read for.
- Scores need Home 1 and at least one stop; they refresh a moment after the stops, hours or durations change.

15.5 3 · Set working hours and time per stop
- Start and Finish — clock times, 08:00 and 18:00 at first.
- The sunrise button beside Start and the sunset button beside Finish pin that end to the sun on the chosen date (today while no date is picked), worked out at Home 1. The time field then shows the resolved clock and can't be edited.
- Each dynamic end gets its own twilight shoulder field, right under it: Before sunrise (start this long before sunrise) and After sunset (finish this long after). They are hours : minutes pickers in 5-minute steps, from 0 up to 3 h; × returns one to zero. The shoulders only move a dynamic end — a time you typed is left exactly as typed — and they buy the blue hour on either side, which is the half of the day most worth shooting.
- Per stop — the default time at each stop, an hours : minutes picker from 5 min to 8 h, 1 h at first. A stop's own override (in its row) wins.
Every change — date, hours, toggles, shoulders, durations, stops — clears the computed route; press Calculate again to re-price it.
The stops, the hours and the per-stop time are kept on this device between sessions. Clear empties the stop list and also resets the date, the sunrise and sunset toggles and both shoulders; the Start and Finish times and the Per stop default stay.
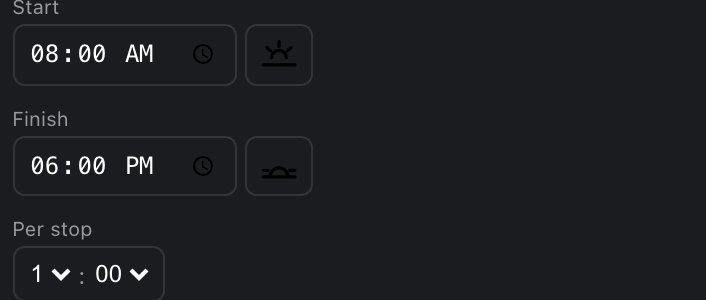
15.6 4 · Press Calculate route
The button reads Calculating… while it works. The optimizer tries every visiting order and a leave-home time every half hour across your window, against traffic predicted for that day (TomTom), the forecast at each stop, and the light. It will happily drive thirty minutes longer to move a stop out of its rain window, wait for a stop's desired golden hour, and time a facade using the stop's shot direction.
Traffic is fetched for the start of your window; if the window is longer than 4 hours, a second time for its end, and leg times in between are interpolated between the two.
15.7 How the optimizer actually decides
One rule is hard: start at Home 1, visit every stop, finish at the end point (Home 1 again, or Home 2 for a one-way day) inside your working hours. A day that can't do that is reported as a failure — never quietly trimmed.
Everything else is soft, and weighed in the same currency: seconds of driving. "Is dodging this rain worth twenty extra minutes on the road?" is literally the comparison being made.
| What it weighs | Worth up to |
|---|---|
| Weather at the slot | ~2 hours of driving per stop. Thunderstorms, rain, gusts and fog make the shoot pointless, so it outranks everything routable |
| A desired shoot time (carried from the Shot planner) | Free within ±30 min, then ~20 s per minute off, capped at 80 min |
| Facade light — a stop with a shot direction but no set time | Up to 40 min, to avoid shooting a backlit face |
| Golden light — a plain stop | Up to 15 min against harsh midday light |
| Your morning/evening taste | Up to 20 min per stop, pulling the whole day that way when traffic allows |
The morning/evening taste is Settings → Shooting preferences → Time of day (Morning · Anytime · Evening). It is ignored for stops with a desired shoot time — you already chose their hour.
With seven stops there are 5040 possible orders, and the planner tries all of them — no heuristic shortcuts. For a stop with a desired shoot time, arriving more than half an hour before its slot inserts an hourglass wait so the shoot lands on the light. Idle time carries half the cost of driving time, so the day packs rather than parks.
When the order is settled, a second routing call prices the exact legs and draws the line. If that call fails, the schedule stands and the map falls back to straight point-to-point segments — degraded visibly, not silently. Then every stop gets the full flight verdict at its slot.
15.8 The schedule
A successful calculation replaces the stop list with the schedule, top to bottom:
- Leave home and its time;
- before each stop, the drive into it in minutes, and an hourglass wait N min when the stop waits for its desired time;
- each stop: its letter, name, the arrival–departure slot, and a line of whatever drags its score down — rain 60%, gusty, strong gusts, fog, thunderstorm, no forecast, harsh midday light, facade backlit, sun below horizon, 95 min off desired time, plus FAA authorization required or the first two caution reasons from the verdict;
- under it, the stop's score — 0–100, 45 % light plus 55 % weather (for a stop with a desired time, "light" is how close the slot is to that time), green 70+, amber 40–69, red below 40; its tooltip reads How well this time slot suits this stop (45% light, 55% weather) — then the verdict label when it isn't Good to fly, Directions, Spot properties, and ▲▼ (Visit earlier / Visit later);
- the last drive, then Back home — or Arrive at Home 2 for a one-way day — and its time;
- Travel time, Shooting time and Total time.
A Not advised stop refuses the whole route rather than drawing through it (see the table below); authorization and caution flag the row. If the safety check itself fails, each stop's line says safety check failed — verify manually.
A note under the schedule: Drive times use predicted traffic for that day and hour (TomTom). Scores blend light and forecast per stop — tap a stop to see it on the map at its slot. It adds Departure is shifted later: your time-of-day preference, weighed against traffic. when the planner leaves later than your start time, and Order rearranged by hand — Calculate returns the optimal one. after ▲▼.
▲▼ reorders by hand. Each press recalculates that exact order (the leave-home time is still searched), and times and scores re-price. It reuses the traffic fetched by the last calculation for 30 minutes; after that, a press spends one of the day's calculations. If the new order doesn't fit, the error shows and the previous schedule stays.
Tap a scheduled stop and it becomes the PIC point, the map flies there and the time slider jumps to its arrival, so every section of the brief shows the conditions you'd actually shoot in. If that moment lies beyond your Forecast days setting, the setting is raised to cover it (up to 7 days) and stays raised.
The buttons under the section: Calculate route (it reads Recalculate once a plan exists), Reset — shown after a plan or an error — discards the calculated route while the stops stay, and Clear empties the list (see above).
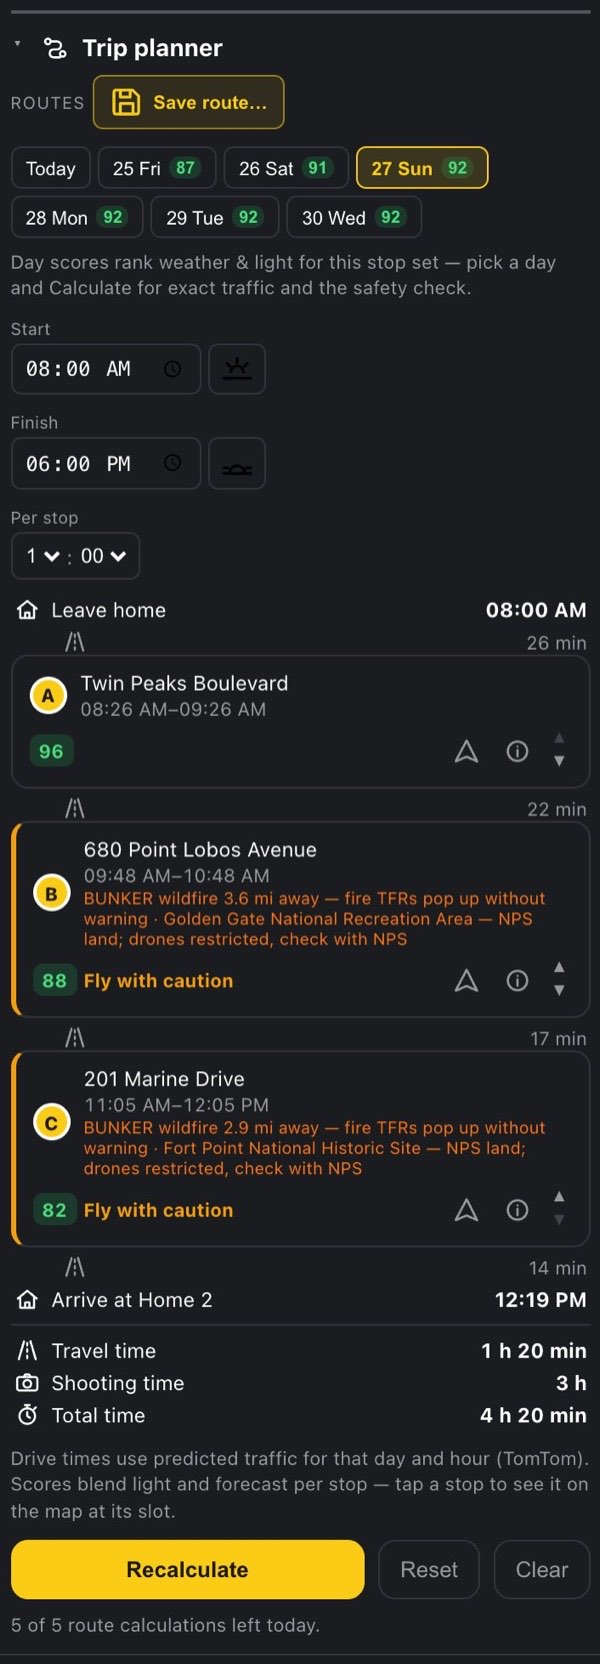
15.9 The route on the map
A calculated day draws the route line, the stops as yellow circles lettered A–G in visiting order, and a small "N min" label on each leg with its drive time. Tap a lettered stop to make it the PIC point.
15.10 When a day can't be planned
A failure says exactly what went wrong, in red under the list:
| Message | What to do |
|---|---|
| Set Home 1 first — the route starts there. | Set Home 1 in Settings → My locations |
| Add at least one spot to the route. | Add a stop |
| Pick a shoot date first. | Pick a date chip |
| The shoot date must be within the next 7 days. | A saved date has passed — pick a new one |
| The day must end after it starts — check the working hours. | Fix Start/Finish (or a shoulder) |
| That start time has already passed — move it forward or pick another day. | Today's start is in the past |
| No drivable route to stop N — remove it or move it to a road. | Usually a point on water, an island or a closed track. N is the stop's number in the list |
| The day doesn't fit: shooting and driving need X, the window is Y. Drop a stop, shorten stop times, or widen the hours. | The exact arithmetic, from the earliest departure |
| Route not built: stop B is "Not advised" (reason). Remove the stop or pick another day. | The safety check at the stop's slot |
| Daily route-calculation limit reached (5/day) — resets at 00:00 UTC. | (1/day on trial) on a trial |
| Monthly route-calculation limit reached — it resets with the new month. | The monthly backstop |
| Routing is unavailable — the routing balance is exhausted. We're on it; please try later. | Our routing account ran dry — nothing you can fix |
| The route service didn't answer — try again in a minute. | A transient failure |
One case comes with a plan: after the exact routing call, the return can land later than the window allows. The schedule is shown, Back home turns red, and it says Exact routing puts the return after your finish time — widen the hours or trim a stop.
15.11 Budget
5 route calculations a day (1 on a trial), resetting at 00:00 UTC. The line at the foot of the section keeps count: 4 of 5 route calculations left today. The count is the worst case: a calculation prices traffic twice when your window is longer than 4 hours, once when it is 4 hours or less — so with short windows you can get up to 10 (2 on a trial). A monthly backstop allows about 60 calculations a month (3 on a trial).
- The day-chip scores are free.
- Calculate spends a calculation, unless the same stops and date were priced in the last 30 minutes.
- ▲▼ reuses that traffic for 30 minutes; after that each press spends a calculation.
- The exact routing call that draws the line uses one of the day's drive-time lookups (200 a day on Pro, 50 on a trial; 2000 a month), the same allowance as Drive from you.
16 The rest of Pro
The chapters above cover the big Pro tools. These are the smaller Pro powers. They sit around the app where they're useful instead of in one menu, and most of them are easy to miss.
16.1 The fleet answers "which drone do I bring"
Below Pro, My fleet holds one aircraft. Its rated wind limit personalizes the verdict, the timeline and the recommended windows. Every verdict names the aircraft it was judged for, on a line under the reasons: Judged for your drone — wind limit N mph, followed by Change, which opens Settings at My fleet.
Pro keeps up to ten aircraft. Below Pro, trying to add a second one opens the plans. With two or more drones in a Pro fleet, the verdict also answers which of mine can fly. Two lines appear under the aircraft line:
- ✓ OK to fly: the drones that can handle this hour.
- ✗ Sit this one out: the drones that can't. Each one carries its own limit in brackets. (wind limit 23.9 mph) means the hour's worst wind (the highest of the surface wind, the gusts and the wind up at flying height) is at or above that drone's rating. (VLOS 700 m) means that, with a shot planned in the Shot planner, the framing puts the aircraft farther away than you can keep a drone that size in sight. The app sets that distance at roughly 2,000 times the drone's diagonal. Wind is checked first, so a drone that fails both is listed for wind.
The advice appears whenever nothing but wind grounds the hour, and that includes calm hours where every drone is fine. It disappears when anything else grounds the hour: fog, a TFR, a no-fly park, controlled airspace without authorization, and so on. In those hours nothing flies, and an OK to fly line under a red verdict would contradict it. When wind alone is the problem, the advice stays, because switching to a sturdier drone is exactly the way out.
The recommended windows are scored against the active aircraft, which is the one at the top of My fleet. Switching drones re-ranks them: the same forecast can give a heavy airframe a whole breezy afternoon and give the small one nothing.
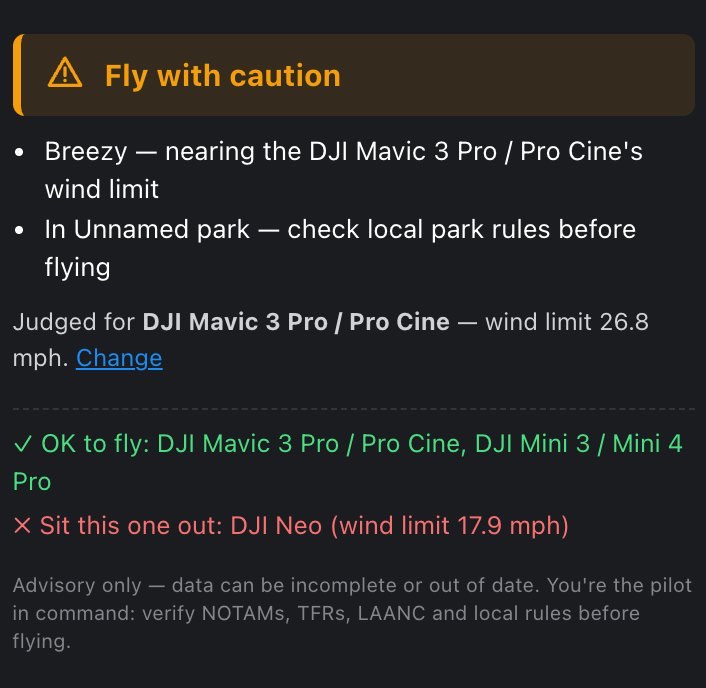
16.2 The altitude probe
The Altitude explorer is Pro too. It's the balloon you drop on a ridge to find out what your controller may legally read over there, and whether a hill in between would hide the aircraft. Its button is on the top bar on every plan. Below Pro, pressing it opens the plans.
16.3 The sun path across a window
This one needs the Sun ray layer on and a PIC point placed. While the timeline's time sits inside a recommended window, the map draws a fan of up to seven sun rays out of the PIC point, one for each sixth of the window. The first is faint (15 % opacity) and each later one is darker, up to 70 % at the window's end. The fan never turns fully solid, so the single "now" ray still stands out. Rays for times when the sun is below the horizon are left out.
One ray tells you where the light is. The fan tells you where it's going, which decides whether a facade stays lit for the whole shoot or falls into shadow halfway through.
16.4 Private spots and the community layer
Every signed-in account's saved spots feed the anonymized community layer unless they're made private. Only a cell about 150 m across is shared, never the exact coordinates, and a cell only appears once at least two pilots have saved a spot in it. Seeing the layer takes Hobby or Pro. Keeping a spot out of it takes Pro.
On Pro, each row in My spots has a globe / lock button:
- Globe: "Public — feeds the anonymized community layer. Click to make it private."
- Lock: "Private — only you see this spot. Click to share it to the community layer."
While the PIC point is one of your saved spots, the brief's My spots section also shows a checkbox, Show this spot in the community layer, which does the same thing. A spot you made private stays private if you later leave Pro. Its row keeps a small lock, but you can't flip it back until you're on Pro again.
16.5 A week of forecast, and how many windows
| Free | Hobby | Pro | |
|---|---|---|---|
| Forecast horizon | 24 h | 48 h | 2–7 days, your choice (5 to begin with) |
| Recommended windows | 1 | 3 | 3, 4 or 5, your choice (5 to begin with) |
On Pro, both are in Settings → Forecast. Plan ahead offers 2d through 7d, and Recommended windows offers 3, 4 or 5. Below Pro the same section just reads Planning horizon: 24 hours. (or 48 hours.), with a link to upgrade.
The horizon is more than a longer view. It's what makes the day chips in the Trip planner useful, and it's the difference between "when today" and "which day this week". Five windows over seven days can get crowded, which is why you can pick from 3 to 5.
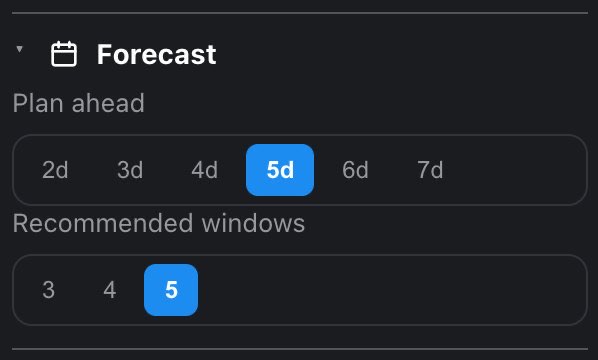
16.6 Home 2, and the one-way day
Setting a Home 2 is Pro, in Settings → My locations. It turns a shooting day from a loop into a line. With Home 2 set, the Trip planner ends the day there instead of returning to Home 1, automatically. The Spot finder also gets two more search areas: Around Home 2, and Between homes along the drive, with the detour you allow. Home 2 is for a drive to another city, or for a day that ends at a different hotel from the one it started at.
16.7 No daily counter
Free gets 5 new spot analyses a day and Hobby gets 50. Pro has no limit: analyze as many points as a day of scouting takes, and keep as many saved spots as you like. The Spot finder, the Trip planner's route calculations and the drive-time lookups have their own daily allowances, because each one costs real money at an outside provider. See Plans, limits and budgets. Everything the app works out by itself is unlimited.
17 Drive from you Hobby
The Drive from you section of the flight brief gives the drive from Home 1 to the PIC point, on request. Press Get drive time and it shows:
- Distance, in your distance units.
- Drive time, using live traffic.
- Traffic delay, only when traffic adds a minute or more.
- The route itself, drawn on the map as a cyan line.
A note under the figures reads Live-traffic ETA (TomTom). While it works, the section reads Routing…. When you move the PIC point, the answer clears and the button comes back. Nothing is fetched until you press it again.
It only runs on request because every lookup is a paid call to the routing provider. The daily allowance is generous (see the budgets), and the section's last line shows what's left today, for example 47 of 50 drive-time lookups left today.
What you may see instead:
- Free plan: "Traffic-aware drive time and the live-traffic map layer come with a paid plan." with an Upgrade button.
- No Home 1 yet: "Set Home 1 in Settings → My locations to compute distance and drive time — it's the origin the drive is measured from."
- The lookup failed: a red line under the button and a ↻ Reload chip in the section heading. "Routing is temporarily unavailable — please try again." is a passing problem. "Routing is unavailable — the routing balance is exhausted. We're on it; please try later." means the problem is on our side, not yours.
- Daily or monthly cap reached: "Daily drive-time limit reached — resets at 00:00 UTC." or "Monthly drive-time limit reached — it resets with the new month."
Drive time always starts from Home 1. Every other part of the brief is about the PIC point itself.
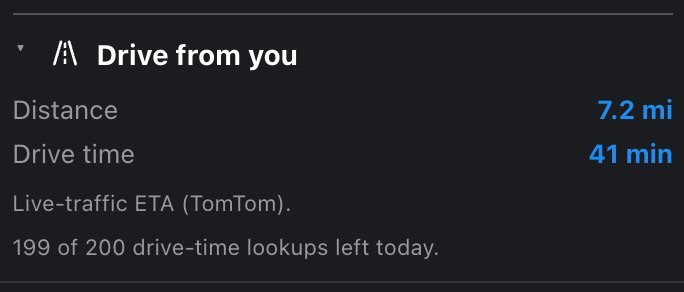
18 Pre-flight checklist
The checklist button is on the top bar. It has no label, just a checklist icon with the tooltip Pre-flight checklist. It opens 37 items in six phases, in the order a pilot actually works: from planning at home, through gear, setup on site, camera and flight settings, to the final checks right before takeoff.
On a tablet the checklist opens as a window docked at the right edge of the map, with the map still in view beside it. It lies over the map, stopping short of the brief's grip at the screen edge, so the map and the timeline keep their full width in either orientation. Opening it closes whichever side drawer was open. Close it with the ✕ in its corner or with the toolbar button again.
Android: the Back button closes the checklist too.
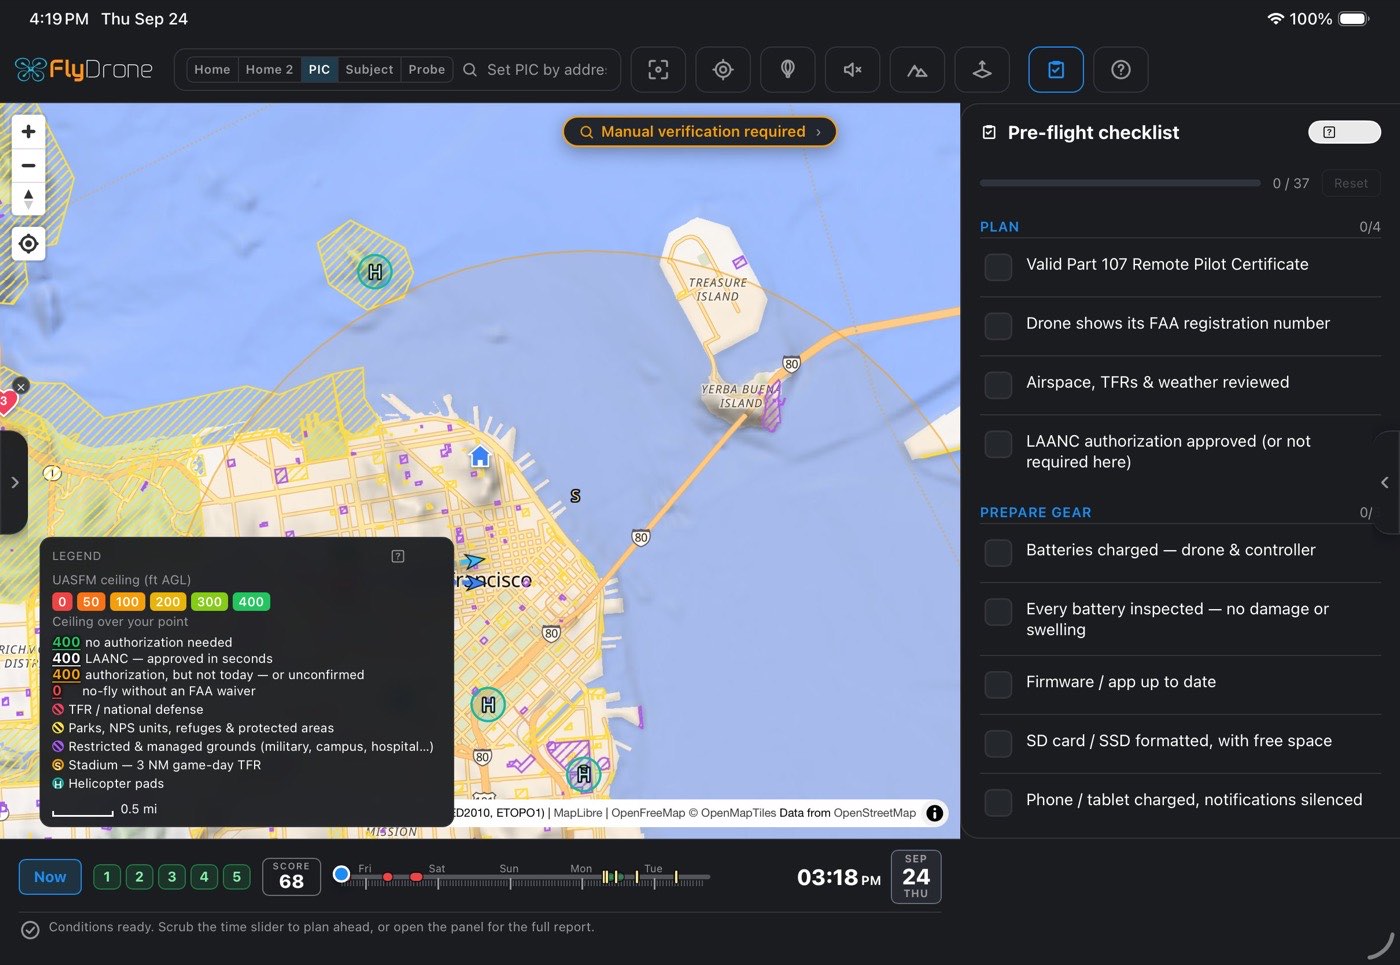
The 37 items, as the app lists them:
- Plan (4)
- Valid Part 107 Remote Pilot Certificate (for a recreational pilot: TRUST completion certificate on hand; with no category set: Part 107 certificate, or TRUST certificate if flying for fun)
- Drone shows its FAA registration number
- Airspace, TFRs & weather reviewed
- LAANC authorization approved (or not required here)
- Prepare gear (5)
- Batteries charged — drone & controller
- Every battery inspected — no damage or swelling
- Firmware / app up to date
- SD card / SSD formatted, with free space
- Phone / tablet charged, notifications silenced
- Set up on site (12)
- Gimbal clamp / lock removed
- Battery seated & locked in
- Propellers checked & secure
- Obstacle-avoidance sensors clean
- Camera lens clean
- ND / polarizing filter fitted (if using)
- Anti-collision strobe fitted (if low-light / night)
- Controller antennas angled ~90° to the ground
- Landing pad placed (if needed)
- Drone & controller powered on
- Controller online — hotspot / Wi-Fi
- Map / terrain loaded on the controller
- Camera setup (5)
- Recording format set — resolution / codec / fps
- White balance set
- ND filter & exposure set
- Polarizing filter angle tuned (if using)
- Gimbal calibrated
- Flight settings (6)
- Max altitude set
- Max distance (range) limit set
- Return-to-home altitude set
- Signal-lost action set — RTH / hover / land
- Obstacle avoidance set — Brake / Avoid / Off
- Flight mode selected — Cine / Normal / Sport
- Final checks (5)
- Compass / IMU calibrated (if prompted)
- GPS signal strong — home point recorded
- Wind & gusts within the aircraft's limit
- Clear line of sight — visual observer ready (if needed)
- Takeoff area clear — wires, trees, people
Situational lines are worded so you can always tick them honestly ("if using", "if needed", "or not required here"). A tick means dealt with, so a fully green checklist means you thought about every line.
The progress row sits at the top: a bar, the count N / 37, and a Reset button. Each phase heading also shows its own count, such as 3/5. Reset clears every tick at once, with no confirmation. It stays grayed out until at least one item is ticked.
When everything is ticked, the bar turns green, the count changes to Ready to fly, and the checklist button on the top bar glows green, even after you close the window.

It covers one flight and is not saved. Closing the window keeps your ticks for as long as the app stays open. Closing the app, or reloading the page in a browser, starts the checklist over. That includes the one reload the website may do by itself when a new version has arrived. It's deliberate: an all-green "ready" glow carried over to a new spot on another day would be a false signal. Reset starts the next launch clean.
19 On location
On location: drive time with live traffic, PIC here, the facing compass, the pre-flight checklist, the Spoken brief, and larger text for bright sun.
This chapter is about the part of the day spent standing at the launch point, where the app has to work with the panels shut, in bright sun, and sometimes with gloves on.
19.1 Before you leave
- Check the spot while you still have signal. There's no offline mode. Airspace, TFRs, weather, the verdict and every Pro tool need a connection, and a brief loaded at home isn't refreshed once you're out of coverage.
- Save the spot in My spots. Opening a saved spot again never counts against the daily analysis allowance, and its row has a directions button.
- Run the first two phases of the checklist (Plan, Prepare gear) at home. The rest belongs on site.
- Pro: turn on the Spoken brief before you get out of the car. While the speaker button is lit, every point you place is read aloud as soon as its data arrives. That's the answer to a screen you can't read in the sun.
19.2 Navigate
The last button in the brief's PIC section is Navigate. It opens driving directions to the PIC point in Google Maps. It's a plain link, so it spends nothing. The same directions arrow is on every My spots row, in a spot's properties, and on each stop of a planned trip.
19.3 PIC here: put the point where you are standing
The crosshair button on the top bar is PIC here. It takes one location fix from your device and puts the PIC point there, without opening a panel. It's the fastest route from "I'm here" to a brief.
- You're not on the point yet: the point moves to you and the spot is analyzed like a map tap. That includes the daily allowance on Free and Hobby. A spot within 50 m of one you already analyzed today doesn't count again.
- You're already within 50 m of the point: nothing is analyzed again. The map flies back to the point, and the app records that you're standing on it. That unlocks the compass (below).
- The fix fails: the button turns red, and its tooltip reads "Couldn't read your location — check the location permission and try again." The app waits up to 8 seconds for a fix.
Use my location in the PIC section (and in the empty brief before any point is set) does the same job from inside the brief.
The first location prompt. The system asks for location permission when the map first loads. In the apps that's the iOS or Android prompt, in a browser it's the browser's. Declining breaks nothing: you can still place points by tapping the map or searching, and set Home from Settings → My locations. But PIC here, Use my location and Locate will report that they couldn't read your location until you allow it in the system settings.
19.4 Which way I'm facing Hobby
In a valley or under trees you can know exactly where you're standing and still not know which ridge in front of you is which. Which way I'm facing, in the brief's PIC section, reads your device's compass and draws a green ray out of the PIC point in the direction the device is pointed. Turn on the spot until the ray lies over what you're looking at, and the map and the landscape line up. Hold the device flat like a map or upright like a viewfinder, whichever you prefer.
- It appears only on Hobby and Pro, and only on a device with a working compass. On a Free account, or on a laptop, the control isn't there at all.
- The button is grayed out until the PIC point came from your own location, set with PIC here or Use my location. From a point you just tapped on the map, the ray would describe nothing. Move the point anywhere else and the compass switches off.
- While it's on, the section shows Facing with the heading in degrees and a compass direction. Next to the altitude probe, it also tells you how far to turn toward it, or says straight ahead.
- If a location fix puts you more than 150 m from the point, a note says so: the ray starts at the point, not at you.
- It stays on after you close the brief, since you'll be looking at the map. Stop compass turns it off.
- It's your device's compass, with its errors. A car, a tripod head or a power line pulls it, and some devices report magnetic north instead of true north. Check the ray against something you can see before trusting it at a distance.
On iOS, the first use asks for motion access ("Waiting for motion & orientation access…"). If you refuse, only the system settings can give it back. If the sensor goes quiet, the app asks you to move the device in a figure of eight to recalibrate it.
19.5 While you set up
- Open the checklist and work through Set up on site, Camera setup, Flight settings and Final checks. Pre-flight checklist has the full list.
- Watch the verdict, not just the first reading. Placing the point from a fix gives a fresh brief for this hour. Move the timeline if you're waiting for a window.
- Make the text bigger. Settings → Appearance → Text size → Large scales the panels, not the map, for sun and gloves. Theme (Gray or Navy), just above it, only repaints the panels.
- A tablet has no full-screen mode. Close both drawers to give the map the whole screen. The verdict chip floats over the map while the brief is shut.
19.6 The Android Back button
In the Android app, Back closes the topmost thing that's open, one press at a time. The order is: any open dialog, then the Spot finder results, the Shot planner's frame card, Help, the checklist, the search sheet, the legend sheet, full screen, the flight brief, and Settings. With nothing open, Back minimizes the app and never quits it, so your point and brief are still there when you come back.
20 Plans, limits and budgets
Plans and your account: what every plan gets, what Hobby and Pro add, buying on the web or in the apps, and Settings: sign-in methods, reset, account deletion, units and support.
20.1 What each plan includes
| Free | Hobby | Pro | |
|---|---|---|---|
| Price on flydrone.app (the apps show the store's price) | $0 | $3.99 / mo · $34.99 / yr | $8.99 / mo · $79.99 / yr |
| The whole safety answer: airspace, TFRs, weather, hazards, verdict, timeline, windows | ✓ | ✓ | ✓ |
| New spot analyses | 5 / day | 50 / day | Unlimited |
| Saved spots | 5 | 20 | Unlimited |
| Forecast horizon | 24 h | 48 h | 2–7 days |
| Recommended windows | 1 | 3 | 3–5 |
| Camera settings: ND, exposure, white balance | — | ✓ | ✓ |
| Movement settings: how the shot may move | — | ✓ | ✓ |
| Which way I'm facing: the compass ray | — | ✓ | ✓ |
| Community spots layer (seeing it) | — | ✓ | ✓ |
| Drive time and the live-traffic layer | — | ✓ | ✓ |
| Private saved spots | — | — | ✓ |
| Aircraft in My fleet | 1 | 1 | Up to 10 |
| Home 2 and one-way days | — | — | ✓ |
| Spoken brief | — | — | ✓ |
| Shot planner and the sun path across a window | — | — | ✓ |
| Altitude explorer (the probe) | — | — | ✓ |
| Spot finder | — | — | ✓ |
| Trip planner | — | — | ✓ |
Where the line is drawn. Free gets the entire may I fly answer: every verdict factor, every safety source, the timeline and the windows. A plan buys the how to shoot half. Hobby adds the camera card (ND, exposure, white balance) and the movement limits. Pro adds the planning tools. Two field conveniences sit on top of the safety answer, not inside it: the compass ray (Hobby) and the spoken brief (Pro). A flight is no less legal because you don't know which ridge you're looking at, and the spoken brief only puts behind a plan hearing the verdict, never knowing it.
Your plan belongs to your account, not to a device. Subscribe anywhere and the plan unlocks on every device you sign in to.
The cards in the plans dialog (and on the flydrone.app home page) list each plan in these words:
- Free: Go/no-go verdict for any spot: FAA airspace & LAANC ceiling, live TFRs, parks, restricted grounds, stadium game days, wildfires & smoke, helipads & airfields · Weather for your drone: wind at ground & 400 ft against its wind limit, gusts, clouds & fog, rain, visibility, temperature · Air quality, GPS satellites & Kp index · Sun: sunrise, sunset, golden & blue hour, sun ray on the map · The best window to fly in the next 24 hours, every hour scored · Map layers, points of interest, 3D terrain, the legal ceiling over your launch point · Pre-flight checklist (37 items) · 5 new spot analyses a day · 5 saved spots
- Hobby: Everything in Free · Camera settings: exposure, ND filter, white balance for the light at that hour · Movement settings: gimbal & flight speeds for the shot, ready to dial into DJI Fly · Which way I'm facing: compass ray from where you stand (phone or tablet) · Drive time from Home with live traffic · traffic layer · Community spots layer · 48-hour forecast · up to 3 recommended windows · 50 spot analyses a day · 20 saved spots
- Pro: Everything in Hobby · Spoken brief: the verdict, why, and the numbers you pick, read aloud · Shot planner: distance, altitude, shooting ring on the map, frame preview · Altitude explorer: probe any point for its ceiling, controller reading, line of sight · AI Spot finder: real launch spots around either Home or between them · Trip planner: best order and times for up to 7 stops, with traffic; saved routes · Home 2 and one-way days · Sun path across the shoot window · Multi-drone fleet: which of your drones can fly the hour you pick · Up to 7-day forecast · up to 5 recommended windows · Unlimited spot analyses · unlimited saved spots · private spots
20.2 How to open the plans
- A plan tag on a section heading. A section above your plan shows a small Hobby or Pro tag on the right of its heading. Press the tag to open the plans. Tags only appear for what you don't have yet: a Hobby subscriber never sees a Hobby tag.
- A locked button. On Free and Hobby, the probe and the speaker buttons on the top bar open the plans. So does trying to add a second drone to My fleet.
- A limit. When a Free account places a new point past the day's five (or a Hobby account past fifty), the point doesn't move and the plans open. Upgrade links in Settings → Forecast, on the Free daily counter and in the Drive from you section open them too.
- Settings → Account. Upgrade on the Free plan line, or Change plan once you subscribe.
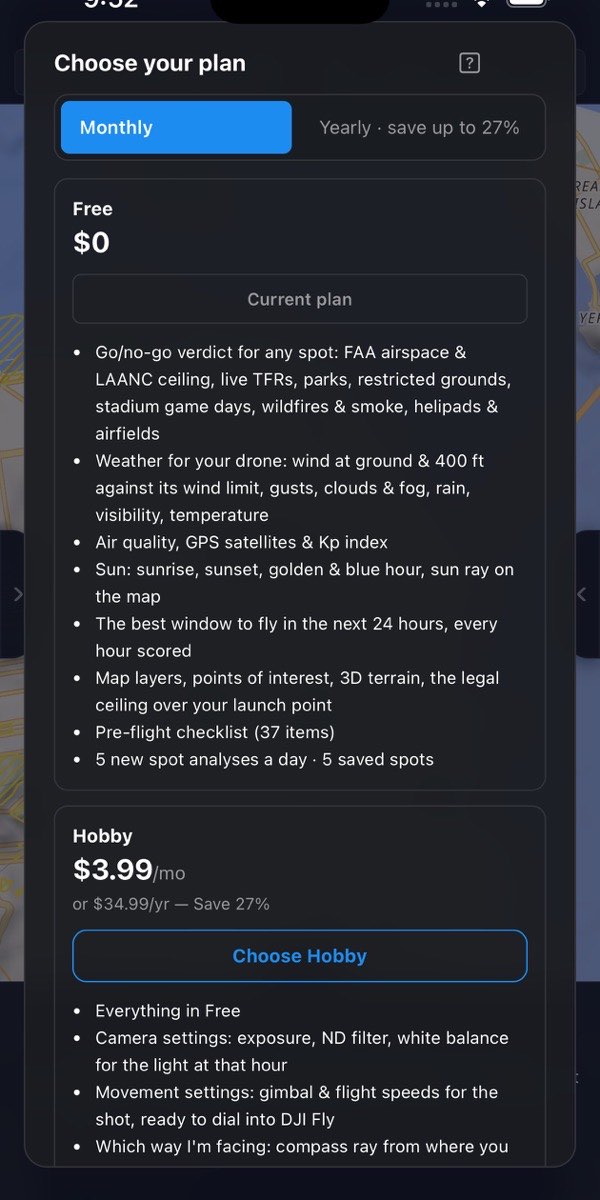
20.3 The plans dialog
The dialog's title is Choose your plan on Free and Manage your plan once you subscribe. A toggle at the top switches between Monthly and Yearly · save up to 27%. Under it are three cards (Free, Hobby, Pro), each with its name, its price, its button right under the price, and then the list of what it includes (quoted above). Side by side, the buttons line up across the three cards. At the bottom are links to the Terms of Service and Privacy Policy.
On the Yearly view the Pro card carries a Best value chip beside its name, because yearly Pro is the lowest price per month. The chip is left off when Pro is already your plan, and in the apps when the store can't sell Pro right now.
The dialog opens on Monthly, the smaller commitment, which suits a hobby with a season. On the Monthly view each paid card also shows its yearly price underneath, for example or $34.99/yr — Save 27% (Save 26% on Pro), so the saving is visible without switching. If you already subscribe, the dialog opens on your billing period, so reopening it never switches a monthly plan to yearly by accident.
The button under each card's price depends on where you are:
| You are on | Free card | Hobby card | Pro card |
|---|---|---|---|
| Free | Current plan | Choose Hobby | Choose Pro |
| Hobby | Switch to Free | Current plan | Upgrade to Pro |
| Pro | Switch to Free | Downgrade to Hobby | Current plan |
When a change is waiting for the end of the billing period (a downgrade or a cancellation), the card it lands on shows Scheduled · ‹date›. Your current card shows Keep Hobby or Keep Pro, which undoes the change.
Switch to Free asks first: "Cancel? You keep access until the period ends." with Keep plan and Confirm.
20.4 Buying in a browser, at flydrone.app
The website works the same way on a phone or tablet browser as on a computer. What counts is browser versus app, not the size of the device.
In a browser, plans are sold through Stripe, at the prices in the table above:
- Every paid plan starts with a 7-day free trial. The dialog says "7-day free trial, cancel anytime." Choose Hobby or Choose Pro takes you to Stripe's checkout page, which also accepts promo codes.
- Back in the app, a Welcome to FlyDrone Hobby (or Pro) window confirms it: what the plan adds, when the free trial ends, and that a confirmation email is on its way to your account's address. While the payment provider is still confirming, it says Unlocking your features — this takes a few seconds. Continue closes it. If you backed out of checkout, a banner says "Checkout canceled — no charge was made." and goes away after six seconds, or when you press it.
- Upgrading (Hobby to Pro) happens at once, and you're charged only the difference for the rest of the period. The plans dialog closes and the same welcome window opens.
- Downgrading (Pro to Hobby) and Switch to Free take effect at the end of the paid period. You keep what you paid for until then, and the dialog shows the change as Scheduled. Picking Keep … before then undoes it.
- Settings → Account → Manage opens Stripe's billing page for your card, invoices and cancellation.
- Every change gets an email when you make it, to your account's address: a downgrade (with the date it takes effect), a cancellation (with the last day of your plan), undoing either, and a switch between monthly and yearly billing. Nothing more arrives when a scheduled change takes effect, and renewals are confirmed by Stripe's own receipt.
- If a step can't go through, the dialog says why in a line under the cards: Couldn't reach FlyDrone. Check your connection and try again. when you're offline, or Billing didn't answer — please try again in a minute. when the billing service gives no reason of its own.
20.5 Buying in the iOS or Android app
In the App Store and Google Play apps, plans are sold by the store. Store rules don't allow any other way to pay in an app.
- The price is the store's, in your currency and at the store's own price points, so it may differ from the website's dollar figures. The dialog shows … while it asks the store. It shows Price shown in the store if the store didn't answer, and Unavailable (with the button disabled) if the store doesn't sell that plan right now. The yearly saving on the toggle and under each monthly price is worked out from the store's prices. Until those arrive, the toggle just says Yearly.
- A free trial line appears only when the store will actually give you one, and only when both paid plans have the same trial for the period you're viewing. On iOS the app asks the App Store whether your account is eligible, and shows the line only on a clear yes. If you've already used the trial, you see the price with no trial line, because the store would charge right away. The store's own purchase sheet always has the final word.
- Choose, Upgrade to and Downgrade to open the store's purchase sheet. The store decides when a change takes effect and says so on that sheet. The plan unlocks moments after the store confirms.
- When a new plan or an upgrade goes through, the plans dialog closes and a Welcome to FlyDrone Hobby (or Pro) window opens over the screen you were on: what the plan adds, when the free trial ends if the store started one, and that a confirmation email is on its way. Continue takes you back to what you were doing, with the plan already working.
- Switch to Free (after the same confirmation) opens the store's own subscription screen. Only the store can cancel a store subscription.
- A downgrade the store schedules for your renewal date shows on the Hobby card as Scheduled · date. Keep Pro opens the store's subscription screen, where you pick Pro again.
- Every change gets an email as soon as the store reports it to us: the welcome for a new plan or an upgrade, and for a downgrade, a cancellation, undoing either, or a switch between monthly and yearly billing, what changes and from which date. Nothing more arrives when a scheduled change takes effect.
- Restore purchases, under the cards, asks the store again for anything you bought with this store account. Use it after reinstalling or on a new device.
- Settings → Account → Manage opens the App Store or Google Play subscription page.
- Closing the store's sheet without buying is not an error: nothing is shown. A real failure is said in a line under the cards, for example No connection to the store. Check your internet and try again., This store account already has this plan. Tap Restore purchases., This purchase belongs to another FlyDrone account. Sign in with that account., The payment is waiting for approval. Your plan starts once the store confirms it. or This device isn't allowed to make purchases. Check Screen Time or family settings. Anything else reads The store couldn't complete this. Please try again.
20.6 Bought in one place, used in another
A plan is managed where it was bought, and works everywhere else.
- In the app, a plan bought on the website shows no buttons on the cards. The dialog says "Manage on flydrone.app. Your plan unlocks on every device you sign in to."
- On the website, a plan bought in an app says "Manage in the App Store or Google Play."
- In the rare case that you have both a website and a store subscription active, the higher plan applies.
20.7 Your plan in Settings → Account
The plan line in Settings → Account shows:
- On Free: Free plan with an Upgrade button.
- On a paid plan: FlyDrone Hobby or FlyDrone Pro, then the next date. That reads renews ‹date›, trial ends ‹date›, cancels ‹date›, or → Hobby ‹date› when a downgrade is scheduled.
- Where the plan was bought here: Change plan (the plans dialog) and Manage (Stripe's page on the web, the store's subscription page in the apps). Elsewhere, the line says where to manage it instead.
Deleting your account (Settings → Account → Delete account) cancels a flydrone.app subscription immediately. A store subscription keeps renewing unless you cancel it in the store, so cancel it there first. The confirmation card reminds you.

20.8 The daily spot-analysis allowance (Free and Hobby)
A new spot analysis is a point you haven't analyzed today. Free gets 5 a day and Hobby 50. What doesn't count:
- opening one of your saved spots;
- placing a point within 50 m of one you already analyzed today;
- PIC here when you're already standing on the point.
On Free, a counter at the top of the flight brief reads N of 5 new spots left today, then Daily free limit reached, with an Upgrade button. Hobby has no counter. The count is kept on this device and starts over at local midnight (the device's clock), unlike the allowances below. When you're out, a new point doesn't move and the plans open.
20.9 Daily and monthly budgets
The tools below cost real money at an outside provider on every call, so they have allowances. They're counted on our server, per account, so every device you use sees the same number. They start over at 00:00 UTC. For the Americas that's in the late afternoon or evening of the day before.
| Action | Pro | Pro trial | Hobby | Hobby trial |
|---|---|---|---|---|
| Spot finder searches | 10 / day | 5 / day | — | — |
| Trip route calculations | 5 / day | 1 / day | — | — |
| Drive-time lookups | 200 / day | 50 / day | 50 / day | 10 / day |
Monthly backstops sit behind two of them, and they start over on the 1st of the month (UTC): about 60 route calculations a month on paid Pro (3 on a trial), and 2,000 drive-time lookups on Pro or 1,000 on Hobby. The live-traffic map layer also has a very high daily ceiling that only a runaway script would reach.
A few details:
- Route calculations are counted at the worst case. One Calculate prices traffic once for a working day of 4 hours or less, and twice for a longer one. The allowance assumes two, so on short days you may get more than five. Reordering stops with ▲▼ recalculates and can spend one too. The exact routing of the finished plan uses drive-time lookups.
- Asking the same thing again soon is usually free. Answers are cached for a while, and only a fresh call to the provider counts.
- A trial has smaller allowances until the trial ends and the plan is paid.
What's left today is printed at the foot of each section that spends money: Spot finder, Trip planner and Drive from you. It shows 3 of 10 searches left today., 5 of 5 route calculations left today., and so on. Once it's all used, it reads No searches left today — the allowance resets at 00:00 UTC. The number already allows for the monthly backstop, so it never offers a use the server would then refuse.

When an allowance runs out, the app says so plainly and says when it comes back:
- "Daily Spot finder limit reached (10/day) — resets at 00:00 UTC." (on a trial: "(5/day on trial)")
- "Daily route-calculation limit reached (5/day) — resets at 00:00 UTC." (on a trial: "(1/day on trial)")
- "Daily drive-time limit reached — resets at 00:00 UTC."
- "Monthly route-calculation limit reached — it resets with the new month."
- "Monthly drive-time limit reached — it resets with the new month."
When the provider itself fails, you get the truth instead of a false all-clear. "Routing is unavailable — the routing balance is exhausted. We're on it; please try later." means the problem is ours. "The route service didn't answer — try again in a minute." means a passing hiccup. A failed call is given back and doesn't count against your allowance.
21 Where the data comes from
| Subject | Source |
|---|---|
| Airspace ceilings and LAANC grid | FAA UAS Facility Map (FAA ArcGIS) |
| TFRs | FAA (tfr.faa.gov and the FAA's TFR areas service) |
| Stadiums with game-day TFRs | FAA stadium list (FAA ArcGIS) |
| Game schedules at those stadiums | ESPN |
| ATIS frequencies and airport facilities | FAA (FAA ArcGIS) |
| NOTAMs | A link out to the FAA NOTAM Search |
| National parks | National Park Service |
| Parks, zones, helipads, airfields, parking, buildings, points of interest | OpenStreetMap (Overpass) |
| Weather, air quality, ground elevation | Open-Meteo |
| Cloud-cover overlay | MSC GeoMet (Environment and Climate Change Canada) |
| Wildfires · smoke · volcanoes | NIFC (WFIGS) · NOAA smoke forecast · USGS |
| Geomagnetic Kp | NOAA Space Weather Prediction Center |
| Satellite orbits | CelesTrak |
| Drive times, live traffic, trip route matrix | TomTom |
| Spot finder subjects | Google Gemini, grounded in Google Search |
| Addresses and search | Nominatim (OpenStreetMap) |
| Default units from Home's country | BigDataCloud |
| Map basemap | OpenFreeMap |
| Satellite basemap and its place labels | Esri World Imagery · Esri Reference labels |
| Terrain basemap relief | AWS Terrain Tiles |
| Crime incidents | City open-data portals |
| Community spots | FlyDrone pilots' public saved spots, aggregated |
| Spoken brief voice | Pre-recorded clips served from Google Cloud Storage and cached on your device. The device's own voice fills in when a clip can't be fetched |
22 Glossary
AGL: above ground level. Every altitude in the app is AGL unless it says otherwise.
AQI: the US air-quality index.
ATIS: an airport's recorded broadcast (weather, runway in use) on a radio frequency. Listening tells you what the manned traffic overhead is doing. Nobody on it will answer you.
Contre-jour: shooting into the light, with the sun behind the subject.
DroneZone: the FAA's website for filing airspace authorizations and waivers. It's the only route where a grid square doesn't offer LAANC, and it takes time, so file ahead of the flight.
EV: exposure value, the light level a meter reads, here at ISO 100.
GSD / ground resolution: how much ground one pixel covers.
Home 1 / Home 2: your own fixed places, set in Settings → My locations. Home 1 is where the day starts: drive times, the Spot finder and the Trip planner run from it. Home 2 (Pro) is an optional destination for a one-way day. Neither moves unless you move it.
Kp: the geomagnetic activity index, 0–9. From 5 up, GPS and compass readings can drift.
LAANC: the FAA system that grants near-instant authorization in controlled airspace, up to the ceiling published for that grid square.
MSL: mean sea level, the height above sea level. Ground elevations are MSL.
ND filter: a neutral-density filter, sunglasses for the lens, so you can keep a cinematic shutter speed in bright light.
NM: nautical mile, 1,852 m (about 1.15 statute miles). Stadium TFRs are given in NM.
NOTAM: Notice to Air Missions. Always check them.
Part 107: the FAA rules for commercial small drones (14 CFR Part 107).
PIC: pilot in command. In this app it's also the launch point being analyzed: where you stand to take off, fly and land.
Probe: the Altitude explorer's balloon, a point you drop somewhere to see how high you may fly over there, measured from your PIC point.
Structure exception: 14 CFR 107.51(b). Under Part 107 a drone may fly higher than 400 ft above the ground while it stays within 400 ft (horizontally) of a structure, and no more than 400 ft above that structure's top. Recreational flights (49 USC 44809) have no such exception.
Subject: what you're filming: the building, bridge or landmark you pick in the Shot planner.
TFR: temporary flight restriction.
UASFM: UAS Facility Map, the FAA grid of pre-approved LAANC ceilings.
VLOS: visual line of sight. You (or a visual observer) must be able to see the aircraft.
23 Troubleshooting
23.1 Loading and the verdict
"Checking conditions, please wait…" never finishes. A source is slow or blocked. The status line under the timeline names what's still loading ("Loading …") or what failed ("Couldn't load … — pan the map or tap again to retry."). A section that failed has its own ↻ Reload chip on its heading.
Best windows are hidden. One of the safety checks didn't answer, and the app won't recommend an hour it couldn't check. The Best windows section says "Best windows are hidden — couldn't check …" and offers ↻ Reload missing data, which retries only what failed. The windows come back once every safety source has answered. If the section says "Couldn't load the forecast", the weather itself failed: use the section's ↻ Reload, or check your connection.
No recommended windows, and nothing failed. The section says which case it is: "Flying isn't advised here for the next …" means the spot is grounded for most of the horizon (see the airspace and conditions below it), and "No good flying window in the next …" means no hour scored well enough. Moving the timeline won't change the list, because windows are anchored at now: try another spot, a longer horizon (Pro) or different shooting preferences.
The verdict says "Couldn't verify …". That's literal: the check didn't finish. Check it yourself before flying, and don't read it as clear.
23.2 Location
"Couldn't read your location — check the location permission and try again." The system permission was declined, or no fix arrived within 8 seconds. Allow location for FlyDrone (in the apps) or for the site (in a browser) in the system or browser settings, and try again outdoors if you're deep inside a building. Until then you can place points by tapping the map or searching.
Home 1 is in the wrong place. Home 1 is filled in once, from your first location fix, and after that it only moves when you move it. Set it in Settings → My locations with Locate (your device's position now), Map (then tap the map), or the search box with Home chosen as the target. Pressing the address only flies the map there.
"Which way I'm facing" is missing or grayed out. It's missing on a Free account and on devices without a compass, laptops included. It's grayed out until the PIC point came from your own location: press PIC here or Use my location. On iOS, if you refused motion access, allow it for FlyDrone in the system settings and switch the compass on again.
23.3 Plans and sign-in
I subscribed, but the app still says Free.
- Make sure you're signed in to the same account you bought with. Settings → Account shows which one.
- Bought on flydrone.app: nothing else to do. The plan arrives on every device by itself, usually within moments of the payment clearing.
- Bought in the app: open the plans and press Restore purchases, which asks the store again for anything bought with this store account. That's also the fix after reinstalling or moving to a new device.
I can't cancel from the app. A store subscription can only be canceled in the store. Switch to Free (or Account → Manage) opens the store's subscription screen. A flydrone.app subscription is canceled from the website, under Settings → Account.
I have two accounts. Sign-in is Google or Apple, on the web and in both apps. If you signed in once with each and they have different emails (Apple's Hide My Email makes one), you may have two accounts. In the iOS and Android apps, the first time a sign-in would start a new account, the app asks Merge with your other account?. Sign in the way you did before and the two become one. Anywhere, including a browser, you can join them in Settings → Account, where Signs in with … lists your methods and offers Add Google or Add Apple.
A limit says "resets at 00:00 UTC", but it's still today here. The server allowances roll over on UTC midnight, which is late afternoon or evening in the Americas. Only the Free and Hobby spot-analysis count uses your device's own midnight.
23.4 The Pro tools
Drive time or the traffic layer is missing. Both need Hobby or Pro. Drive time also needs a Home 1.
The Spot finder found nothing. Try a wider radius, a bigger detour, or different interests. Subjects with no public parking within 800 m are dropped on purpose, because the parking is where you'd stand.
The route "doesn't fit". The Trip planner won't draw a day that can't happen. Widen the working hours, shorten the time per stop, drop a stop, or pick the day chip with the better score.
23.5 The app itself
Settings are in a state I don't recognize. Settings → Account → Reset all settings asks for confirmation, then puts these back to their defaults: the map, layers, points of interest, summary, spoken brief, units (the ones for Home 1's country, or US units without a Home), shooting preferences, interests, forecast, appearance and timeline. Your Homes, fleet, saved spots and routes stay. It resets this device only: settings live on the device, while saved spots, routes and your plan follow your account.
The speaker button turned red (Pro). Nothing could be played. Check the volume and your connection. Only in Safari on an iPhone older than iOS 16.4 does the ringer switch matter too: there a web page obeys it, so turn it off silent. Safari on iOS 16.4 and later, and the iOS app on any version, play through the silent switch.
The app looks out of date. The website updates itself: a new version is picked up the next time you open it, with one quick reload. The apps update only through the App Store or Google Play, so if a feature in this guide is missing in the app, update it there.
A drawer won't open. Drag the grip further: a short press toggles it, but a drag that stops before halfway springs back. The same grip closes a drawer that's open.
On Android, dragging a grip minimizes the app. With gesture navigation, a swipe that starts within about 20 px of the screen's edge is Android's own Back gesture, and with nothing open, Back minimizes FlyDrone. Start the drag on the inner half of the grip instead.
On Android, the text doesn't follow the system font size. The Android app keeps its own text size so the panels don't break. Use Settings → Appearance → Text size → Large instead.
23.6 Still stuck
Tell us: Settings → Support, the last section. Pick Bug, Idea, Account or Other, write your message and press Send. The reply comes to your account's email, which the form shows. The app version, device type, your plan, browser and screen size go along automatically. Your current PIC point is only included if you tick Include my current PIC. Outside the app, write to support@flydrone.app.